Lou Bachrodt’s Tri-County Truck

Complimentary Delivery in the State of Florida

Blog

Commercial Truck DOT Inspection: A Fleet Preparation Guide

Fleet manager checking a commercial truck before an inspection

A commercial truck DOT inspection is easier to prepare for when drivers and fleet managers use a consistent review before the vehicle is presented. A pre-inspection walk-around cannot replace the official inspection, required maintenance, or a qualified repair. It can help your team notice visible concerns, collect records, and address issues in an orderly way. Begin with the truck’s identity and paperwork, then work through safety equipment, brakes, tires, lights, and reported defects.

Talk with the service team

What does a commercial truck DOT inspection cover?

Federal motor carrier rules address inspection, repair, and maintenance of commercial vehicles. Part 396 states that each commercial vehicle, including each segment of a combination vehicle, must receive a periodic inspection at least once every 12 months. The Missouri Department of Transportation’s reproduction of Part 396: Inspection, Repair, and Maintenance provides the rule text. Confirm current requirements and applicable procedures with the appropriate regulator or a qualified compliance professional.

Preparation is not a prediction of an inspector’s decision. A walk-around may reveal a damaged lamp or tire, but it cannot establish the condition of every internal component. Requirements and inspection details can depend on the vehicle configuration and operation. Use an applicable checklist and treat it as a way to organize attention, not as proof that a truck meets every requirement.

It also helps to distinguish the official periodic inspection from routine driver checks and maintenance work. A driver may identify a new symptom between formal inspections. A technician may diagnose and repair a system. Each has a different role; one does not automatically replace the others. Keep the records that apply to your operation and ask when a rule or procedure is unclear.

How should you organize a pre-inspection review?

Choose a safe, level location and follow company procedures for securing the vehicle. Use a checklist suited to the truck, trailer or combination, and installed equipment. Do not crawl under a vehicle, handle hot or pressurized components, or conduct a running check without the right training, equipment, and safe procedure. Bring in a qualified person for checks outside the driver’s role.

  1. Identify the vehicle. Record unit number, date, odometer reading, and the name or role of the person conducting the review. Confirm which trailer or equipment is part of the inspection.
  2. Gather the relevant records. Locate maintenance entries and prior inspection reports under your organization’s process. Make a note of missing or unclear information rather than trying to reconstruct it from memory.
  3. Follow one route. Start at the front, move down one side, around the rear, then along the other side. Include the cab and accessible equipment. A repeatable path makes skipped areas less likely.
  4. Record observations as you go. Note the exact location and behavior: for example, “left rear turn signal did not illuminate during test,” rather than “lights bad.”
  5. Escalate concerns. Route uncertain or safety-related findings to the responsible fleet manager or qualified technician. Follow policy and law on whether the vehicle must be held from operation.

Assigning roles makes the review more useful. A driver may report a change in steering or braking, while a manager checks whether the report was logged and routed. A technician handles diagnosis and repair within their qualifications. Decide in advance who can authorize a return to service under company procedures, so a defect does not disappear in a verbal handoff.

Which safety equipment should you check?

Check that required emergency and safety equipment is present, accessible, secured, and apparently serviceable. The precise items depend on the vehicle and operation, so rely on requirements applicable to your fleet instead of assuming every truck carries an identical kit.

  • Confirm any required fire extinguisher is secured and appears serviceable. Review its gauge, condition, and inspection information as applicable.
  • Check warning devices, including reflective triangles where required, for presence, damage, and accessibility.
  • Inspect seat belts for cuts, fraying, damaged hardware, and secure mounting. Confirm that buckles latch and release.
  • Check mirrors for cracked glass, loose mounts, and obstruction. Adjust them for the intended view before departure.
  • Test wipers and washers. Inspect blades and windshield for damage or dirt that could interfere with visibility.
  • Look for loose objects or equipment in the cab that could obstruct controls, exits, or the driver’s view.

Think about usability as well as presence. An emergency item buried beneath cargo may be difficult to reach when needed. A belt that is present but will not latch is not ready for use. Record missing or damaged items, correct them as appropriate, and check the result rather than closing the item merely because it was reported.

How can you review brakes and related components?

Brakes are safety-critical and should not be judged by appearance alone. During a basic review, note warning indicators, unusual sounds, visible damage, air leaks where applicable, or any change in pedal feel or braking response reported by the driver. Inspect accessible hoses, lines, chambers, and connections for damage, rubbing, leaks, or insecure mounting without placing yourself in an unsafe position.

For an air-brake vehicle, use manufacturer instructions and your organization’s qualified procedures for operational checks. Do not improvise a test or adjust components unless properly trained and authorized. A warning light, air-pressure concern, dragging, pulling, vibration, or altered stopping behavior needs prompt assessment by a qualified technician. Follow your fleet’s process for holding the vehicle when a concern may affect safe operation.

Ask for details that can help diagnose a reported symptom. When did it begin? Does it happen during a turn, at a certain speed, while loaded, or after the truck has been parked? Is there a warning, sound, smell, or change in pedal feel? The driver’s account is not a diagnosis, but precise observations are more useful than a general “brakes seem off.”

When a concern is intermittent, write down when it occurs and whether anyone else observed it. Avoid repeated road tests by an unqualified person just to reproduce the symptom. Give the information to the technician and follow the technician’s safe diagnostic plan. After repair, retain the work record and confirm the original report has been addressed through your process.

What tire and wheel conditions deserve attention?

Check tires across the vehicle, including inner tires where they can be reached safely. Look for cuts, bulges, exposed cords, uneven wear, lodged objects, leaks, and evidence of contact with a fender or nearby component. A quick glance cannot reliably measure inflation. Use a suitable gauge when appropriate, with the tire maker’s or vehicle maker’s specifications and procedures.

  • Look for visibly damaged or mismatched tires and signs of pressure loss.
  • Review tread condition and wear patterns. Uneven wear can point to alignment, suspension, inflation, or operating issues that need qualified diagnosis.
  • Inspect accessible wheels for cracks, deformation, missing fasteners, and rust trails or other clues that deserve closer examination.
  • Check for tire-to-body contact and confirm fitted mud flaps or fenders are secure.

Use a consistent route so you cover each wheel position, not just the outside tires. For a tandem arrangement, make a simple diagram or checklist with positions such as left front, right front, inner dual, and outer dual. Mark the location of a concern precisely; “rear tires” is less helpful than “right rear outer tire, sidewall bulge.” Never remove a wheel or work beneath a truck without proper equipment and training.

If pressure is outside the specified range or damage appears structural, follow fleet procedure and obtain qualified assistance before returning the vehicle to service. Do not treat adding air as a complete response to a suspected leak or damage. A technician can determine what inspection or repair is appropriate and whether a recurring wear pattern needs further investigation.

Which lights and visibility items should you test?

Operate relevant lighting functions and, when possible, have a second person confirm them from outside. Check headlights and high beams, turn signals, hazard flashers, brake lamps, tail lamps, clearance and marker lamps, and other installed lamps. Confirm that lenses are present, reasonably clean, and not obscured by dirt, cargo, or a loose cover.

A practical sequence prevents confusion: switch on one function at a time, name it aloud, and have the helper confirm the corresponding lamps. Then use the turn signals and brakes while the helper checks front and rear. If alone, use a safe reflection or other suitable method where practical, but do not assume a lamp works merely because its dashboard indicator is lit. Follow company procedure for reliable confirmation.

Look for flickering or intermittent operation as well as a complete failure. Note whether the issue changes when a connector or housing is gently checked; do not pull wiring or open components without authorization. Inspect reflectors and conspicuity markings where fitted. Check windshield, mirrors, and any visibility-supporting camera or sensor for damage or obstruction. Repair electrical faults rather than relying on a lamp that works only sometimes.

What records should a fleet manager gather?

Organize inspection and maintenance information by vehicle, with dates and enough detail to show what was reported, what was inspected, and what action followed. Before a scheduled inspection, check that records are retrievable under your company’s process. Do not create or backdate paperwork to make a file look complete. If information is missing, identify the gap and determine the proper next step.

Depending on the vehicle and operation, useful records may include prior inspection reports, repair orders, maintenance entries, and documentation for specialized equipment. Check the rules that apply to your fleet for required contents and retention periods; a general preparation guide cannot establish every operator’s obligations. The federal rule text linked above is a starting point, not a substitute for confirming which provisions apply.

When a driver reports a defect, preserve the report and document the response. Include the vehicle, date, specific condition, person notified, and follow-up action. If a repair is deferred, record the reason and decision according to policy, then follow applicable safety and maintenance procedures. Good records can also reveal repeat patterns, such as recurring lamp failures or uneven tire wear across the same unit.

Before the vehicle is presented, use a short file check: Does the report correspond to the correct unit? Are dates and repair descriptions legible? Is there a record of follow-up for an earlier defect? Is the document easy for the responsible person to locate? This is an organization check, not an invitation to alter records or infer compliance from a tidy folder.

How should you describe and resolve visible defects?

Separate what you observed from what you think caused it. “Right rear marker lamp does not illuminate” is more useful than “electrical system is bad.” Record the unit, location, date, and whether the issue was confirmed. A photograph may help when company policy allows, but it does not replace diagnosis, repair, or required documentation.

Route concerns according to potential safety impact and company policy. A damaged mirror, leaking line, unsecured part, or tire with visible structural damage needs prompt attention. Do not decide that a concern is harmless simply because the truck has completed previous trips. If policy or applicable rules require a hold, keep the truck out of service until the required decision and corrective work are complete.

Close the loop after repair. Match the repair record to the original report, check that the reported issue was addressed, and record any follow-up needed. If a concern cannot be reproduced, retain the report and the technician’s findings rather than erasing the concern. A clear history lets the next driver and manager know what was found and what was done.

What common preparation mistakes should you avoid?

  • Rushing the walk-around: use a consistent route and leave enough time to examine each area.
  • Assuming yesterday’s condition is today’s condition: repeat checks at required intervals and respond when a driver reports a change.
  • Checking only the exterior: include the cab, equipment, records, and relevant operating observations.
  • Ignoring intermittent faults: record when they happen and arrange appropriate diagnosis even if a quick check does not reproduce them.
  • Treating a checklist as a repair: a checked box does not correct a defect; track the issue through the proper resolution.
  • Using a generic checklist as the whole rulebook: match the checklist to the vehicle and applicable requirements.
  • Assuming preparation guarantees an outcome: only the authorized inspection process determines whether applicable requirements are met.

A rushed review often fails at handoffs. A driver may tell one supervisor about a defect, while the repair coordinator never sees the report. Use a written log or approved system, identify who owns each open item, and set a clear follow-up step. At the end of the shift or review, compare open concerns against the vehicle’s status under company procedures.

How can a fleet make the review repeatable?

Build preparation into normal fleet operations rather than waiting until an inspection date is near. Assign responsibility, keep vehicle-specific checklists available, teach drivers how to report changes, and review defect logs for recurring patterns. Make sure the person coordinating repairs can see reports and confirm status under company procedures.

For example, if several drivers report marker-lamp failures over a short period, record which units and lamp positions are involved, when repairs occurred, and whether the same issue returned. A pattern may justify asking a qualified technician to look beyond the individual lamp and assess the relevant wiring, mounting, or environmental exposure. Do not assume the cause from the log alone.

For tire concerns, compare location and wear pattern across inspection notes. If wear repeatedly appears in one position, preserve the observations and ask a technician to assess possible causes such as alignment or suspension condition. Replacing a tire may address the immediate item but may not explain why the pattern returned. The record helps the technician see the sequence without turning a visual review into a diagnosis.

Fleet managers can also review the process itself. Are drivers using the latest checklist? Are defect reports reaching the repair coordinator? Are completed repairs being matched back to the original concern? Do recurring items get reviewed rather than handled as isolated incidents? These questions help improve consistency without promising a particular inspection result.

When should you ask a technician to inspect the truck?

Ask a qualified technician when a review reveals a possible safety issue, a driver reports changed handling or braking, warning indicators appear, or a check requires expertise or tools beyond approved fleet procedures. Provide the unit number, symptom, location, timing, and any warning or sound observed. Clear information helps the technician start with the relevant concern.

Tri-County Truck offers commercial vehicle service and maintenance. Fleet teams can review service and parts information or request a service appointment. Service work can support maintenance readiness, but no service provider can promise an official inspection will produce a particular result.

When planning service, share prior repair history and any symptoms that return after work is completed. Ask what checks or repairs are proposed, what the technician found, and what documentation will be available for your records. The fleet remains responsible for following its procedures and confirming the applicable regulatory requirements.

Request a service appointment

How can you prepare for different fleet situations?

A single-truck business and a multi-unit fleet may use the same basic sequence but need different handoffs. An owner-driver may complete the observation and contact a technician directly. In a larger fleet, the driver reports the condition, a manager logs it, and a repair coordinator tracks it to closure. In both cases, record facts clearly and follow the applicable safety process.

Consider a truck scheduled for a morning route with a lamp reported out the previous evening. The manager should confirm whether the concern was checked and resolved, not rely on a message that says “fixed.” The driver or assigned person can verify the relevant function safely, and the repair record should be retained. If the fault remains or recurs, escalate it instead of treating the earlier note as proof of correction.

For a vehicle with specialized equipment, add checks for the equipment that is part of the operation and make sure the checklist reflects the configuration. If the truck is part of a combination, identify the relevant units and records rather than assuming the power unit’s file covers everything. When unsure about a requirement, confirm it with the authority or a qualified compliance professional.

Preparation is most useful when it produces accurate observations, timely decisions, and traceable follow-up. Keep the walk-around focused, use qualified help for technical questions, and leave formal compliance decisions to the applicable inspection and regulatory process.

Recommended Posts

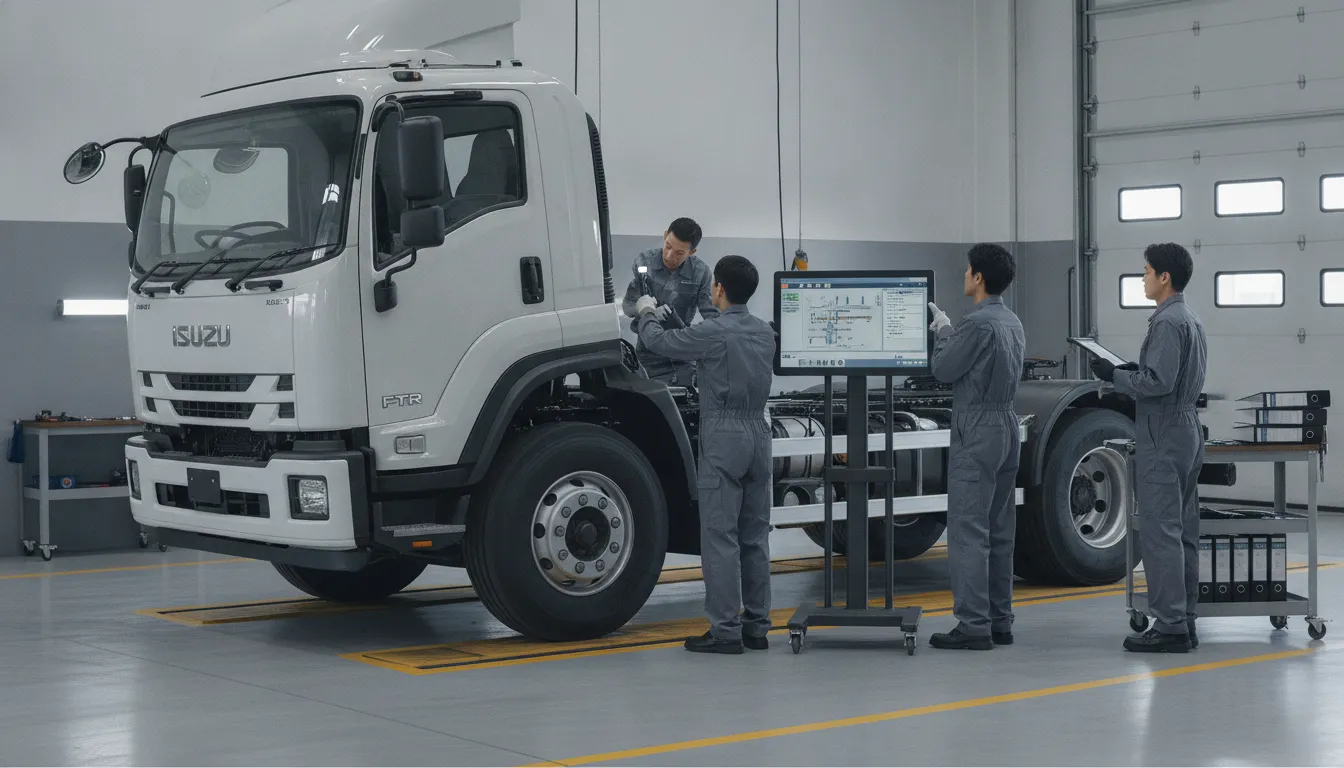
Isuzu FTR truck undergoing service and maintenance in a repair bay.

Isuzu FTR truck service and maintenance: A Practical Guide

For a landscaping crew, moving company, construction contractor, or hauler, truck downtime can affect more than transportation. It can mean delayed jobs, rescheduled deliveries, and equipment sitting idle. A thoughtful Isuzu FTR truck service and maintenance plan helps you prepare for scheduled work and respond sooner when symptoms appear. Begin by checking the manual for your truck’s maintenance schedule, then track its mileage, engine hours, and repair history. Your service provider can use those details, along with information about loads, routes, and idling, to recommend the right checks. This guide explains what to monitor and how to plan service with fewer surprises. Key Takeaways Verify your FTR’s specifications: Use the VIN, model year, and configuration to confirm the right service schedule, parts, and load limits. Build a consistent inspection routine: Check key components before work, note unusual symptoms, and stop if the truck may be unsafe to operate. Keep maintenance organized: Track mileage, engine hours, and repairs, then work with a qualified technician to plan service and review written estimates. What Should FTR Owners Know? An Isuzu FTR’s service needs depend on its model year, equipment, and the work it does. Before arranging maintenance, ordering parts, or loading the truck for a job, confirm its specifications and check that its service plan fits its day-to-day use. Check your model year’s engine, transmission, chassis, and configuration FTR specifications can vary by model year and configuration. Before requesting service or parts, confirm the truck’s model year, engine, transmission, chassis, and any modifications or upfits. Your VIN and vehicle identification plate can help a service provider find the correct information. Use the owner’s manual and service guidance that match your specific truck. Don’t assume that instructions for a different FTR apply. Isuzu’s Priority Service Maintenance Program outlines model-specific maintenance and includes more than an oil change. Ask your service provider to confirm the recommended schedule and parts for your truck. Confirm payload ratings, body fit, and operating limits Before loading the truck, check its GVWR, axle ratings, and other limits in the vehicle documentation. Include the weight of the body, equipment, fuel, passengers, and cargo when assessing the load. If your FTR has a liftgate, crane, service body, or another upfit, confirm that it is compatible with the chassis and within applicable weight limits. Secure and distribute cargo according to the vehicle and body guidance. Don’t use the way a truck looks, or what it carried on a previous job, to judge whether a new load is suitable. If you’re unsure about a load or upfit, ask a qualified truck professional to review it before the truck goes to work. Plan maintenance around loads, routes, idling, and duty cycle Heavy loads, long periods of idling, rough roads, and frequent stops can affect how your truck wears. Keep track of mileage and engine hours, and tell your service provider how the FTR is used. Details about typical routes, loads, and work conditions help them recommend a maintenance plan that fits the truck’s duties. Follow the schedule for your model year and configuration rather than relying on a general interval. Isuzu’s maintenance program guidance describes service plans tailored to vehicle requirements and includes a multi-point inspection. Ask your provider which checks apply to your FTR and whether its workload calls for closer attention between scheduled services. What Should You Check Before Each Workday? Set aside a few minutes for a pre-workday check before loading the Isuzu FTR or heading to a jobsite. A consistent walkaround can help you spot visible issues early and give a technician useful information if something needs attention. Park on level ground, secure the truck, and follow the inspection steps in the owner’s manual for your model year and configuration. Check the truck in the same order each day so it’s easier to notice changes. Look over the exterior first, then check the cab and dashboard before driving. Some checks depend on the truck’s equipment, including its brake system, so use the manual rather than assuming every FTR is configured the same way. Isuzu’s Priority Service Maintenance Program describes routine inspections that cover fluids, filters, and other components. Keep a log of anything unusual, including warning lights, fluid loss, tire damage, or changes in how the truck sounds and handles. Note when the symptom occurs and whether the truck is carrying a load. If you find a condition that could affect safe operation, don’t put the truck to work until it has been assessed. A repeatable checklist, such as this commercial vehicle maintenance checklist, can help your crew follow the same routine. Check oil, coolant, and visible leaks Park on level ground and check oil according to the owner’s manual. Depending on the procedure for your truck, you may need to use the dipstick or an electronic reading. Check the coolant reservoir only when the engine is cool, and never remove a hot cooling-system cap. Look beneath the truck and around the engine for fresh drips, wet areas, or residue. Record any fluid loss, even if the truck appears to run normally. If a level is low or keeps dropping, have a qualified technician investigate the cause before it leads to a larger repair. Inspect tires, wheels, lights, mirrors, and windshield Check each tire for low pressure, cuts, bulges, embedded objects, and uneven tread wear. Use a tire-pressure gauge and compare the reading with the specification for your truck and tire setup. Look for visible damage to the wheels, then test the headlights, brake lights, turn signals, and hazard lights. Clean the mirrors and windshield so you have a clear view from the cab. Report cracked glass, damaged mirrors, or lights that don’t work. A consistent walkaround checklist can help you catch these issues before the truck leaves the yard. Check brakes, steering, suspension, and air-system parts Look for visible damage or leaks around brake, steering, and suspension components. If your FTR is equipped with air brakes, follow the manual’s procedure for checking the air system and its warning indicators. After starting the truck, assess brake response and steering feel in a safe area. Pay attention to a soft or unusual brake pedal, pulling, vibration, or an air-pressure warning. If braking or steering feels unsafe, don’t continue the route. Have a qualified truck technician inspect concerns you can’t identify or resolve safely. Inspect belts, hoses, battery connections, and dashboard warnings With the truck parked and the engine off, look for belts that are cracked, frayed, or unusually loose. Check hoses for splits, swelling, wet spots, or rubbing against nearby components. Look at battery connections for looseness or corrosion, and avoid touching damaged wiring. Once you start the truck, check the dashboard for warning lights or messages. Consult the owner’s manual to understand what they indicate, and record any warning before contacting a technician. Don’t dismiss a warning just because it disappears after a restart. Note changes in noise, smell, handling, or performance Pay attention to anything that feels different from the truck’s usual operation. New knocking, squealing, hissing, vibration, or unusual exhaust or fluid smells may be worth investigating. Notice whether the truck pulls to one side, brakes differently, shifts unusually, or loses power. Write down when the change occurs, such as during a cold start, while carrying a load, or after extended idling. These details can help a technician assess the issue. Don’t guess at the cause, and stop operating the truck if the symptom could affect safe driving. How Often Does an Isuzu FTR Need Service? There isn’t one service interval that fits every Isuzu FTR. The right schedule depends on the truck’s model year, engine, configuration, and workload. Start with the maintenance schedule in the owner’s manual, and ask a qualified Isuzu truck service provider to confirm which intervals apply to your vehicle. That’s especially helpful if your FTR has a specialized body or spends long days on job sites, hauling materials, or making frequent stops. As a general reference, a dealer’s Isuzu service guidance cites service every 8,000 kilometers, about 5,000 miles, or 150 engine hours. Don’t treat that as a universal FTR interval. Use your truck’s schedule to set service dates, and consider both mileage and engine hours when tracking use. Isuzu’s Priority Service Maintenance Program describes a model-specific maintenance plan that includes more than an oil change. Keeping good service records helps you plan the next visit and gives technicians useful details about your truck’s history. Follow the schedule for your model year, engine, and configuration Check the owner’s manual for the maintenance schedule that matches your FTR’s model year, engine, transmission, and chassis configuration. Requirements can vary, so don’t assume that a schedule for another FTR or Isuzu truck applies to yours. If you’re not sure which manual or schedule is correct, ask a qualified service provider to verify your vehicle details. General guidance can help with planning, but it shouldn’t replace the manufacturer’s schedule. For example, a dealer’s service guidance cites 8,000 kilometers or 150 engine hours. Confirm the interval for your specific truck before setting reminders or booking work. The owner’s manual is also the place to check required fluids, capacities, and service procedures. Track mileage and engine hours between services Record the odometer reading and engine hours at each service. Mileage tells you how far the truck has traveled, while engine hours account for time spent running, including idling at a job site or waiting between deliveries. Depending on the schedule for your FTR, either measure may help determine when maintenance is due. A simple logbook, fleet system, or maintenance app can keep this information in one place. For each visit, note the date, mileage, engine hours, work completed, and any concerns reported by the driver or technician. These details make it easier to plan the next service and help the shop understand how the truck is used. If your team shares the vehicle, ask each driver to report unusual sounds, warning lights, or changes in performance. Adjust service plans for heavy loads and severe conditions Your FTR’s workload can affect the attention it needs. Frequent heavy loads, long periods of idling, repeated short trips, stop-and-go driving, and dusty work environments may place extra demands on components. Let your service provider know how the truck is used, including the routes it runs and the conditions it works in. Don’t change the manufacturer’s service intervals without checking first. Instead, ask whether your operating conditions call for more frequent inspections or additional checks. Isuzu’s Priority Service Maintenance Program can be customized to include items such as tires and brakes. That can help you plan maintenance around the demands of hauling, construction, landscaping, or other commercial work. Your provider can explain which checks make sense for your FTR and its schedule. Schedule specified oil, filter, fluid, brake, tire, and driveline checks Follow your manual’s schedule for oil and filter changes, fluid checks, and inspections of brakes, tires, and driveline components. The work required can vary by model and service interval, so confirm specifications before ordering parts or booking an appointment. A scheduled service should cover the maintenance due at that interval, not just an oil change. Isuzu describes its Priority Service Maintenance Program as a model-specific plan that includes a multi-point inspection. When arranging service, ask which items the shop will check, whether any parts need attention, and what to monitor before the next visit. This gives you a clearer picture of your truck’s condition and helps you plan repairs around your work schedule. Record inspections, services, and repairs Keep a maintenance history for your FTR that includes routine services, inspections, repairs, and replaced parts. Record the date, odometer reading, engine hours, work completed, and any symptoms or recommendations. Save invoices and inspection reports with your log so you can confirm what was done and when. These records help you plan upcoming maintenance and give technicians useful context if an issue returns. They can also reveal patterns, such as repeat tire wear or a warning light that appears more than once. Bring the latest records to each appointment and ask the service provider to document its findings. A clear history helps you make informed decisions about repairs and keep your truck’s maintenance aligned with the work it handles. Which FTR Problems Need Prompt Attention? A change in how your Isuzu FTR sounds, handles, or performs deserves attention, especially when you rely on it to carry tools, materials, or equipment to a job site. Addressing symptoms early can help you plan repairs and reduce the chance of an unexpected interruption. If the truck shows a serious brake problem, overheats, or displays a critical warning, stop in a safe place and follow the owner’s manual before deciding whether to continue. You can gather useful information without trying to diagnose the problem yourself. Note warning messages, visible leaks, unusual sounds, and changes in handling. Check only what the manual identifies as safe for a driver to inspect, and never work beneath a truck that is not properly supported. Isuzu’s Priority Service Maintenance Program describes multi-point inspections that cover items such as fluids and filters. Share your observations with a qualified truck technician, who can assess the cause and advise whether the FTR is safe to return to work. Overheating: Check coolant levels, leaks, and airflow If the temperature gauge climbs above its usual range or an overheating warning appears, pull over safely as soon as possible. Continuing to drive may cause further engine damage. After parking, let the engine cool before checking the coolant level according to the owner’s manual. Look for visible leaks around accessible hoses or beneath the truck, and check whether debris is blocking airflow through the radiator area. Never remove a radiator cap while the engine is hot. A low coolant level is one possible sign, not a complete diagnosis. Don’t restart the truck if the warning returns or you find a leak. Regular cooling-system checks can help catch issues early, as noted in this Isuzu service interval guide. Arrange an inspection before putting the truck back to work. Engine or emissions warnings: Record fault codes and follow the manual When an engine or emissions warning appears, note the exact dashboard light or message and whether the truck’s performance changes. If a diagnostic code is available, record it before arranging service. A photo of the dashboard can help preserve details if the warning disappears. Check the owner’s manual for guidance on the alert and whether you should stop driving. Avoid clearing codes or replacing parts based on a guess. A code can point to a system that needs testing without identifying the underlying cause. Isuzu’s Priority Service Maintenance Program includes multi-point inspections of items such as fluids and filters. Give the technician the code, when the warning appeared, and any changes in performance. These details can help inform the diagnosis. Transmission changes: Note slipping, delayed engagement, or unusual noise Pay attention if the transmission slips, takes longer than usual to engage, shifts differently, or makes a new noise. These changes can affect how the truck responds, particularly when carrying a load. If it behaves unpredictably, stop in a safe location and check the owner’s manual before continuing. Don’t repeatedly accelerate or shift under load to test the problem. Record when the symptom occurs, such as during startup, on a grade, or with a particular load. Note whether the truck was cold or warm and whether any warning lights appeared. This information may help a technician assess the issue. Fleet maintenance guidance identifies slipping, delayed engagement, and unusual transmission noises as signs that need prompt attention. Arrange an inspection with a qualified truck technician before the symptom worsens or affects your ability to control the vehicle. Electrical faults: Check battery connections and record warning lights Flickering lights, intermittent starting, or several warning indicators appearing together may signal an electrical fault. If it’s safe, look for obvious looseness or corrosion at accessible battery connections, following the owner’s manual. Don’t disconnect components unless the manual directs you to do so. Before driving, check that the headlights, brake lights, turn signals, and hazard lights work. Record which systems are affected and when the issue occurs. Note whether it follows rain, extended idling, or recent service, and take a photo of any warning lights. Electrical symptoms can have several causes, so avoid replacing parts based on a guess. Fleet inspection guidance recommends checking lights and battery connections. If the truck won’t start reliably or required safety lights fail, arrange an inspection before returning it to the road. Brake, tire, or suspension changes: Watch for uneven wear or altered handling A longer stopping distance, pulling to one side, vibration, or a change in steering response calls for prompt attention. Check tires for low pressure, visible damage, or uneven wear, and look for signs that a wheel may be loose. Don’t crawl beneath a truck unless it is properly supported. If braking feels weak, the truck pulls sharply, or a tire appears damaged, stop safely and arrange assistance rather than continuing with a load. Note when the change began and whether it happens while braking, turning, or traveling at a particular speed. Uneven tire wear or altered handling can involve tires, brakes, suspension, or related components. Fleet maintenance checklists recommend checking tire pressure, tread depth, and overall condition. Have a qualified technician inspect the truck before putting it back into demanding service. Document symptoms and conditions; don’t assume the cause A clear record can help a technician understand what happened and when. Write down the date, mileage, engine hours if available, load, route conditions, and what the truck was doing when the symptom began. Include dashboard messages, diagnostic codes, unusual sounds or smells, visible leaks, and changes in handling. Photos or a short recording can capture an intermittent issue that may not appear during an appointment. Keep your notes factual. “Temperature warning appeared after a long climb” gives the technician more to work with than a guess about which part failed. Don’t erase codes or make adjustments that could hide the original symptom. Isuzu’s service program outlines the role of thorough inspections. Share your notes when booking service, and ask what checks are needed before the FTR returns to work. Where Can You Find the Right Isuzu FTR Service Manual? The right service information can help you plan maintenance, check specifications, and explain an issue to a technician. Start with Isuzu resources or ask a qualified Isuzu truck service provider to help identify the correct information for your vehicle. Make sure any manual or schedule you use matches your FTR’s model year and configuration. Check Isuzu resources or consult a qualified Isuzu truck service provider Start with Isuzu’s official service resources, then confirm that the information applies to your specific FTR. Isuzu’s Priority Service Maintenance Program provides maintenance schedules tailored to vehicle requirements. A qualified Isuzu truck service provider can help you identify the right service information and explain what applies to your truck. When you contact a provider, have the model year, VIN, engine details, and configuration ready. This information helps narrow down the correct reference materials. Also ask whether the document is an owner’s manual, a maintenance schedule, or a workshop service manual. These resources serve different purposes, and an owner’s manual may not include the detailed repair procedures found in a workshop manual. Match the manual to your truck’s model year, engine, and configuration Check the manual against the truck itself, not only the FTR name on its cover. Model year, engine, transmission, chassis, and installed equipment can affect maintenance procedures and specifications. FTR trucks used for different jobs may also have different body configurations or components. Use the VIN and vehicle identification information to confirm the match. Isuzu describes its maintenance schedules as tailored to each vehicle’s requirements, so a general schedule may not cover your truck’s needs. If your FTR has been modified or fitted with specialized equipment, ask a qualified service provider whether the manual applies to those changes. Confirming the details first can help you avoid following an unsuitable procedure or ordering an incorrect part. Find service intervals, procedures, fluid specifications, and capacities A useful service manual should explain when maintenance is due and provide instructions for specified tasks. Look for service intervals, inspection steps, fluid types and capacities, filter details, and model-specific notes. Check whether an interval is based on mileage, engine hours, time, or operating conditions. Don’t assume the same interval applies to every FTR. A general service interval reference can offer context, but follow the schedule for your truck when planning maintenance. Keep a record of mileage, engine hours, services, and repairs so you can track what is due. If your truck hauls heavy loads, idles for long periods, or works in demanding conditions, ask a technician whether its maintenance plan should account for that use. Use diagnostic codes, troubleshooting steps, wiring diagrams, and parts information When a warning light appears or the truck’s behavior changes, record the symptoms and any diagnostic codes. A service manual may include code definitions, troubleshooting steps, wiring diagrams, connector locations, and parts information. These details can help you describe the issue clearly when arranging service. Use troubleshooting guidance as a starting point, not as proof of what caused the problem. Electrical and emissions faults can involve several components, and replacing a part based on a code alone may not fix the issue. Note when the warning appeared, what the truck was doing, and whether you noticed a change in performance. If a diagnostic procedure calls for specialized tools or training, contact a qualified Isuzu truck service provider. Confirm specifications before maintenance or repairs Before starting work, verify the procedure, fluid specification, capacity, torque value, and part number against information for your exact truck. Don’t rely on a specification from another model year or an online discussion that doesn’t identify the vehicle configuration. If the manual and a parts listing appear to conflict, check with Isuzu or a qualified service provider. Take extra care with brakes, steering, suspension, electrical systems, and other safety-critical components. If a procedure is unclear or requires tools you don’t have, arrange service with a trained technician. Ask the provider to explain the inspection findings and confirm which specifications and parts they plan to use. Checking the details helps you make informed decisions about maintenance and repairs. When Should You Call a Qualified Truck Technician? A daily walkaround can help you spot changes before they interrupt a workday, but it can’t replace a professional diagnosis. Call a qualified truck technician when a warning light stays on, a problem keeps returning, or the truck handles differently than usual. This is especially important when your Isuzu FTR carries tools, equipment, or materials for a job. Share what you’ve observed, including when the symptom started and whether it changes with load, speed, or idling. Clear details can help the service team assess the issue and recommend next steps. If you’re unsure whether it’s safe to keep driving, stop in a safe location and call for guidance. Stop safely if you notice serious brake problems, overheating, or critical warnings If the brakes feel weak, respond differently, or make unusual noises, pull over as soon as you can do so safely. Stop driving if the engine overheats or a critical dashboard warning appears. Continuing could put people at risk or lead to more damage. Once parked, check your owner’s manual and contact a qualified technician. Don’t open a hot cooling system or attempt a roadside repair unless you’re trained and can do so safely. Isuzu emphasizes regular maintenance for reliable operation, and prompt attention to serious problems can help prevent a small concern from becoming a larger repair. Request a diagnosis for persistent engine, transmission, electrical, or emissions faults Arrange a diagnosis if an engine or emissions warning returns, the truck repeatedly loses power, starting becomes difficult, shifting changes, or electrical issues keep recurring. Note when the symptom appears, such as during a cold start, while carrying a load, or after extended idling. Record warning lights and fault codes if you can, but avoid clearing codes or replacing parts based on a guess. Those details can help the technician investigate the cause. Ongoing issues may point to a problem that needs specialized testing. Isuzu’s service resources provide guidance for owners seeking support with engine, transmission, electrical, and emissions concerns. Leave safety-critical repairs and specialized procedures to trained technicians Brake, steering, and suspension repairs can directly affect safe operation, so have them handled by a technician with the right training, tools, and service information. Specialized diagnostics may also require equipment that isn’t available in a typical shop or at a jobsite. If a repair could affect how the truck stops, steers, or carries its load, ask a qualified provider to inspect it. Before work begins, find out what checks are included and whether the service calls for a road test or follow-up inspection. Isuzu describes multi-point inspections in its Priority Service Maintenance Program, which can help owners understand the value of a thorough service visit. Ask about inspections and worn belts, hoses, filters, and brake parts At scheduled service, ask the technician to check belts, hoses, filters, and brake parts for wear, damage, or leaks. These components can affect reliability and safe operation, so knowing their condition helps you plan repairs around your work schedule. Tell the service team about anything you’ve noticed, including fluid spots, squealing, a change in pedal feel, or visible cracks on a belt. Ask which items need attention now and which can be monitored until the next visit. The inspection should account for your FTR’s condition and how you use it. A commercial vehicle maintenance checklist offers examples of components technicians may review. Confirm inspection scope, parts, labor, and warranty terms Before approving work, request a written estimate that lists the inspection, recommended repairs, parts, labor, and diagnostic charges. Confirm which concerns the estimate covers, and ask the shop to contact you before completing additional work. Find out whether the parts are genuine Isuzu parts or alternatives, and ask how the choice affects any applicable coverage. Review the warranty terms for both parts and labor, along with the provider’s policies if the repair doesn’t resolve the issue. If your truck may qualify for an Isuzu maintenance program, ask what it covers and whether it applies to the planned service. Clear details help you compare estimates and prepare for downtime. What Affects Isuzu FTR Service Costs? Isuzu FTR service costs depend on the work required, the parts used, and how your truck is configured. A routine maintenance visit will have a different price from troubleshooting a warning light or repairing a major component. Costs can also vary by service provider and location, so it helps to ask for a clear estimate before approving work. For contractors, movers, landscapers, and other businesses that rely on their trucks, the cost of service is only part of the decision. Consider how long the FTR may be out of service and whether the work can be scheduled around jobs and deliveries. Ask what the estimate includes, when the shop expects to finish, and how it will handle any additional repairs it finds. Isuzu’s service network can help you find a dealership for model-specific service and an estimate. Consider labor, parts, service scope, and truck configuration The work required, labor time, and parts all affect the final bill. Your FTR’s model year, engine, transmission, chassis, and body configuration can influence which parts and procedures apply. For example, a scheduled inspection has a different scope from diagnosing an engine warning or repairing a driveline issue. Ask the service provider to itemize labor, parts, diagnostic work, fluids, and fees. If the technician finds another issue, ask what it means for the truck and request an updated estimate before approving additional work. A clear breakdown helps you understand the proposed repair and plan for the expense. Compare written estimates for the same work and parts A written estimate helps you compare service providers fairly. Describe the same symptoms or maintenance needs to each shop, then confirm that each quote covers the same work. Ask whether diagnostics, labor, fluids, shop fees, and taxes are included. Check which parts each estimate specifies, including the part brand and warranty. A lower quote may cover a different repair scope or parts than another estimate, so ask questions before comparing totals. Find out whether the price is fixed or could change if the technician discovers another issue. Also ask how the shop will contact you for approval and when it expects the truck to be ready. Isuzu’s dealer service information can help you locate a provider for another estimate. Ask about service packages, current offers, and suitable parts Ask whether the shop has a maintenance package or current offer that fits your FTR’s needs. Compare the services included, such as inspections, oil and filter changes, or labor, and check any mileage limits, exclusions, and coverage dates. A package is most useful when it covers work your truck actually needs and fits its service schedule. For repairs, confirm that the proposed parts are suitable for your truck’s model year and configuration. Ask about the parts warranty and whether the estimate includes installation. Isuzu’s Priority Service Maintenance Program includes multi-point inspections and is designed to help protect owners from increases in parts and labor costs. Ask a dealer about current terms and availability before enrolling. Check eligibility for Isuzu maintenance programs or oil coverage Review your purchase or lease documents to see whether your FTR has oil coverage or a maintenance plan. Eligibility and terms may depend on the truck, purchase date, mileage, and program rules. Confirm what work is covered, when service is due, and whether you need to use a specific location. Modern Work Truck Solutions reports that a two-year or 60,000-mile oil coverage plan has been offered with new FTR diesel purchases, including oil and filter changes every 10,000 miles. Coverage details can vary, so check your paperwork and confirm current terms with an Isuzu dealer before scheduling service. Weigh DIY work against safety, warranty, and downtime Simple checks, such as looking for visible leaks or checking fluid levels, can help you spot changes between service visits. Use the owner’s manual for the correct specifications, and take on only work you can do safely with the right tools and experience. For brake, engine, transmission, electrical, or emissions concerns, ask a qualified truck technician to diagnose the problem. Specialized tools or procedures may be required, and improper repairs can create safety risks or affect warranty coverage. Consider downtime as well: a repair that takes longer than expected can disrupt job schedules, deliveries, and crew availability. Before deciding, ask a commercial truck service provider to explain the work, estimate the cost, and give you an expected turnaround time. How Can You Keep FTR Maintenance on Schedule? A simple routine helps you plan service around your workload instead of waiting for a problem to interrupt it. Track the truck’s use, follow the schedule for your specific FTR, and share clear records with your service provider. Log mileage, engine hours, and repairs Keep a maintenance log for each Isuzu FTR. Record the odometer reading, engine hours when available, service dates, repairs, and any symptoms you’ve noticed. Whether the truck hauls materials to a construction site or carries equipment for a landscaping crew, this history helps you track upcoming service and gives your technician helpful context. Follow the schedule for your truck’s model year and configuration. One Isuzu service interval guide cites 8,000 kilometers or 150 engine hours, but intervals can vary. Check your owner’s manual or confirm the correct schedule with an Isuzu service provider. Set reminders based on the manual and your truck’s work demands Use your FTR’s maintenance schedule to set reminders for inspections and service. Add alerts to a digital calendar, fleet-management system, or paper log. Include the due date as well as the mileage or engine-hour target, and make the schedule easy for everyone who drives the truck to access. Factor in how you use the FTR. Heavy loads, frequent idling, dusty job sites, and stop-and-go routes can affect maintenance needs. Follow the manual’s guidance for severe operating conditions, and ask a technician whether your work routine calls for more frequent checks. Isuzu’s Priority Service Maintenance Program provides model-specific schedules to help owners plan service. Address symptoms early to help prevent extended downtime Pay attention to warning lights, leaks, unusual noises, and changes in braking or handling. Record when a symptom began, what the truck was doing, and whether it happens under particular conditions, such as a heavy load or a long drive. Share those details with your technician so they can investigate the issue. If a warning signals a serious problem or the truck feels unsafe, stop in a safe place and follow the owner’s manual. For other concerns, arrange an inspection promptly. During scheduled service, ask about checks of fluids, filters, and driveline parts. Isuzu’s maintenance program information describes multi-point inspections that can help identify concerns early. Coordinate preventive maintenance with a commercial truck service provider Work with a commercial truck service provider familiar with Isuzu FTR models, and book routine maintenance before a busy period. Bring your maintenance log and explain the truck’s usual loads, routes, and operating conditions. Sharing any symptoms in advance helps the service team prepare for the visit and focus on relevant checks. When you schedule, ask what the service includes, how long the truck may be out of operation, and whether the technician expects to recommend follow-up work. If your crews rely on the FTR for daily jobs, plan service around work commitments where possible. Isuzu’s service resources can help you find support and review available service options. Frequently Asked Questions Can I use the same maintenance schedule for every Isuzu FTR? No. Service requirements can vary by model year, engine, configuration, and how the truck is used. Check the owner’s manual for your FTR, and confirm the schedule with a qualified Isuzu truck service provider if you’re unsure. Should I track engine hours as well as mileage? Yes, when your truck’s schedule or service provider uses engine hours. They can account for time spent idling at job sites, which the odometer won’t capture. Keep both readings in your maintenance log when available. What should I do if a warning light appears during a job? Check the owner’s manual for guidance, record the message or light, and note what the truck was doing when it appeared. If the warning indicates a serious issue, or the truck’s braking, steering, or performance changes, stop safely and contact a qualified technician. Can I load an FTR based on what it carried on a previous job? Not without checking the truck’s ratings and current setup. Account for the body, equipment, fuel, passengers, and cargo, and confirm that any upfit is compatible with the chassis. Ask a qualified truck professional to review the load if you’re uncertain. What information should I have ready when booking service? Share the VIN, model year, engine and configuration details, current mileage and engine hours, and any warning messages or symptoms. Your service records and notes about loads, routes, and idling can also help the technician assess the truck.

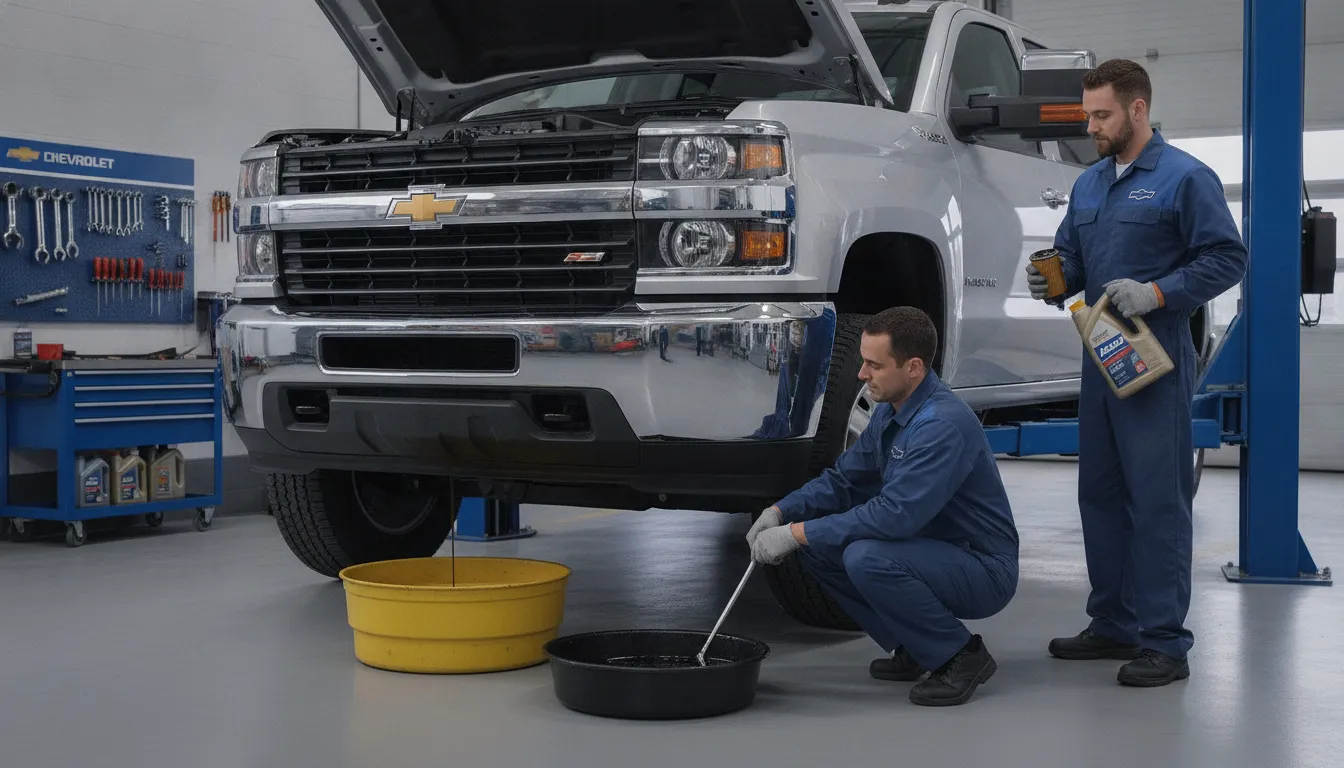
Chevrolet 4500 HD oil change with mechanics draining and adding engine oil.

Chevrolet 4500 HD Oil Change: A Step-by-Step Guide

Downtime can disrupt an entire workday. A truck stuck in the shop may leave a crew without equipment, delay customer appointments, and create scheduling problems across your business. Regular oil service helps reduce the chance of preventable engine trouble, especially when a Chevrolet 4500 HD spends its days towing, hauling, idling, or traveling through dusty areas. A chevrolet 4500 hd oil change also creates a useful inspection point for leaks, worn parts, damaged filters, and low fluid levels. This guide explains how to plan service around your truck’s real workload and how to recognize problems before they become roadside emergencies. Key Takeaways Identify the correct engine first: Use the VIN, owner’s manual, and engine labels to confirm the proper oil viscosity, GM approval, filter, and capacity for your Chevrolet 4500 HD. Match service to actual use: Heavy towing, hauling, job-site idling, short trips, heat, and dusty roads can require shorter oil-change intervals than normal highway driving. Inspect more than the oil: Check for leaks, low fluid levels, tire or brake concerns, damaged filters, warning lights, and unusual engine noises before returning the truck to work. Why Change Chevrolet 4500 HD Oil? A Chevrolet 4500 HD works under conditions that can strain the engine more than ordinary daily driving. Towing trailers, carrying equipment, idling at job sites, and traveling through dust or stop-and-go traffic all increase the demand placed on the oil. Over time, heat, fuel vapors, moisture, and combustion byproducts can reduce its ability to lubricate engine components and carry heat away. Regular oil changes replace worn oil with the correct lubricant for your truck’s engine. The service also creates an opportunity to check for leaks, inspect the filter and drain plug, and look for signs of contamination or unusual wear. These checks matter whether your truck supports a landscaping crew, moves furniture, hauls materials, installs windows, or handles construction work. Your 4500 HD may include an Oil Life System, but the recommended interval still depends on the engine, model year, climate, and workload. Check the owner’s manual before scheduling service, and use Chevrolet’s owner resources to find model-specific maintenance information. If your truck operates under severe conditions, ask a commercial truck technician whether it needs a shorter interval. Protect the engine during towing, hauling, and idling Towing and hauling increase engine load, which can raise operating temperatures and place extra demand on bearings, pistons, the crankshaft, and the valvetrain. Extended idling creates a different concern. When the engine runs for long periods without reaching full operating temperature, moisture and fuel can accumulate in the oil. Frequent short trips can contribute to the same problem. Changing the oil on schedule keeps a clean supply of lubricant moving through the engine. Check the oil level on level ground before demanding jobs, and inspect beneath the truck for fresh spots or damp areas. Routine oil changes remain one of the basic maintenance steps recommended in these Chevrolet truck maintenance tips. Support landscapers, movers, crews, installers, and contractors For landscapers, movers, construction crews, window installers, haulers, painters, and maintenance contractors, a 4500 HD is a working asset. The truck may carry tools all day, tow a trailer between properties, or idle while a crew loads materials. That pattern can wear oil more quickly than steady highway travel. Set the service plan around the truck’s real workload rather than a generic mileage reminder. Some Chevrolet models using approved full synthetic oil can reach 7,500 miles between changes under suitable conditions. Heavy towing, dusty roads, high heat, extended idling, and frequent short trips may require more frequent service. Use the truck’s manual as the primary source, while these Chevrolet oil interval guidelines provide useful general context. Catch leaks, contamination, and wear during service An oil change gives you a practical chance to inspect the truck. A technician can check the filter, drain plug, oil pan, valve covers, and nearby seals for leaks. A small damp spot may be easy to repair now, while an ignored leak can lower the oil level and leave the engine without adequate lubrication. The used oil can also reveal potential problems. A strong fuel smell, milky appearance, gritty texture, sludge, or visible metal particles deserves investigation. Dark oil by itself does not prove that the oil needs immediate replacement, since oil can darken as it carries combustion byproducts. Pay closer attention to sudden changes in appearance, level, or smell. These oil change facts from Chevrolet service experts can help you distinguish normal oil changes from warning signs. Reduce downtime for work trucks and fleets Unplanned engine repairs can delay appointments, separate crews from their equipment, and leave a truck out of service when customers need it. Planned oil changes make it easier to schedule maintenance between jobs and service several fleet vehicles without interrupting operations. During the appointment, have the technician inspect the air filter, belts, hoses, fluids, tires, brakes, and visible leaks. Record the service date, mileage, oil specification, quantity, filter part number, and next service interval. Fleet managers can use these records to identify trucks that consume oil quickly or need shorter intervals. Schedule service before the next demanding job, particularly when the route includes heavy towing, extended idling, dusty conditions, or steep grades. Confirm the Model Year and Engine Before draining the oil, identify the truck’s exact model year, chassis, and engine. Chevrolet’s 4500 name can refer to different commercial truck platforms, and oil viscosity, capacity, filter selection, and service intervals may vary between them. A parts lookup based only on “Chevy 4500” may not provide enough information. Check the VIN, engine label, emissions sticker, oil cap, and owner’s manual before purchasing supplies. Chevrolet’s owner resources provide model-specific manuals, but some commercial trucks may also require chassis or engine service information from the manufacturer. If the truck has been upfitted or its engine has been replaced, verify the installed engine rather than relying on the original build sheet. 2012–2018: Verify the legacy 4500 chassis and engine A Chevrolet 4500 from 2012 through 2018 may belong to an earlier commercial chassis rather than the Silverado 4500HD lineup introduced for the 2019 model year. Do not assume it shares the same oil, filter, capacity, or drain-plug specifications as a newer Silverado 4500HD. Inspect the engine identification label, emissions information, and VIN. Depending on the configuration, the truck may have a gasoline engine, diesel powertrain, or an upfitted engine installed after it left the factory. If the truck works in landscaping, moving, construction, or hauling, confirm that added equipment has not restricted access to the oil filter or drain plug. Keep the full vehicle identification number available when ordering parts or requesting service information. 2019–2020 Silverado 4500HD: Identify the 6.0L gas or 6.6L Duramax engine The 2019 and 2020 Silverado 4500HD were commonly available with a 6.0L gasoline engine or a 6.6L Duramax diesel. These engines use different oil specifications, filters, capacities, and maintenance procedures. Choosing parts by chassis alone can result in an incorrect oil change. Check the engine cover, VIN, under-hood labels, and service records to verify the powertrain. The Duramax also has diesel-specific maintenance considerations, especially when a truck spends long periods idling, pulls heavy trailers, or makes frequent short trips. Compare the engine information with Chevrolet’s Silverado 4500HD specifications, then confirm the oil and filter requirements in the manual for that specific truck. 2021 and newer Silverado 4500HD: Check updated gas and diesel specifications For a 2021 or newer Silverado 4500HD, verify the engine before selecting oil. Gasoline and diesel models can require different viscosities and manufacturer approvals. The correct choice may also depend on the model year, emissions equipment, operating temperature, and the truck’s duty cycle. Read the oil cap and owner’s manual, then match the oil container’s viscosity and approval to the engine. Avoid relying on a general-purpose truck oil or an older service routine. This check matters for work trucks that haul materials, tow equipment, or idle at job sites throughout the day. If an online parts listing conflicts with the manual, use Chevrolet’s commercial vehicle resources or ask a qualified technician to verify the specification. 2022 4500 LCF: Follow LCF-specific service information The 4500 LCF is a different commercial truck platform from the conventional Silverado 4500HD. Its cab-over layout, engine placement, filter location, and service requirements may differ from those of a Silverado chassis. Treat “4500” as a model range, not proof that parts or procedures are interchangeable. Use the LCF owner’s manual and service information for the exact model year, engine, and market. Confirm the oil viscosity, capacity, filter part number, drain-plug washer, and service interval before beginning work. If the truck has a box body, liftgate, or other equipment, check that the added body does not prevent safe access to the service points. A commercial truck service department can verify LCF requirements using the VIN and chassis records. Confirm the VIN, engine code, manual, and service schedule Before buying oil and filters, record the full VIN and engine code. Confirm the model year, chassis family, engine type, and whether the listed oil capacity includes the replacement filter. Also determine whether the truck follows a severe-duty schedule because of towing, hauling, dust, heat, extended idling, or frequent short trips. Keep a service record with the oil viscosity, manufacturer approval, filter number, quantity installed, mileage, and date. This gives your crew a dependable reference when the truck returns for service and helps prevent the wrong oil from being used during a busy workweek. If the VIN, engine label, and paperwork do not match, do not guess. Have a Chevrolet commercial truck technician verify the vehicle before servicing it. What Oil Does a Chevrolet 4500 HD Need? The correct oil for a Chevrolet 4500 HD depends on its engine, model year, climate, and workload. A truck that spends long days hauling materials, towing equipment, or idling at job sites may need closer attention than one used mainly for highway driving. Before purchasing oil, confirm the truck’s engine and year using the VIN, owner’s manual, or service records. Chevrolet provides owner’s manuals and vehicle information that can help you verify the required viscosity, oil specification, and capacity. If the truck has been modified or has an unusual service history, ask a commercial truck technician to confirm the requirements. 6.0L gasoline: Use SAE 5W-30 with the required GM dexos specification A Chevrolet 4500 HD with the 6.0L gasoline engine generally uses SAE 5W-30 engine oil that meets the required GM dexos1 specification. The SAE grade describes how the oil flows at different temperatures, while the dexos approval confirms that the product meets GM’s performance requirements for compatible gasoline engines. Do not select oil by viscosity alone. Check the container for the licensed dexos mark, then confirm that the approval matches the requirement for your truck’s model year. GM’s dexos oil information explains how to identify licensed products and read the certification shown on the label. Using an oil without the required approval can leave the engine without the protection specified by Chevrolet. 6.6L gasoline: Confirm SAE 0W-20 and dexos1 requirements Some Chevrolet 4500 HD trucks with the 6.6L gasoline engine call for SAE 0W-20 oil that meets the dexos1 specification. This grade flows readily during cold starts while still providing the protection required by the engine when the oil reaches operating temperature. Check the owner’s manual before adding oil, especially if you are servicing trucks from different model years. Do not substitute SAE 5W-30 simply because it is common in other Chevrolet gasoline engines. The correct grade and approval belong to the specific engine application. If the oil container does not show the required dexos approval, choose a licensed product that does. 6.6L Duramax diesel: Use SAE 15W-40, cold-weather alternatives, and diesel specifications The 6.6L Duramax diesel commonly uses SAE 15W-40 diesel engine oil under normal operating conditions. In cold weather, an approved lower-temperature grade, such as SAE 5W-40, may be appropriate. The acceptable choice depends on the truck’s model year, expected temperatures, and the instructions in the owner’s manual. Diesel oil must also meet the required performance classification. Depending on the application, the manual may specify API CK-4, CJ-4, or another approved diesel standard. Do not use gasoline-engine oil in a Duramax unless the manufacturer specifically approves it. Review Chevrolet’s Duramax maintenance information, then use the manual as the final authority for viscosity and diesel specifications. Match viscosity to the engine, year, climate, and duty cycle Oil viscosity is not interchangeable across every Chevrolet 4500 HD. A truck operating through cold winters may require a different approved grade from one working in a consistently hot climate. Temperature is only one consideration. Frequent short trips, extended idling, heavy towing, dusty roads, and stop-and-go driving can also increase the demands placed on the oil. Consider how your business uses the truck. A window installer carrying tools around town, a landscaper hauling equipment, and a contractor towing a loaded trailer may each have a different duty cycle. Use the grade listed for the engine and climate, then follow the severe-service recommendations when the truck regularly works under demanding conditions. Use approved full synthetic oil A full synthetic oil can handle temperature changes and demanding operating conditions well, but it still must meet the specification listed for the engine. For a gasoline engine, that may include GM dexos1. For a Duramax diesel, the oil must meet the required viscosity and diesel performance classification. Synthetic oil does not change the recommended grade, and it does not automatically allow longer service intervals. A truck that idles at job sites, hauls heavy loads, or works in dusty conditions may still require more frequent oil changes. When choosing gasoline-engine oil, check GM’s dexos licensed brands to verify the product’s approval before you buy it. Pair the oil with the correct filter and drain-plug washer Use an oil filter designed for the exact engine and model year. The filter should fit correctly, and its gasket should be clean, undamaged, and properly seated. Before installing the new filter, make sure the old gasket has not stuck to the mounting surface. A double gasket can cause a serious oil leak when the engine starts. Replace the drain-plug washer when the service information calls for a new one. After adding the specified amount of oil, run the engine briefly, shut it off, and inspect the filter and drain plug for leaks. If your truck works on commercial jobs every day, a Chevrolet commercial vehicle service center can verify the oil, filter, washer, and torque specifications before the truck returns to work. How Much Oil Does a Chevrolet 4500 HD Take? The oil capacity of a Chevrolet 4500 HD depends on the model year, engine, and whether the listed amount includes a new oil filter. A 6.0L gasoline engine does not use the same amount of oil as a 6.6L gasoline engine or a 6.6L Duramax diesel. Using a generic capacity could leave the engine underfilled or overfilled. Before beginning an oil change, confirm the truck’s VIN, model year, and engine configuration. Check the owner’s manual or model-specific service information for the required oil type, filter-included capacity, drain-plug specifications, and oil-level checking procedure. A GM engine oil capacity guide can provide a helpful comparison, but the manual for your specific truck should take priority. Oil capacity is only one part of proper service. You also need the correct viscosity, a compatible filter, and a clean sealing surface around the drain plug and filter. This matters for work trucks used by landscapers, movers, haulers, construction crews, window installers, painters, and maintenance contractors. Heavy loads, long periods of idling, dusty roads, and frequent stop-and-go driving can place greater demands on the engine oil. Plan to purchase enough oil for the listed capacity, plus a small amount for final adjustment. However, do not pour the entire amount into the engine without checking the dipstick. Add oil in stages, allow it to settle, and verify the level on level ground before putting the truck back to work. Confirm filter-included capacity for the engine and year Oil capacity can vary between model years and engine configurations. Begin by confirming the VIN, engine size, and model year, then check whether the published capacity includes a new oil filter. A capacity listed without the filter may leave the engine short after service. The filter affects the final amount because it holds oil after the engine starts. Use the filter specified for your Chevrolet 4500 HD and check the service information before adding the full listed capacity. If you service a 2021 truck, for example, verify its engine and requirements rather than assuming every 4500 HD uses the same specifications. A model-specific oil guide may offer a useful reference, but it should not replace the owner’s manual. 6.0L gasoline: Plan for approximately 6 quarts A Chevrolet 4500 HD with the 6.0L gasoline engine takes approximately 6 quarts of oil with a filter change. Keep an extra quart available for the final adjustment, but do not add it automatically. The amount required can vary slightly based on how completely the old oil drains and how much oil remains in the engine. Install the new filter and drain plug, then add most of the planned capacity. Wait several minutes, check the dipstick, and add oil in small amounts until the level reaches the specified range. This method helps prevent overfilling when the truck has not drained completely or the replacement filter holds a slightly different amount of oil. 6.6L gasoline: Plan for approximately 8 quarts The 6.6L gasoline engine requires approximately 8 quarts of oil, including the filter. Confirm the engine before beginning service, since the capacity differs from the 6.0L gasoline engine. The owner’s manual, VIN records, engine identification, and previous service records can help verify the correct configuration. Add the oil gradually, leaving room for a final dipstick adjustment. Once the initial fill is complete, run the engine briefly, shut it off, and wait several minutes before checking the level again. Look around the drain plug and filter for leaks. If the dipstick shows a level above the full mark, remove the excess oil before returning the truck to a demanding job. 6.6L Duramax diesel: Plan for approximately 10 quarts A 6.6L Duramax diesel takes approximately 10 quarts of oil with the filter included. This engine is commonly used for demanding work, including towing, hauling, construction, and extended idling. Its larger oil capacity supports its lubrication needs, but it does not replace regular oil-level checks. Use oil that meets the required diesel-engine specification and viscosity for your model year and operating conditions. Add most of the planned 10-quart capacity, then check the dipstick and make small adjustments. If the oil level rises between services, have the truck inspected for fuel dilution or another engine problem. Do not simply drain the excess and continue driving without finding the cause. Account for engine, filter, and application differences The approximate capacities above are useful planning figures, not a replacement for model-specific service data. Engine design, model year, oil-pan configuration, filter size, and service procedures can affect the final amount. Always verify the details before ordering oil for a fleet or scheduling several trucks for service. Operating conditions matter as well. A 4500 HD used on dusty landscaping sites may need different service attention than one used for highway hauling. Frequent idling, short trips, heavy payloads, towing, heat, and dust can place additional stress on the oil. Record the oil viscosity, brand, quantity, filter, mileage, and date after every service so the next technician has a clear maintenance history. Add oil gradually and check the dipstick After draining the old oil and installing the new filter, add oil through a clean funnel. Start with less than the listed capacity, then wait briefly for the oil to flow through the engine. Park the truck on level ground, remove and wipe the dipstick, insert it fully, and check the reading. Continue adding oil in small increments until it reaches the specified range. Do not estimate the level by looking into the filler opening. If the reading seems inconsistent, wait a few minutes and check it again. A careful final measurement is important for commercial trucks that may leave the service bay and immediately begin towing, hauling, or extended idling. Prevent underfilling, overfilling, and oil foaming Too little oil can reduce lubrication and increase engine wear. Too much oil can allow the crankshaft to contact the oil, creating aeration or foaming that interferes with proper lubrication. Both conditions can lead to costly problems for a truck that supports daily business operations. Keep the truck level while checking the dipstick, use the correct filter, and confirm that the drain-plug washer and filter gasket seal properly. If the oil-pressure warning appears, stop the engine as soon as it is safe and investigate. Do not assume the oil level explains the warning. A leak, failed sensor, blocked passage, or mechanical fault may also be responsible. When Should You Change Chevrolet 4500 HD Oil? The correct oil-change interval for a Chevrolet 4500 HD depends on its engine, model year, mileage, and workload. A truck that spends most of its time on highways may follow a different schedule from one that idles at jobsites, hauls equipment, or operates in dusty conditions. Use the owner’s manual and Oil Life System, if equipped, as your primary references. Then adjust your maintenance plan for severe service. Regular oil-level checks are also important because an oil monitor cannot detect every leak, contamination issue, or sudden change in oil level. Follow the manual and Oil Life System, if equipped Start with the owner’s manual for your specific Chevrolet 4500 HD. Oil-change recommendations can vary between gasoline and Duramax diesel engines, and the correct schedule may change by model year. Confirm the recommended interval, oil type, filter requirements, and service procedure in Chevrolet’s owner’s manuals and vehicle guides. If your truck has an Oil Life System, use it as a helpful maintenance reminder. The system estimates oil condition based on engine use and driving conditions, but it does not replace inspections. It may not identify a leaking filter, low oil level, fuel dilution, or coolant contamination. Treat the alert as a service prompt, not a complete engine-health diagnosis. Use 7,500 miles or six months as a general reference For many Chevrolet vehicles, 7,500 miles or six months can serve as a general reference for normal use. It is not a universal rule for every Chevrolet 4500 HD. The owner’s manual and Oil Life System take priority, especially when the truck regularly carries heavy loads or operates in severe conditions. If the truck reaches six months before reaching the mileage guideline, schedule an oil and filter change. Oil can collect moisture, combustion byproducts, and other contaminants during repeated heat cycles, even when annual mileage is low. This Chevrolet oil-change guide also recommends using the vehicle’s manual and Oil Life System to determine the most accurate schedule. Shorten intervals for towing, hauling, idling, dust, heat, and short trips Commercial work can place more stress on engine oil than steady highway driving. Towing and hauling increase engine load, while extended idling keeps the engine running without adding much mileage to the odometer. Dusty jobsites can challenge the air filtration system, and high temperatures can increase thermal stress. Short trips also deserve attention. If the engine rarely reaches full operating temperature, moisture and fuel byproducts may remain in the oil. Landscapers, movers, construction crews, window installers, painters, haulers, and maintenance contractors should base the service schedule on actual working conditions, not mileage alone. Keep a record of idling, payloads, and unusually demanding jobs to help set a practical interval. Consider a 3,000 to 5,000-mile interval for severe-duty work A 3,000 to 5,000-mile interval may be a reasonable starting point for trucks that tow frequently, carry heavy payloads, idle for long periods, or work in dusty, hot, and stop-and-go conditions. Service information for the 2022 Chevrolet 4500 LCF, for example, lists an oil and filter interval in this range, according to Coggin Chevrolet’s 4500 LCF oil-change information. Do not apply this range automatically to every 4500 HD. Check the manual for your exact engine and model year, then speak with a commercial truck technician if the truck has an unusually demanding duty cycle. A shorter interval may make sense when the cost of preventive maintenance is less than the lost revenue and scheduling problems caused by an engine issue. Watch for fuel dilution and frequent diesel DPF regeneration Diesel operators should pay attention to oil condition as well as mileage. Fuel dilution occurs when diesel fuel enters the engine oil, reducing its viscosity and protective ability. A rising oil level, strong fuel smell on the dipstick, or oil that feels unusually thin requires prompt inspection. Frequent diesel particulate filter regeneration can also affect oil condition, especially when the truck idles often or takes repeated short trips. Follow the emissions-system instructions in the owner’s manual and have repeated regeneration concerns diagnosed by a qualified technician. Do not wait for the next scheduled service if you notice a fuel smell, rising oil level, warning light, or change in engine performance. Do not extend intervals just because you use synthetic oil Synthetic oil can provide strong performance across temperature changes, but it does not cancel the manufacturer’s service schedule. Your Chevrolet 4500 HD still produces combustion residue and may collect soot, moisture, or fuel during operation. Severe-duty work can affect oil condition regardless of whether the oil is synthetic or conventional. Use the oil specification listed for your exact engine, then follow the manual, Oil Life System, and duty cycle. Do not switch to a thicker oil or extend the interval without confirming that the change is approved. This Chevrolet service guidance explains why oil changes should not be based on one simple mileage rule. Check the oil at fuel stops and between services Make oil-level checks part of your regular truck inspection. Park on level ground, shut off the engine, allow the oil to settle, and check the dipstick according to the procedure in the owner’s manual. Fuel stops offer a convenient reminder, but check more often when the truck is towing, hauling, idling, or working long shifts. A low oil level may point to an external leak, oil consumption, or another engine problem. Add only the approved oil, and avoid filling above the full mark. If the level drops repeatedly, arrange an inspection rather than treating frequent top-offs as a solution. Check around the filter, drain plug, oil pan, and engine for fresh oil during each walkaround. Record the mileage, date, oil, quantity, filter, and next service Keep a maintenance log for each Chevrolet 4500 HD. Record the service date, mileage, oil brand and specification, quantity added, filter part number, and planned next service. Also note whether the truck was used for towing, heavy hauling, extended idling, or dusty jobsites. These records make it easier to identify changes in oil consumption and plan service for a single truck or fleet. They also give technicians useful information when diagnosing a warning light, leak, or unusual oil condition. Schedule the next oil change before the truck takes on another demanding job. Chevrolet 4500 HD Oil Change Warning Signs Your Chevrolet 4500 HD may need attention before its scheduled oil change. Towing trailers, hauling materials, extended idling, and driving through dusty work areas all place added stress on the engine and its oil. Landscapers, movers, construction crews, installers, and contractors should watch for changes in oil pressure, fluid level, engine sounds, and visible leaks. These signs do not always mean an oil change will solve the problem. They may point to a leak, contamination, worn component, or lubrication issue. Catching the problem early can help prevent an unexpected breakdown during a job. Stop and investigate low oil pressure or an oil-pressure warning Treat a low oil-pressure warning as an urgent problem, not as a routine service reminder. Oil pressure moves lubricant through the engine, and inadequate pressure can damage bearings, the oil pump, valvetrain, and other internal components. Pull over safely, shut off the engine, and check the oil level after parking on level ground. If the oil level is normal, do not continue driving as though the warning is harmless. A failing oil pump, restricted pickup, faulty sensor, damaged bearing, or internal engine problem could be responsible. Low oil pressure requires immediate attention, particularly when it appears with ticking, knocking, smoke, or reduced power. Have the truck inspected before returning it to a demanding route. Find the cause of falling oil levels Check the oil level regularly, especially before towing equipment, hauling materials, or starting a long workday. A level that keeps dropping between services may point to an external leak or internal oil consumption. A sudden drop calls for prompt attention, even if you do not see oil on the ground. Inspect the oil filter, drain plug, oil pan, valve covers, seals, and the area beneath the engine. Oil can also reach hot components and burn away before it forms a spot on the pavement. Blue exhaust smoke, a burnt-oil smell, or repeated low readings may indicate internal consumption. Regular oil-level checks help identify problems early. Add only the specified oil and arrange an inspection to identify the source. Check used oil for fuel, coolant, grit, sludge, or metal Used oil can reveal clues about what is happening inside the engine. During an oil change, watch for a strong fuel smell, a milky or creamy appearance, thick sludge, gritty particles, or shiny metal flakes. Fuel may thin the oil and reduce its protective properties. Coolant can indicate a gasket or cooling-system problem, while metal particles may point to internal wear. Dark oil alone does not confirm a failure. Unusual texture, contamination, or particles deserve closer attention, though. Save a sample if you are unsure and ask a commercial truck technician about oil analysis. Contaminated oil can signal engine wear or failure, so find the cause before replacing the oil and sending the truck back to work. Investigate new ticking, knocking, or valvetrain noise A new ticking, tapping, or knocking sound deserves attention, especially after startup or while the truck is under load. Low oil, restricted oil flow, incorrect oil, or a worn component can prevent the valvetrain and lower engine from receiving proper lubrication. A noise that becomes louder while accelerating, towing, or climbing a grade is particularly concerning. Park safely and check the oil level before doing anything else. Do not keep driving if the sound is loud, persistent, or accompanied by an oil-pressure warning, smoke, rough running, or power loss. Avoid revving the engine to test the sound. A technician can measure oil pressure, scan for fault codes, and determine whether the concern involves the filter, oil pump, valvetrain, bearings, or another component. Inspect the filter, drain plug, seals, and engine for leaks Look for fresh oil around the filter, drain plug, washer, oil pan, valve covers, and engine seals. A loose filter, damaged gasket, worn seal, or improperly tightened drain plug can gradually lower the oil level. Trucks that travel over rough access roads or construction sites also need an inspection for impact damage around the oil pan and drain plug. Check the ground after parking, but do not rely on floor spots alone. Oil may collect on shields, crossmembers, or other components before it drips. Cleaning old residue can make a new leak easier to locate. During service, inspect the filter, drain plug, and seals carefully because leaks can lead to low oil levels. Repair the source instead of repeatedly adding oil. Distinguish Oil Life alerts from oil-pressure and check-engine warnings An Oil Life alert generally indicates that the calculated service interval has been reached. It does not measure the exact amount of oil in the engine, and it is not the same as an oil-pressure warning. The dipstick, warning lights, and service monitor each provide different information. An oil-pressure warning requires immediate action because it may indicate inadequate lubrication. A check-engine light can point to many issues, including emissions, sensor, fuel, or engine faults. Read the owner’s manual to identify each warning, and have an unfamiliar light scanned by a qualified technician. Understanding the difference between these alerts supports better Oil Life System maintenance, especially when your 4500 HD is working between scheduled services. Do not judge service timing by dark oil alone Gasoline and diesel engine oil can darken quickly as it suspends soot and other combustion byproducts. Color alone does not show whether the oil has reached the end of its service life. Fresh-looking oil also does not guarantee that it has the correct viscosity or manufacturer-required specification. Use the service schedule, Oil Life System when equipped, mileage, engine hours, and operating conditions together. Short trips, extended idling, heavy loads, extreme temperatures, and dusty roads may call for more frequent service. Check the oil level and condition, but do not decide on service timing based only on appearance. As Chevrolet oil-change guidance explains, dark oil is only one observation among several that should guide maintenance. Chevrolet 4500 HD Oil Change Tools and Safety An oil change on a Chevrolet 4500 HD takes more preparation than one on a passenger car. The truck may hold more oil, require additional clearance, and spend long hours towing, hauling, idling, or working in dusty conditions. Gather all supplies before you start, and confirm the truck’s engine, model year, oil specification, filter, capacity, and tightening values in the owner’s manual or service information. If your equipment is not rated for a commercial truck, have the work completed by a qualified heavy-duty technician. A safe service area and the correct tools help prevent spills, damaged fasteners, injuries, and avoidable downtime. Chevrolet maintenance guidance also recommends using the specified oil and filter for the engine, rather than selecting parts based only on size or price. Review these Chevrolet truck maintenance recommendations before beginning. Gather the specified oil, filter, washer, funnel, and shop towels Start with the oil approved for your Chevrolet 4500 HD engine and model year. Gasoline and Duramax diesel engines can require different viscosities and specifications, so compare the container label with the owner’s manual. You will also need the correct oil filter and a new drain-plug washer if the service information requires one. Keep a long-neck funnel nearby to reduce spills around the fill opening. Shop towels help you clean the dipstick, drain plug, filter seat, and surrounding components. A small work light is useful for checking the filter gasket and spotting fresh leaks after the engine runs. Using the correct oil and filter supports reliable engine performance, as explained in these Chevrolet truck maintenance tips. Use a heavy-duty drain pan larger than the oil fill Choose a drain pan that can hold the truck’s entire oil capacity with extra room. A Chevrolet 4500 HD may require considerably more oil than a light-duty pickup, and a shallow or undersized pan can overflow while oil is still draining. A wide pan is also helpful because the stream can change direction when you remove the plug. Position the pan on a stable, level surface before loosening the drain plug. If the pan includes a pour spout or cover, make sure both are secure and clean. Keep absorbent pads or shop towels close by for drips and splashes. Using a pan with enough capacity is one of the simplest ways to prevent a messy spill, a point covered in these oil change safety recommendations. Prepare the correct socket, ratchet, filter wrench, and torque wrench Use the socket size specified for the drain plug. A properly fitting socket gives you better control and reduces the chance of rounding the fastener. A filter wrench can help remove an overtightened filter, but use it carefully so you do not damage the filter housing or nearby components. Keep a torque wrench ready for reinstallation. The drain plug must be tight enough to prevent leaks, but excessive force can damage the threads, oil pan, or sealing washer. Follow the torque value for your specific engine and model year instead of using a general truck specification. Inspect your tools before starting, particularly if you will work beneath a raised vehicle. The right socket set and torque wrench make the service more controlled. Wear oil-resistant gloves and eye protection Wear oil-resistant gloves that provide a secure grip on wet parts. Used oil can irritate your skin, and recently operated oil or engine components may be hot enough to cause burns. Long sleeves and sturdy work clothing can provide additional protection from splashes beneath the truck. Put on safety glasses before loosening the drain plug or removing the filter. Oil can drip from crossmembers and other components without warning, especially when the truck is raised. Keep your face and body out of the direct path of the drain stream. If oil contacts your skin or eyes, rinse promptly and follow the product’s safety instructions. Basic glove and eye protection can help prevent common service injuries. Work on level ground with commercial-rated lift or support equipment Park on firm, level ground before servicing the truck. A flat surface helps keep the vehicle stable and makes the final dipstick reading more accurate. Avoid soft soil, loose gravel, sloped driveways, or any surface that could shift beneath a tire, ramp, stand, or lift. If you need additional clearance, use equipment rated for the Chevrolet 4500 HD’s weight and configuration. Follow the lift manufacturer’s instructions and use the specified lifting points. Never place yourself beneath a truck supported by equipment that is not designed for commercial vehicles. If you do not have a suitable lift, stands, or ramps, arrange service through a heavy-duty truck shop. Proper lifting equipment and a level work area are essential parts of safe Chevrolet truck maintenance. Set the brake, chock the wheels, and never rely on a floor jack Set the parking brake before beginning, then place wheel chocks against the wheels that remain on the ground. Make sure the chocks sit firmly against the tires. If the truck is attached to a trailer or other equipment, secure the complete setup according to the manufacturer’s instructions. A floor jack can lift a vehicle, but it is not designed to support it while someone works underneath. Use properly rated stands, ramps, or a commercial lift, and confirm that the truck is stable before getting beneath it. Keep bystanders clear while raising or lowering the vehicle. A parking brake and wheel chocks add protection against movement, but they do not replace rated support equipment. Follow this vehicle stability guidance throughout the service. Prepare sealed containers for oil and filter recycling Have a clean, sealable container ready before you drain the oil. Transfer the used oil carefully after it has cooled enough to handle, and keep the container upright during storage and transport. Do not mix used oil with coolant, fuel, solvent, brake cleaner, or other fluids. Mixed fluids may not be accepted for recycling. Let the old filter drain into the pan, then place it in a sealed bag or suitable container. Auto parts stores, service centers, and local recycling programs may accept used motor oil and filters, although collection rules vary. Check with your municipality or recycling center before transporting the waste. Never pour oil onto the ground, into a drain, or into household garbage. Proper oil and filter recycling protects the worksite and the surrounding environment. How Do You Change Chevrolet 4500 HD Oil? Changing the oil in a Chevrolet 4500 HD requires the correct parts, accurate service information, and a safe work area. These trucks may use different gasoline or diesel engines depending on the model year, so oil viscosity, capacity, filter type, drain-plug specifications, and tightening procedures can vary. Confirm the truck’s VIN, engine, and chassis before beginning. Chevrolet’s owner resources can help you locate the correct manual and maintenance information. Plan the service around the truck’s workload. A 4500 HD used by a landscaper, mover, hauler, installer, or construction crew may carry heavy loads, idle frequently, or operate in dusty conditions. While the oil is draining, inspect the underside for leaks, damaged wiring, loose fasteners, and worn components. If you do not have commercial-rated lifting equipment or enough room to work safely, schedule the service with a commercial truck technician. Verify the engine, oil, capacity, filter, and torque values Begin by confirming the model year, VIN, engine, and chassis. Chevrolet 4500 HD trucks may have different requirements for gasoline engines and Duramax diesel engines. Check the owner’s manual or service information for the approved oil viscosity, GM oil specification, filter part number, filter-included capacity, drain-plug washer requirements, and torque values. Write down each specification before opening the oil container. Do not rely on a generic parts-store lookup or information from another 4500 HD. Aftermarket equipment, such as a utility body or auxiliary system, may also affect access to the filter and drain plug. For commercial upfitting details, the GM Upfitter resource provides useful information for businesses and technicians working with Chevrolet commercial vehicles. Warm the engine without handling dangerously hot oil Run the engine for a few minutes so the oil becomes warm and drains more easily. Warm oil flows better than cold oil, but it should not be so hot that removing the drain plug or filter creates a burn hazard. Shut the engine off and wait for moving parts to stop before working near or beneath the truck. Never work underneath a running vehicle. Keep your hands, hair, loose clothing, and tools away from belts, fans, and other moving components. If the truck has just completed a long haul, heavy tow, or extended idle period, allow additional cooling time. Wear oil-resistant gloves and eye protection, and keep shop towels nearby. If oil contacts your skin, wash the area promptly with soap and water. Secure the truck and place the drain pan under the plug Park the truck on level, solid ground and set the parking brake. Place wheel chocks on the wheels, even when the surface appears flat. If you need to raise the vehicle, use commercial-rated lifting and support equipment designed for the truck’s weight. Never rely on a floor jack alone while working underneath the chassis. Position a heavy-duty drain pan beneath the oil drain plug, leaving enough room for the oil stream to travel outward when the plug is removed. A 4500 HD may hold several quarts, so choose a container larger than the listed oil capacity. Put the replacement oil, filter, tools, gloves, and cleanup supplies within reach before starting. This limits the need to leave a supported truck unattended or reach across hot components. Remove the fill cap and drain plug, then drain the oil fully Remove the oil fill cap before loosening the drain plug. Opening the fill point allows air into the engine and helps the old oil drain smoothly. Place the correct socket firmly on the drain-plug head and loosen it carefully. Keep steady pressure on the tool to reduce the chance of rounding the fastener. Once the plug is loose, finish removing it by hand while keeping your arm out of the oil’s path. Allow the oil to drain until it slows to a light drip. Letting it drain fully helps limit the amount of old oil left in the engine. Set the plug and washer in a clean location. Inspect both parts for damaged threads, a worn sealing surface, or a crushed washer before reinstalling them. Check used oil for fuel, coolant, grit, sludge, or metal Inspect the drained oil before disposing of it. Dark oil alone does not mean the engine has a problem, particularly in a diesel. A strong fuel smell, unusually thin texture, or oil level that rises between services may indicate fuel dilution. Milky or frothy oil can point to coolant contamination, while gritty oil or shiny metal particles may suggest internal wear. Thick sludge, chunks, or unusual debris also deserve attention. These signs do not identify the exact fault, but they can help a technician determine what to inspect next. Save a small sample in a clean container if further testing may be needed. If you find coolant, fuel, or metal in the oil, have the truck inspected before returning it to heavy-duty work. The American Petroleum Institute’s oil guidance can also help explain oil classifications and specifications. Remove the old filter and confirm its gasket came off Place the drain pan beneath the oil filter before loosening it. Turn the filter slowly and keep it upright as you remove it to control spills. Use a filter wrench only when necessary. Excessive force can damage the filter, mounting surface, housing, or nearby components. After removing the filter, inspect the engine’s sealing surface. Confirm that the old rubber gasket came off with the filter and is not stuck to the mounting base. A second gasket left behind can cause a serious oil leak when the new filter is installed. Wipe the sealing area with a clean, lint-free cloth, then check it for dirt, scratches, or pieces of old gasket material. If the surface is damaged, stop and have it evaluated before installing the replacement filter. Lubricate and install the new filter without cross-threading Compare the replacement filter with the old filter before installation. Check the threads, gasket size, diameter, and part number against the application. Apply a thin layer of clean engine oil to the new gasket. This helps the gasket seat evenly and makes the filter easier to remove during the next service. Start the filter by hand and turn it slowly. It should thread smoothly without binding. If it stops or feels crooked, remove it and inspect the threads rather than forcing it. Cross-threading can damage the filter mount and lead to an expensive repair. Tighten the filter using the instructions printed on the filter or the vehicle’s service information. Some filters require a specified number of turns after gasket contact. Avoid using a long wrench to tighten the filter beyond the required amount. Install the drain plug with a new washer, if required Clean the drain plug with a shop towel and inspect the threads and sealing surface. Replace the plug if the threads are damaged, the head is rounded, or the sealing surface is worn. Many applications use a crush washer or sealing washer that should be replaced during service. Confirm the requirement for the specific engine and model year before installation. Thread the drain plug into the oil pan by hand. It should turn several rotations without unusual resistance. If it will not start smoothly, remove it and inspect the threads on both the plug and pan. Do not force a misaligned plug into place. Damaged oil-pan threads can turn a routine oil change into a larger repair. Keep the sealing surface clean, and do not add sealant unless the manufacturer specifically calls for it. Torque the plug and filter with model-specific service data Use a calibrated torque wrench for the drain plug when the manufacturer provides a torque specification. Correct torque allows the washer to seal without damaging the oil pan or threads. Too little torque may cause a leak, while too much can strip the pan, deform the washer, or make future removal difficult. Oil filters may use a tightening method instead of a torque value. For example, the instructions may call for a specific number of turns after the gasket touches the mounting surface. Follow the filter instructions and the vehicle’s service information rather than guessing from the previous filter. A documented procedure also helps keep maintenance consistent across a fleet. The Occupational Safety and Health Administration’s automotive repair guidance includes useful safety information for shops and crews performing vehicle maintenance. Add oil in stages and check the dipstick Confirm that the drain plug and filter are installed before adding oil. Pour in most of the specified capacity, leaving some oil in the container for final adjustment. Use a clean funnel to prevent spills and keep dust out of the fill opening. Avoid pouring the entire container into the engine at once. Park the truck on level ground and wait briefly before checking the dipstick. Add oil in small amounts, checking the level after each addition. Oil may need time to fill the filter and passages, so the first reading may not show the final level. Keep the oil between the dipstick marks, not above the maximum line. Overfilling can allow the crankshaft to whip the oil into foam, while underfilling leaves less oil available for lubrication and cooling. Run the engine briefly, shut it off, and check for leaks Start the engine and let it run briefly while watching the oil-pressure warning light or gauge. Do not rev the engine during this check. Inspect the area around the filter and drain plug for fresh oil. If the oil-pressure warning remains on, shut the engine off immediately and investigate before running it again. Turn the engine off after a short period and wait several minutes for the oil to settle. Check the dipstick again and add oil only if needed. Inspect beneath the truck for drips or wet areas, then wipe away any spilled oil. If oil continues to leak after the filter and plug have been installed correctly, stop the service and inspect the sealing surfaces. Do not place a leaking work truck back on the road. Reset the Oil Life System, record the service, and recycle the oil If the truck has an Oil Life System, reset it according to the procedure for that model. The system estimates oil condition from operating conditions, but it does not replace dipstick checks, leak inspections, or the maintenance schedule. An oil-life reminder is also different from an oil-pressure warning. An oil-pressure warning requires immediate attention. Record the service date, mileage, engine, oil brand and specification, quantity added, filter part number, and next planned service. Keep the receipt with the truck’s maintenance file, especially when several employees operate the vehicle. Pour used oil into a sealed, labeled container, and take it with the used filter to an approved recycling location. The Environmental Protection Agency’s used-oil guidance explains how to handle and recycle these materials safely. Chevrolet 4500 HD Oil Change Mistakes and Myths Oil service on a Chevrolet 4500 HD involves more than removing the drain plug and pouring in fresh oil. These trucks often tow trailers, carry equipment, idle at job sites, and travel through dust, heat, and stop-and-go traffic. Those conditions can place more stress on the engine oil than a typical passenger vehicle experiences. Gasoline and Duramax diesel models also have different oil specifications, capacities, filters, and service requirements. A mistake that seems minor, such as using the wrong viscosity or installing a filter gasket incorrectly, can lead to leaks, poor lubrication, or costly downtime for your crew. Before servicing the truck, confirm the model year and engine. Use the owner’s manual or GM’s owner resources to verify the correct oil, filter, fill quantity, drain-plug torque, and service interval. If the truck supports your landscaping, moving, construction, installation, hauling, or maintenance business, keep a written record of every service. That record helps you spot changes in oil consumption and gives your technician useful information when diagnosing a problem. The following mistakes are common, but each one is easy to avoid with the right information and a careful process. Do not treat 3,000 miles as a universal interval The 3,000-mile oil change rule does not apply to every Chevrolet 4500 HD. The correct interval depends on the engine, model year, oil specification, operating conditions, and Oil Life System, if equipped. A truck that makes steady highway trips may have different service needs from one that idles at job sites, hauls heavy materials, or makes repeated short trips. Use the manufacturer’s service schedule as your starting point, then consider how the truck actually works. Towing, high temperatures, dust, extended idling, and frequent stop-and-go driving can shorten oil life. Fleet operators should track mileage, engine hours, load conditions, and service dates for each truck rather than applying one interval to the entire fleet. A commercial truck technician can help establish a practical schedule when a truck spends most of its time under severe-duty conditions. Do not assume black oil needs immediate replacement Dark oil is not, by itself, proof that the oil has failed. Fresh oil collects combustion byproducts and suspended contaminants as it lubricates the engine, so it can become darker during normal operation. Diesel oil may darken particularly quickly because it handles soot produced during combustion. Color alone cannot tell you whether the oil still meets the engine’s lubrication needs. Check the level on level ground and look for an unusual fuel or coolant smell, a sharp increase in the oil level, or a change in texture. Milky oil, heavy sludge, visible metal, or gritty deposits require investigation. If the condition is unclear, an oil analysis can provide more useful information than a quick look at the dipstick. The American Petroleum Institute’s engine oil guide explains how oil categories and performance standards relate to engine protection. Do not use thicker oil than the manufacturer specifies Thicker oil is not automatically better for a hard-working truck. The engine’s oil passages, pump, bearings, seals, and temperature range are designed around specific viscosity requirements. Oil that is too thick can circulate slowly during startup, when many engine components need immediate lubrication. A 4500 HD working in winter conditions may require a different approved viscosity from one operating in sustained heat, but that choice should come from Chevrolet’s service information, not guesswork. Do not add heavy oil simply because the truck tows a trailer or has high mileage. If the engine consumes oil or shows low pressure, find the cause instead of masking the issue with a different viscosity. Check the container for both the required SAE grade and the applicable GM specification before adding it to the engine. Do not mix gasoline-engine and Duramax oil requirements A Chevrolet 4500 HD with a gasoline engine does not use the same oil requirements as a truck with a 6.6L Duramax diesel. The engines have different combustion processes, emissions equipment, lubrication demands, and approved oil specifications. Using the wrong product can reduce protection and create problems with emissions-system service or warranty claims. Before purchasing supplies, identify the engine by the VIN, under-hood label, owner’s manual, or service records. Confirm the viscosity, performance category, fill capacity, and filter for that exact application. In a busy shop, label gasoline and diesel service supplies clearly so the wrong container does not end up beside the truck. For diesel models, review Chevrolet’s Duramax maintenance information and follow the specifications for the particular model year. Do not assume synthetic oil allows longer intervals Synthetic oil can provide strong performance across a wide temperature range, but it does not give every truck permission to exceed its recommended service interval. Oil life also depends on heat, load, idling, fuel dilution, moisture, contamination, and engine condition. A truck pulling equipment between job sites may use its oil differently from one making light highway runs. Follow the owner’s manual and Oil Life System when the truck has one. Consider a shorter interval when the 4500 HD operates under severe conditions, including frequent towing, heavy payloads, dusty roads, extended idling, or repeated short trips. The filter has its own requirements as well, so do not treat a premium oil as a substitute for scheduled maintenance. The GM dexos program provides information about approved oil standards, while the truck’s service schedule determines when the oil should be changed. Change oil types only when the new oil meets specifications Changing from one oil brand or type to another is usually less important than choosing a product that meets the engine’s required specification. The container should identify the correct viscosity and applicable GM approval, such as the dexos requirement listed for that engine and model year. Do not choose oil based only on a familiar brand name or a claim that it is made for heavy-duty use. If you switch from conventional oil to synthetic oil, or from one synthetic brand to another, verify the new product before pouring it into the crankcase. Use the oil listed for the engine, not a substitute selected by appearance or price. When the label is unclear, check the oil manufacturer’s documentation or ask a commercial truck service department. Record the brand, viscosity, specification, and quantity after each service so the correct product is easy to reorder. Do not replace oil-level checks with the oil monitor An Oil Life System estimates when the oil should be changed. It does not replace a manual check of the oil level, and it cannot identify every leak, damaged seal, or sudden loss of oil pressure. A truck can lose oil between services while the monitor continues counting down normally. Check the dipstick regularly, especially before a long haul, after towing, and during weeks with heavy job-site use. Park on level ground, shut the engine off, wait the recommended amount of time, and read the dipstick according to the owner’s manual. Watch for a level below the safe range, a sudden increase, or a change in smell or appearance. If the level keeps falling, schedule an inspection instead of repeatedly topping off the crankcase. Record any oil added, because that information helps a technician diagnose consumption or a leak. Do not use a generic capacity or damaged filter gasket Oil capacity varies by engine, model year, filter design, and application. A generic number from a parts website may not match your Chevrolet 4500 HD. Use the filter-included capacity listed in the correct service information, then add oil gradually and confirm the final level with the dipstick. The Chevrolet maintenance schedule is a useful place to check service information before gathering supplies. Inspect the filter before installation. Make sure the old gasket came off with the filter and that the new gasket is clean, flexible, and properly seated. A cut, flattened, or hardened gasket can leak as soon as the engine runs. Replace the drain-plug washer when the service instructions call for a new one. Use a clean funnel and keep dirt away from the fill opening. Adding the entire stated capacity at once can also cause an overfill if some old oil remains in the engine. Avoid cross-threading, over-tightening, and double-gasketing The drain plug and oil filter need to be secure, but excessive force can damage threads, seals, or the filter housing. Start the drain plug and filter by hand so you can feel whether the threads are engaging correctly. If either part will not turn smoothly, stop and inspect it instead of forcing it with a ratchet or filter wrench. Double-gasketing occurs when the old filter seal remains attached to the mounting surface and the new filter is installed over it. The result can be a rapid oil leak once pressure builds. Before installing the new filter, wipe the mounting surface and confirm that only one gasket is present. Lightly coat the new gasket with clean oil, then tighten the filter according to the manufacturer’s instructions. Use a torque wrench for the drain plug when the correct value is available, and inspect for leaks before returning the truck to work. Stop driving after an oil-pressure warning An oil-pressure warning is different from a routine Oil Life alert. It may indicate a low oil level, an active leak, a failed oil pump, a blocked passage, a faulty sensor, or serious internal wear. Continuing to drive can turn a repairable problem into major engine damage in a short time. If the oil-pressure warning appears, move to a safe location, shut the engine off, and check the oil level after the truck is safely parked. Do not restart the engine if the level is dangerously low, oil is leaking heavily, or you hear ticking, knocking, or grinding. Arrange an inspection or tow to a qualified commercial truck service facility. A technician can test actual oil pressure and inspect the filter, drain plug, wiring, and engine before the truck returns to towing, hauling, or job-site duty. Maintain Your Chevrolet 4500 HD Between Oil Changes An oil change is one part of Chevrolet 4500 HD maintenance, not the entire routine. Between services, simple inspections can help you catch low fluid levels, tire damage, worn belts, loose connections, and leaks before they interrupt a workday. This is especially important for landscapers, movers, haulers, contractors, installers, and construction crews that depend on their trucks to carry equipment and materials safely. Build these checks into your routine at fuel stops, before a demanding job, and whenever the truck sounds, feels, or performs differently. A quick walk-around can reveal a problem that is easier and less expensive to repair in the shop than on the roadside. If you see a significant leak, a warning light, damaged tire, weak brake response, or an unfamiliar engine noise, arrange an inspection before continuing to work the truck. A Chevrolet 4500 HD carries substantial weight, so do not rely on a basic visual check when the problem involves brakes, steering, suspension, or the drivetrain. Commercial truck maintenance guidance recommends checking several major systems at regular service intervals. Check oil, coolant, brake, transmission, and power-steering fluids Park on level ground and shut off the engine before checking the oil. Allow enough time for the oil to settle, then use the dipstick to confirm that the level falls within the marked range. A low reading may indicate a leak or oil consumption. An unusually high reading may point to overfilling or contamination. The Oil Life System tracks service conditions, but it does not replace a physical oil-level check. Also inspect the coolant, brake fluid, transmission fluid, and power-steering fluid when the truck is safely parked. Look for low levels, discolored fluid, unusual odors, or wetness around caps and connections. Do not remove a hot coolant cap. Regular fluid inspections can help identify developing issues before they affect a loaded truck. Inspect tires, tread, inflation, wheels, and suspension Walk around the truck before a full day of hauling or job-site work. Look for cuts, bulges, exposed cords, punctures, and objects lodged in the tread. Check for uneven wear across each tire, then measure inflation while the tires are cool. Use the pressure listed for your truck and load, rather than judging inflation by appearance. Inspect the wheels and lug areas for damage, missing hardware, or signs that a wheel has shifted. Look for a leaning stance, sagging, damaged suspension components, or fluid leaking from shocks. Uneven tire wear can indicate an alignment or suspension problem. Regular tire inspections support handling, braking, and tire life under commercial loads. Check brakes, belts, hoses, battery terminals, and wiring Pay attention to a soft or spongy brake pedal, pulling while braking, grinding, squealing, or new vibration. Look through the wheel openings for obvious damage, but remember that a complete brake inspection may require lifting the truck and removing components. Arrange prompt service if the brake warning light appears or braking performance changes. Under the hood, check belts for cracking, fraying, glazing, or missing sections. Inspect hoses for swelling, soft spots, rubbing, and coolant residue. Battery terminals should be secure and free of heavy corrosion. Follow visible wiring and connectors for chafing, loose insulation, or signs of heat damage. These checks are particularly useful for trucks that work around dust, moisture, and debris. Replace air and fuel filters based on duty cycle and schedule Filter service depends on the engine, model year, operating conditions, and maintenance schedule. A 4500 HD working around dusty landscaping or construction sites may load its air filter sooner than a truck used mostly on paved roads. A restricted air filter can affect engine performance, while a neglected fuel filter can contribute to hard starts or poor operation. Follow the schedule for your specific engine and application. Inspect filters more often when the truck idles frequently, travels on unpaved roads, or carries heavy loads. Install the correct filter and keep dirt out of the intake during replacement. Diesel models may also have specific fuel-filter and water-separation requirements, so check the owner’s manual before service. Inspect the chassis, driveshaft, fittings, seals, and engine for leaks Look beneath the truck for fresh drops, wet areas, and stains that have spread along the chassis. Check around the oil pan, filter, drain plug, transmission, differential, power-steering system, coolant connections, and engine seals. Fluid can travel from a higher component, so trace the wet area upward when possible instead of assuming the lowest point is the source. Inspect the driveshaft and nearby fittings for damage, looseness, or signs of grease loss. Never crawl beneath a truck that is supported only by a floor jack. If the source of a leak is difficult to reach or identify, have a qualified technician inspect it. Routine checks of the chassis, driveshaft, seals, and engine can help prevent a small leak from becoming a larger repair. Follow diesel DPF, regeneration, and emissions-system requirements A diesel Chevrolet 4500 HD requires attention to more than oil and filter changes. Watch for DPF messages, regeneration requests, reduced-power warnings, and check-engine lights. Follow the owner’s manual when the truck requests a regeneration, and keep the exhaust area clear of grass, leaves, cardboard, and other combustible materials. Do not ignore an emissions warning or remove emissions equipment. Frequent short trips, extended idling, and interrupted regeneration can create additional problems. If regeneration requests become frequent or a warning remains active, arrange service rather than repeatedly attempting to clear the message. Diesel emissions maintenance should match the engine, model year, and operating conditions. Choose commercial truck service when home equipment falls short Some checks are suitable for a well-equipped home shop, but the 4500 HD is a heavy commercial vehicle. Its weight, wheel hardware, brake components, and underbody access may exceed what a residential garage can safely support. A basic floor jack and a pair of stands are not a substitute for commercial-rated lifting and support equipment. Use a qualified truck service facility for underbody inspections, brake and suspension work, driveline repairs, warning-light diagnosis, and diesel emissions testing. A commercial shop also has the scan tools, torque equipment, lifting capacity, and parts knowledge required for many 4500 HD repairs. Choose commercial truck service when the job exceeds your tools or experience. Combine oil changes with fluid, filter, brake, tire, and leak checks An oil change appointment is a convenient time to inspect several systems at once. Ask the technician to check fluid levels and condition, inspect the air and fuel filters, examine the brakes and tires, and look for leaks around the engine, transmission, chassis, and driveline. This gives you a more complete view of the truck’s condition than an oil change alone. Tell the service team how you use the 4500 HD, including towing, heavy payloads, frequent idling, dusty roads, short trips, and seasonal temperature changes. These details can affect inspection priorities and service timing. Combining routine checks with an oil change follows the principle of comprehensive Chevrolet maintenance, helping you address small concerns while the truck is already in the shop. Keep records and schedule service before the next demanding job Record the date, mileage, engine hours if available, oil type, oil quantity, filter part number, and any issues found. Note tire condition, fluid top-offs, warning messages, repairs, and the next recommended service. Clear records make it easier to identify changes, order parts, and share useful information with your technician. Schedule an inspection before a major move, long haul, busy landscaping season, or construction project. Do not wait until the truck develops a problem during a demanding job. Give the service provider enough time to order parts and complete a proper diagnosis. Keeping maintenance records and planning service ahead of heavy work can help reduce avoidable downtime. Frequently Asked Questions How do I know which oil my Chevrolet 4500 HD needs? Confirm the truck’s model year, VIN, chassis, and engine before buying oil. Gasoline and Duramax diesel engines use different viscosities and performance specifications. Check the owner’s manual, oil cap, engine label, or ask a commercial truck technician to verify the correct product. How often should I change the oil in a Chevrolet 4500 HD? Use the owner’s manual and Oil Life System, if equipped, as your main references. Trucks that tow, haul heavy loads, idle for long periods, make short trips, or work in dusty and hot conditions may need service more often than trucks used for steady highway driving. Track mileage, dates, and engine hours when available. Can I use synthetic oil to extend the service interval? Synthetic oil does not automatically allow longer intervals. It still needs to meet the oil specification listed for your engine, and demanding work can shorten its useful service life. Continue following the manufacturer’s schedule and adjust it only with guidance from qualified service professionals. What should I do if the oil-pressure warning appears? Pull over safely, shut off the engine, and check the oil level once the truck is parked on level ground. If the level is normal, or if you hear knocking or ticking, do not keep driving. Arrange an inspection or tow so a technician can check for leaks, pump problems, sensor faults, or internal engine damage. Should an oil change include other inspections? Yes. Ask the technician to check the filter, drain plug, leaks, belts, hoses, tires, brakes, fluids, air filter, fuel filter, and visible chassis components. Combining these checks with scheduled oil service can help identify problems before they interrupt a landscaping, moving, hauling, installation, or construction job.

Isuzu NPR truck with business professionals reviewing specifications in a modern office.

Isuzu NPR Specifications Guide for Commercial Buyers

A truck that fits your business should support the work you do most often, not just the heaviest load you might carry once a year. Start with your regular routes, cargo, crew size, equipment, and body requirements. Then compare those needs with the isuzu npr specifications, including GVWR, GAWR, curb weight, payload, towing capacity, engine torque, and available wheelbases. The standard NPR may suit lighter commercial applications, while the NPR-HD can provide additional capacity for dense cargo and heavier equipment. Understanding the difference can help your business choose a dependable Chevrolet, Isuzu, or Hino commercial truck with the right capabilities. Key Takeaways Select gas or diesel based on usage: Gas models fit local routes with frequent stops, while diesel models suit heavier loads, longer routes, and extended operation. Verify capacity before purchasing: Compare GVWR, GAWR, payload, curb weight, body weight, occupants, equipment, cargo, and towing requirements for the exact chassis. Match the upfit to the job: Choose the right body, wheelbase, storage, access features, and equipment, then confirm axle loading, clearances, safety systems, and service support with your dealer and upfitter. What Are the Isuzu NPR Gas and Diesel Specifications? The Isuzu NPR offers two powertrains for commercial buyers: a 6.6L V8 gasoline engine and a 5.2L turbo-diesel. Both are built for commercial service, but they suit different routes, loads, and maintenance plans. The gas model can be a practical choice for local work with frequent stops, while the diesel may suit businesses that carry heavier cargo or cover longer distances. Landscapers, movers, contractors, painters, window installers, and service crews should look beyond horsepower when comparing trucks. Consider payload, body weight, annual mileage, idle time, terrain, towing needs, and access to qualified service technicians. Specifications can also vary by model year and chassis configuration, so compare the exact truck using the current Isuzu N-Series gas specifications and diesel specifications. 6.6L V8 Gas Engine: 350 Horsepower, 425 lb-ft of Torque The Isuzu NPR gas model uses a 6.6-liter V8 that produces 350 horsepower at 4,500 rpm and 425 lb-ft of torque at 3,800 rpm. This output supports responsive acceleration on local routes, especially when the truck makes frequent stops at jobsites, loading areas, and delivery locations. The gas engine may suit businesses with moderate annual mileage, short routes, or fleets that already use gasoline-powered vehicles. It can also be a practical fit for painters, window installers, maintenance crews, and local contractors carrying tools and materials without regularly operating near the truck’s maximum ratings. Gasoline service is familiar to many repair facilities, which can simplify routine maintenance. However, the engine’s output does not determine the truck’s legal carrying capacity. Always confirm GVWR, axle ratings, curb weight, body weight, and final payload before choosing a configuration. 5.2L Turbo-Diesel: 215 Horsepower, 452 lb-ft of Torque The NPR diesel uses a 5.2-liter 4HK1-TC turbo-diesel rated at 215 horsepower at 2,500 rpm and 452 lb-ft of torque at 1,850 rpm. While the diesel has a lower horsepower rating than the gas engine, it produces more torque at a lower engine speed. That low-speed pulling power can help when the truck starts with a full body, climbs grades, or operates for long periods under load. The diesel may fit movers, haulers, construction crews, and landscaping companies that regularly carry dense materials or tow equipment. It can also work well for businesses with consistent highway mileage and longer duty cycles. Diesel ownership includes additional emissions equipment and service requirements. Fuel quality, fluid levels, filter changes, and aftertreatment operation all matter. Review the manufacturer’s N-Series diesel specifications and ask the dealer to identify the exact emissions equipment installed on the truck. Compare the Transmission, Drivetrain, and Emissions Systems Gas-powered NPR models pair the V8 with an eight-speed Hydra-Matic automatic transmission. It uses a lock-up torque converter and two overdrive gears, helping the engine maintain efficient operating speeds on both city streets and highways. This setup suits stop-and-go routes, local deliveries, and work that requires frequent acceleration. Diesel models use an Aisin A465id six-speed automatic transmission with double overdrive. The transmission is designed for smooth power delivery and commercial-duty operation. Both versions use rear-wheel drive, although axle ratios and related equipment can differ by chassis and model year. The emissions systems also differ. Gas models use gasoline emissions controls, while diesel models may include a diesel particulate filter and selective catalytic reduction equipment. These systems help meet emissions standards but require correct fluids, operating conditions, and service procedures. Check the truck’s specifications and review the applicable Isuzu owner information before buying or modifying the chassis. Choose Gas or Diesel for Routes, Loads, Mileage, and Maintenance Choose the gas NPR when the truck will handle mostly local travel, frequent stops, moderate loads, and lower annual mileage. A landscaping crew carrying hand tools, a painting company transporting supplies, or a service contractor using a utility body may appreciate the gas engine’s horsepower and familiar maintenance requirements. The diesel NPR deserves closer consideration when the truck carries dense cargo, travels long distances, climbs grades, or operates for many hours at a time. A mover with a loaded box body, a hauler pulling equipment, or a construction company carrying materials may benefit from the diesel’s low-speed torque. Fuel economy depends on payload, body style, traffic, terrain, tire selection, and idle time. Compare the full operating cost, including oil and filter service, emissions-system maintenance, fuel-system repairs, and expected mileage. Also compare the NPR and NPR-HD when the application may require additional capacity. Check Model-Year and Chassis-Cab Differences NPR specifications can change by model year, cab configuration, wheelbase, engine, emissions equipment, and factory options. A used truck may have a different transmission, axle rating, payload, or emissions system from a newer NPR, even when the model name is the same. Standard Cab configurations may offer wheelbases from about 109 to 212 inches, with body lengths of roughly 10 to 24 feet depending on the chassis and wheelbase. Crew Cab models, installed bodies, fuel levels, and optional equipment can change curb weight and available payload. Before purchasing, compare the door-jamb label, VIN data, axle ratings, GVWR, body weight, and intended cargo. The final build sheet is especially important when buying a used truck or replacing a body. A Chevrolet, Isuzu, or Hino truck dealer or qualified service center can verify whether the engine, transmission, body, and chassis ratings match the work you plan to perform. How Do Isuzu NPR GVWR and Payload Ratings Work? GVWR and payload ratings show how much weight an Isuzu NPR can carry safely after the truck is equipped for work. These figures help you select the right chassis before adding a box body, dump body, service body, liftgate, or other commercial equipment. GVWR, or Gross Vehicle Weight Rating, is the maximum permitted weight of the completed truck. That total includes the chassis, body, fuel, driver, passengers, tools, permanently mounted equipment, and cargo. Payload is the amount of weight left for people, equipment, and materials after the truck’s operating weight is accounted for. The standard NPR and NPR-HD have different GVWR ratings, so the right choice depends on your daily loads and planned upfit. A landscaper carrying mulch and equipment may have different requirements than a mover using a box body or a contractor carrying compressors and tools. Review the NPR and NPR-HD specifications as a starting point, then confirm the exact ratings for the truck you plan to purchase. Model year, cab style, wheelbase, engine, body, and installed equipment can all change the final capacity. Standard NPR: 12,000-Pound GVWR and Class 3 The standard Isuzu NPR has a 12,000-pound GVWR, placing it in Class 3. This rating includes the truck, body, occupants, fuel, tools, and cargo. It is not the amount of freight you can add to an empty chassis. A standard NPR may suit landscapers, painters, delivery operators, maintenance companies, and contractors with moderate cargo requirements. Its compact size can also help when working in alleys, residential driveways, and busy commercial areas. Before selecting this model, weigh the proposed body and permanently mounted equipment. A heavy enclosed body, liftgate, shelving system, or compressor uses capacity before you load job materials. The truck’s actual curb weight and axle ratings also need to fit your expected work. NPR-HD: 14,500-Pound GVWR and Class 4 The Isuzu NPR-HD has a 14,500-pound GVWR and is classified as a Class 4 truck. Its 2,500-pound advantage over the standard NPR provides more room for heavier bodies, tools, equipment, and cargo. This extra capacity can help construction crews, landscapers, movers, haulers, and service contractors carrying dense or bulky loads. An NPR-HD may also be a practical starting point for a dump body, landscape body, or service body with cabinets and a compressor. The higher GVWR does not guarantee a specific payload. Body weight, cab configuration, wheelbase, axle ratings, and installed equipment still affect capacity. Use the NPR and NPR-HD comparison to narrow your options, then review the exact certification label and build sheet. Compare GVWR, GAWR, Curb Weight, and Payload GVWR is the maximum weight of the complete truck. GAWR, or Gross Axle Weight Rating, is the maximum permitted weight on an individual axle. The front and rear axles may have different ratings, and both must remain within their limits. Curb weight refers to the truck’s operating weight before your cargo and job equipment are added. Payload is the remaining capacity after accounting for the chassis, body, fuel, occupants, tools, and permanently installed equipment. A useful planning method is: Available payload = GVWR minus the completed truck’s operating weight. Weight distribution matters, too. A truck can remain below its GVWR while placing too much weight on the rear axle. Load position affects tires, brakes, steering, suspension, and handling. Review the Isuzu N-Series specifications, then confirm the ratings on the specific truck’s certification label. Review Published Payloads Up to About 6,978 Pounds Published NPR payload figures vary by model, cab style, wheelbase, engine, and body configuration. Some commercial truck guides place standard NPR payload in the approximate range of 5,000 to 6,000 pounds, while NPR-HD configurations may provide roughly 7,000 to 8,000 pounds. You may also see published figures near 6,978 pounds for certain NPR configurations. Other N-Series listings show figures such as 8,470 pounds or more for specific NPR-HD and NPR-XD configurations. These numbers apply to particular chassis and equipment combinations, not every truck carrying the NPR name. A refrigerated body, liftgate, shelving, or service equipment can reduce usable cargo capacity substantially. Treat published payload as a research figure, then verify the exact chassis, body, and equipment package using the manufacturer’s N-Series data. Account for Bodies, Fuel, Occupants, Tools, and Cargo Begin with the body you plan to install. A lightweight flatbed generally uses less capacity than a refrigerated body, landscape dump body, enclosed box, or service body with drawers. Include the weight of liftgates, ladder racks, hitches, winches, compressors, auxiliary tanks, and other permanent equipment. Next, account for fuel, the driver, passengers, tools, and supplies. A window installer may carry glass racks, ladders, sealants, and installation equipment. A painter may need sprayers, scaffolding, and materials. A maintenance contractor may carry generators, parts, compressors, and hand tools. Estimate the heaviest realistic load, not only an average workday. Consider where each item will sit and how it will be secured. Keep dense cargo low and distribute it across the body. If the remaining capacity is narrow, consider an NPR-HD or a lighter body design before finalizing the upfit. Verify Door-Jamb Ratings, VIN Data, and the Build Sheet Check the certification label on the driver-side door jamb before purchasing a new or used NPR. The label generally lists the vehicle’s GVWR, axle ratings, tire information, and loading details. Use it to evaluate the individual truck, particularly when comparing used vehicles with different bodies or modifications. The VIN can help confirm the original model, engine, cab, and chassis configuration. On a used truck, inspect whether the current body matches the chassis and whether previous modifications added weight or changed axle loading. Missing labels, unapproved alterations, or an unknown body history deserve additional inspection by a qualified truck professional. Request the final build sheet or upfit documentation before approving the purchase. It should identify the body weight, equipment, dimensions, axle placement, and estimated remaining payload. Cross-check those details with the N-Series specifications and the door-jamb label so the completed truck matches the demands of your business. How Do Wheelbase and Dimensions Affect NPR Performance? Wheelbase and chassis dimensions affect how an Isuzu NPR carries cargo, handles turns, and reaches busy jobsites. A shorter truck can fit more easily in narrow streets and crowded parking areas, while a longer truck can support a larger body for equipment, materials, or household goods. The best choice depends on more than cargo-box length. Cab-to-axle distance, body overhang, axle ratings, cargo placement, and ground clearance all influence performance. Isuzu offers several NPR wheelbase configurations for delivery, service, construction, landscaping, and hauling applications. Review the N-Series gas truck specifications when comparing chassis options, and confirm details for the exact model, cab style, engine, and upfit package. A body, liftgate, toolboxes, or other equipment installed after purchase can change the finished truck’s length, weight, payload, and center of gravity. Choose From 109-, 132.5-, 150-, and 176-Inch Wheelbases The Isuzu NPR offers 109-, 132.5-, 150-, and 176-inch wheelbase options. The 109-inch configuration suits compact bodies and routes with frequent turns, narrow streets, and limited parking. The 132.5-inch and 150-inch options provide more room for cargo without creating as large a footprint as the longest chassis. The 176-inch wheelbase can accommodate longer bodies, expanded storage, and larger cargo areas. It may suit movers, landscape operators, and equipment haulers that need additional deck space. Before ordering, compare the manufacturer’s NPR gas specifications with the body manufacturer’s recommended wheelbase and cab-to-axle requirements. Compare Regular-Cab and Crew-Cab Dimensions and Payload Cab style affects seating, finished weight, and the payload available for cargo. A regular cab leaves more capacity for the body, tools, and materials, which can benefit contractors carrying dense equipment or supplies. A crew cab provides seating for additional workers, but its added weight reduces the capacity remaining for cargo and body equipment. Published specifications list a maximum body payload of about 8,470 pounds for the NPR-HD standard cab and approximately 7,725 pounds for the crew-cab version. These figures can change with the chassis, body, accessories, occupants, and cargo. Use the Isuzu N-Series diesel specifications as a reference, then confirm the certification label and final build sheet for the specific truck. Match Cab-to-Axle Measurements to Body Lengths Cab-to-axle, or CA, measures the distance from the back of the cab to the center of the rear axle. This measurement helps determine which body length will fit the chassis and sit correctly over the frame. A body that does not match the available CA can create excessive rear overhang, uneven axle loading, or interference with the cab. Depending on the wheelbase and chassis, NPR configurations can support bodies of roughly 10 to 24 feet. A shorter body may suit a service contractor carrying tools and parts, while a longer body can give movers, window installers, and delivery operators more room for bulky items. Have the upfitter verify body length, mounting points, rear overhang, and axle loading before installation. Check Overall Length, Width, Height, Clearance, and Cargo Space Published dimensions help determine whether the NPR will fit your routes, facilities, and worksites. Typical specifications list an overall width of about 81.3 inches and a height of approximately 92.9 inches. The finished measurements can change with the body, tires, mirrors, roof equipment, liftgate, and other accessories. Measure the complete truck, not only the cargo box. Confirm overall height before entering garages, loading docks, and covered work areas. Check total length when planning parking and backing space, and review body width for residential streets or narrow jobsite entrances. The NPR diesel specification sheet provides a useful reference, but the final upfit drawing should show the completed vehicle dimensions. Balance Short-Wheelbase Maneuverability With Long-Wheelbase Capacity A shorter wheelbase generally creates a tighter turning path and a smaller overall footprint. This can help landscapers, maintenance crews, painters, and contractors working in residential neighborhoods, alleys, and confined commercial lots. It also makes it easier to position the truck near a driveway, building, loading area, or jobsite entrance. A longer wheelbase provides more room for a larger body, but it requires more space for turns, backing, and parking. It may be the better fit for movers, haulers, and construction crews carrying bulky cargo or equipment. Select enough wheelbase for the intended body without adding length that the job does not require. Comparing the NPR and NPR-HD can also help when payload and chassis capacity are part of the purchase decision. Account for Turning Radius, Overhang, Weight Distribution, and Clearance Wheelbase is only one factor that affects handling. Front and rear overhang, steering angle, tire size, body width, and cargo placement also influence how the NPR moves through tight spaces. A body that extends too far behind the rear axle can increase rear swing during turns and affect the truck’s balance. Keep cargo within the front and rear axle ratings, and place heavy equipment low and within the approved load area. Check ground clearance at the bumper, steps, hitch, body, and underbody equipment, especially for construction and landscaping applications. Before delivery, review the completed dimensions and load plan with the dealer and upfitter. This confirms that turning space, clearance, body fit, and axle loading suit the truck’s intended work. What Are the Isuzu NPR Chassis Capabilities and Upfit Limits? The Isuzu NPR chassis can support many commercial bodies, including box, dump, landscape, flatbed, utility, and service bodies. Choosing the right upfit requires more than measuring the available deck space. The truck’s frame, axle ratings, suspension, payload, body weight, cargo placement, and equipment requirements must all work together. A properly matched chassis helps your truck carry its intended load without placing excessive stress on the frame, axles, tires, or brakes. It also leaves room for tools, fuel, occupants, and equipment that may be added after delivery. Review the current Isuzu N-Series specifications with your dealer, then have the body builder confirm the finished configuration before installation begins. Review Frame Rails, Crossmembers, Axles, and Suspension The frame supports the body, tools, cargo, and equipment mounted behind the cab. Frame rail size, crossmember placement, axle capacity, and suspension design all affect how the truck performs under load. The NPR-HD uses a heavier-duty chassis configuration than the standard NPR, making it a better fit for demanding cargo, towing, and equipment applications. Ask the body builder to review the available mounting points before installing a dump body, landscape body, liftgate, or service body. The installation must allow adequate clearance for the wiring, fuel system, suspension, tires, and drivetrain. Reviewing the differences between the NPR and NPR-HD can help you select the right starting point for your application. Match GAWR, Tires, Brakes, and Load Distribution Gross axle weight rating, or GAWR, limits the weight that each axle can safely support. A truck may have sufficient total payload capacity but still exceed its front or rear axle rating if cargo, tools, or equipment are positioned poorly. This matters when carrying landscape materials, window packages, concrete tools, or heavy service equipment. Tires, wheels, brakes, and suspension components must match the selected chassis rating. Keep dense cargo low and distribute it across the body instead of concentrating it at the rear. After the upfit is complete, weigh the truck by axle with a typical working load. Compare those readings with the door-jamb information and applicable N-Series specifications. Check Towing, GCWR, Hitch, and Tongue-Weight Ratings If the NPR will tow a trailer, evaluate the entire combination instead of looking only at the truck’s payload. Gross combined weight rating, or GCWR, includes the truck, body, occupants, cargo, trailer, and trailer cargo. The hitch rating and tongue-weight limit also apply, so the lowest rating in the combination determines the allowable setup. A contractor may tow an equipment trailer, while a landscaper may pull a trailer loaded with mowers and materials. In each case, account for the weight transferred to the truck through the hitch. Confirm that the chassis, hitch, trailer wiring, brake controller, and trailer brakes are compatible. Use the published N-Series diesel ratings as a starting point, then verify the specific VIN and final upfit plan. Confirm PTO, Electrical, and Hydraulic Compatibility Some commercial bodies require more than a mounting surface. Dump bodies, snow equipment, refrigeration units, liftgates, and specialized service bodies may need hydraulic power, electrical capacity, or a power take-off, commonly called a PTO. These systems must match the engine, transmission, wiring, controls, and expected duty cycle. Discuss the equipment requirements with the dealer and upfitter before purchasing the chassis. Confirm PTO provisions, hydraulic pump requirements, battery and alternator capacity, control locations, and idle-time demands. A maintenance truck may need power for compressors and work lights, while a dump body may require a hydraulic system for repeated cycles. The Isuzu body builder resources provide useful guidance for planning approved interfaces. Match Body Mounts, Center of Gravity, and Chassis Fit The body must match the cab-to-axle measurement, wheelbase, frame length, and available mounting locations. A body that is too long can create excessive rear overhang and poor weight distribution. A body that is too short may reduce usable capacity or place cargo in an awkward position. Center of gravity also affects handling. Tall bodies, stacked windows, tanks, ladders, and loaded landscape materials can raise the truck’s center of gravity. Keep heavy items low, secure loose equipment, and follow the body manufacturer’s mounting instructions. Review the available N-Series gas chassis configurations before selecting a body for painting, installation, crew, or service work. Match Each Upfit to the Chassis Ratings Start with the truck’s expected working load, then add the body, liftgate, racks, toolboxes, fuel, occupants, and regular cargo. This produces a more useful payload estimate than considering the body weight alone. Leave capacity for normal changes, such as a full load of materials or equipment added later. The standard NPR may suit lighter box, service, delivery, and contractor applications. The NPR-HD may be a better fit for heavier bodies, dense cargo, frequent towing, or equipment-intensive work. Before approving the build, request a completed weight estimate and confirm the GVWR, GAWR, tire ratings, axle loading, body mounts, and auxiliary systems. The dealer and qualified upfitter should verify that the finished truck matches the work it will perform. Which Isuzu NPR Configuration Fits the Job? The right Isuzu NPR configuration depends on the work your truck performs every day. A window installation crew may need an enclosed body with racks and protected storage, while a landscaper may need a dump body, equipment racks, and room for soil or mulch. Movers often prioritize cargo volume, while contractors may need payload capacity for tools, materials, and jobsite equipment. The standard NPR and NPR-HD share the low-cab-forward design that gives drivers good visibility and easier access in tight areas. Their chassis ratings, axle capacities, engine choices, and wheelbase options differ, however. Comparing those specifications before choosing a body can help you select a truck that handles the job without paying for capacity you will not use. Compare GVWR, Payload, and Class Ratings The standard Isuzu NPR has a 12,000-pound Gross Vehicle Weight Rating (GVWR), which places it in Class 3. The NPR-HD has a 14,500-pound GVWR, placing it in Class 4. That gives the NPR-HD 2,500 pounds more rated capacity, which can make a significant difference when you carry heavy tools, materials, or equipment. Payload is the weight available for the body, occupants, fuel, tools, and cargo after accounting for the truck’s curb weight. Depending on the body and configuration, an NPR typically carries about 5,000 to 6,000 pounds, while an NPR-HD may carry approximately 7,000 to 8,000 pounds. Review the NPR and NPR-HD rating differences before selecting a chassis, then confirm the exact rating on the truck’s door-jamb label and final build sheet. Compare Frame, Axle, Suspension, and Load Capacity The NPR-HD is designed for heavier commercial work with a stronger frame, additional crossmembers, and heavier-duty axles. Its rear axle rating is 17,500 pounds, compared with 13,200 pounds for the standard NPR. Both models have a 7,000-pound front axle rating, but the NPR-HD provides more rear-axle capacity for dense cargo and equipment. These ratings matter when you install a dump body, landscape body, utility body, or other heavy upfit. The body itself uses part of the available payload, and concentrated loads can place substantial weight over the rear axle. Ask your dealer or body manufacturer to review the frame, suspension, tires, brakes, axle ratings, and weight distribution together. Each axle and the complete vehicle must remain within its published limits. For applications that regularly carry masonry, construction equipment, landscaping materials, or loaded service equipment, review the NPR-HD chassis details before ordering the body. Compare Shared Gas and Diesel Options for Different Duties Both the NPR and NPR-HD are available with gas and diesel engine choices. The 6.6-liter V8 gas engine produces 350 horsepower and 425 pound-feet of torque. It can suit businesses that run local routes, make frequent stops, and prefer a familiar gasoline powertrain for everyday service. The 5.2-liter Isuzu 4HK1-TC turbo-diesel produces 215 horsepower and 452 pound-feet of torque. Its torque output can help with heavier loads, sustained operation, and routes that include grades or frequent hauling. Fuel availability, annual mileage, idling, maintenance planning, and expected ownership period should all influence your decision. Compare the manufacturer’s N-Series gas specifications with the N-Series diesel specifications, then confirm the available engine and emissions equipment for the model year you are considering. Match Wheelbase and Body Size to Jobsite Access Wheelbase affects how the truck turns, where the body sits, and how much cargo space you can install. The NPR offers wheelbase choices from 109 to 212 inches, supporting body lengths of approximately 10 to 24 feet. A shorter wheelbase can make it easier to enter residential driveways, narrow streets, alleys, and crowded jobsites. It can also reduce the space needed to turn around. Longer wheelbases can support larger bodies and distribute cargo across more of the chassis, but they require additional room at loading docks and jobsites. Before selecting a body, measure the cab-to-axle distance, overall length, rear overhang, door clearance, and turning area. The Isuzu N-Series gas specifications provide wheelbase and configuration information to help match the chassis to your intended body length. Choose the Standard NPR for Lighter-Duty Work The standard NPR is a practical choice for businesses carrying moderate loads on local routes. Its 12,000-pound GVWR and available body configurations suit package delivery, catering, food service, small moving jobs, and light construction. It can also work well for contractors who carry hand tools, ladders, compact equipment, and job materials without routinely approaching the limits of a heavier chassis. For window installers and painters, an NPR with an enclosed body can provide protected storage for glass, frames, ladders, sprayers, and supplies. Movers may pair it with a box body sized for smaller residential jobs. A contractor or maintenance company may choose a service body when organized compartments matter more than maximum cargo volume. Before selecting the standard NPR, calculate the loaded weight of the body, crew, fuel, tools, and typical cargo. If the truck will regularly carry dense materials or receive a heavy upfit, compare it with the NPR-HD rather than relying on an estimated payload figure. Choose the NPR-HD for Heavy Cargo and Equipment The NPR-HD is suited to work that consistently demands additional GVWR, rear-axle capacity, and payload. Common applications include transporting construction materials and equipment, utility work, bulk food delivery, commercial relocations, and medium-duty freight. It can also suit landscapers carrying soil, stone, mulch, or compact machines, provided the body and load remain within the chassis ratings. Construction and maintenance contractors may benefit from the added capacity when a truck carries generators, compressors, welders, parts, and tools at the same time. A commercial mover may need the NPR-HD when a larger box body and heavier household loads are part of the business model. The added capacity is most useful when it reflects your normal loaded condition, not just a rare maximum. Compare the complete upfit weight, cargo requirements, axle loading, and route conditions with the NPR-HD specifications before ordering. A properly matched NPR-HD can provide room for equipment and future growth while keeping the truck within its published ratings. Which Isuzu NPR Body Fits Your Application? The right Isuzu NPR body depends on what you carry, how you load it, and where the truck works. A moving company may need an enclosed box body with a liftgate, while a landscaper may need an open body for mulch, soil, and debris. A contractor who carries tools between jobs may get more value from a service body with organized compartments than from a standard cargo box. The Isuzu NPR platform can support many commercial body styles, including box, refrigerated, dump, landscape, flatbed, stake, utility, and service bodies. This flexibility lets you configure the truck around your daily work, rather than forcing your crew to work around an unsuitable body. Isuzu lists several of these options among its N-Series gas truck applications. Before choosing an upfit, consider your typical cargo, loading method, route conditions, storage needs, and future equipment. Body weight matters just as much as cargo volume. A larger body may offer more room, but it can also reduce available payload and affect axle loading. Your Chevrolet, Isuzu, and Hino truck dealer or body supplier can help match the body to the chassis ratings and job requirements. Use Box and Refrigerated Bodies for Moving and Delivery Box bodies are a strong choice for movers, delivery companies, appliance installers, and businesses that need protected cargo space. The roof and walls shield furniture, packages, tools, and supplies from weather and road debris. Depending on your route, you can add a roll-up rear door, side access door, shelving, ramp, or liftgate. Refrigerated bodies suit businesses that transport food, flowers, pharmaceuticals, and other temperature-sensitive products. The proper setup depends on the required temperature range, cargo volume, route length, and frequency of door openings. Insulation and interior dimensions matter as much as the refrigeration unit, so review the complete body package before making a decision. For moving and delivery work, compare body length, interior height, rear opening size, floor capacity, and dock access. A body with more cargo space may still be a poor fit if it creates excessive rear overhang or places too much weight behind the rear axle. Use Dump and Landscape Bodies for Construction and Landscaping Dump bodies work well for construction crews, landscapers, painters, and property maintenance companies that move loose materials or jobsite waste. Gravel, topsoil, mulch, brush, and demolition debris are easier to unload when the body can tip. Choose sidewalls and a floor that match the materials you carry, then confirm that the hoist can handle the loaded body. Landscape bodies often combine an open cargo area with side compartments, removable sides, racks, or tool storage. This setup lets crews carry plants, soil, mowers, trimmers, hand tools, and safety equipment on one truck. Open access also makes frequent loading faster than using a fully enclosed body. Isuzu identifies dump and landscape bodies as suitable applications for its N-Series gas trucks. Before ordering, review payload, body weight, hoist capacity, axle ratings, and load distribution. A heavy body can leave less capacity for materials, tools, and crew equipment. Use Flatbed, Stake, and Hauling Bodies for Materials and Equipment Flatbed bodies provide an open, level surface for lumber, pipe, roofing supplies, pallets, generators, and compact equipment. They work well when cargo is too long, wide, or irregular for an enclosed body. A stake body adds fixed or removable panels that help contain materials while keeping the load accessible from multiple sides. Contractors and haulers should also consider tie-down points, side rails, bulkheads, ramps, and equipment racks. These features make loading more orderly and help keep cargo secure in transit. If you carry a skid steer, lift, or other powered equipment, confirm that the deck, ramps, and rear structure can handle the equipment’s loaded weight. The Isuzu N-Series diesel specifications include flatbed and stake body applications, along with chassis details and available body lengths. Match the body to the truck’s GAWR, payload, wheelbase, and expected cargo position, not simply the dimensions of the items you plan to carry. Use Utility and Service Bodies for Maintenance and Contracting Utility and service bodies suit electricians, HVAC companies, plumbers, maintenance teams, cable technicians, and general contractors. Exterior compartments keep tools and parts organized while leaving the central area open for larger equipment. Compartments can be arranged for hand tools, fasteners, hoses, power equipment, and replacement materials. A service body can also reduce unnecessary movement around the jobsite. Workers can retrieve common tools from outside the body instead of climbing into the cargo area. When comparing options, review compartment depth, drawer systems, lighting, locks, ladder storage, and space for a compressor or generator. The NPR and NPR-HD can both support utility and service body applications. This NPR and NPR-HD comparison offers additional information about how the models differ. Ask the body supplier to include shelving, drawers, generators, compressors, ladders, and full compartments when calculating body weight and axle loading. Use Enclosed Bodies for Window Installers, Painters, and Crews Enclosed bodies are useful for window installers, painters, flooring crews, restoration companies, and contractors who carry valuable tools and materials. A protected cargo area keeps products dry and can provide added security when the truck is parked between jobs. Shelving, racks, partitions, and bins help separate fragile products from heavier equipment. Window installers may need padded racks, long-item storage, and a clear loading path for frames and glass. Painters may need shelving for cans, sprayers, drop cloths, and ladders, as well as ventilation appropriate for the materials they carry. Crew-oriented businesses may prefer a wide rear opening, side access, and enough interior height for efficient loading. The N-Series supports enclosed body applications, but the final layout should reflect your work. Measure the longest items, stored equipment height, and clearance needed to move materials without damage. Interior lighting, non-slip flooring, secure locks, and tie-down points can make the body safer and more useful. Match Body Weight, Cargo Space, Storage, Access, and Securement Start with the cargo you carry most often, then account for occasional loads and future equipment. Available Isuzu body lengths can range from approximately 10 to 24 feet, depending on the model and wheelbase. The N-Series diesel specifications can help you compare body length options, but you should also review cab-to-axle fit, rear overhang, body weight, and axle distribution. Next, consider how your crew loads and unloads. A liftgate may be necessary for heavy pallets, while side doors can save time on delivery routes. Shelving and compartments improve organization, but they add weight. Tie-down rails, bulkheads, racks, straps, and load bars help keep cargo in place during transit. Do not judge capacity by body dimensions alone. Include the body, liftgate, fuel, passengers, tools, accessories, and cargo when checking the truck’s ratings. Verify the final numbers against the door-jamb label, VIN information, chassis documentation, and upfit build sheet before placing the order. A qualified commercial truck dealer or body supplier can confirm that the selected body fits the chassis and remains within its ratings. How Does the Isuzu NPR Support Safety and Driver Comfort? An Isuzu NPR is built for commercial work that involves frequent stops, tight job sites, loading zones, and long hours behind the wheel. Its Low Cab Forward design gives drivers a clear view of the road and nearby obstacles, while the step-in cab can make repeated entry and exit easier during a busy workday. Safety and comfort equipment can vary by model year, cab configuration, engine, and selected packages. Before buying, review the truck’s build sheet and the manufacturer’s N-Series specifications. Confirm which features are included on the truck and which require an available package or specific configuration. The best way to evaluate an NPR is to connect each feature to the work your crew performs. A landscaper may prioritize visibility and body clearance around residential properties. A mover may focus on cab access, storage, and braking performance with a loaded box body. A maintenance contractor may need camera support, comfortable seating, and easy access to tools. Use a test drive and a detailed inspection to confirm that the truck fits the job before completing an upfit. Use Low-Cab-Forward Visibility and Step-In Access The NPR uses Isuzu’s Low Cab Forward design, which positions the driver closer to the front of the truck than a conventional pickup-style cab. This layout can provide a broad view of nearby vehicles, pedestrians, curbs, and obstacles around the body. Clear sightlines are useful when pulling away from a curb, backing into a delivery area, or positioning the truck at a crowded construction site. The design also supports a tighter turning radius and easier maneuvering in urban areas. That can help landscapers, movers, window installers, and service contractors working in alleys, residential streets, and small commercial lots. The step-in cab reduces the need to climb up into the truck, while wide-opening doors make frequent entry and exit more manageable. Before purchasing, check the step height, door swing, grab handles, mirror placement, and access to the driver’s seat. The NPR and NPR-HD comparison provides additional information about the Low Cab Forward layout and its effect on access and maneuverability. Rely on ABS, Stability Control, and Airbags Commercial trucks carry substantial weight, so braking and stability systems deserve careful attention. Depending on the model and configuration, NPR safety equipment can include driver and passenger front airbags, four-channel anti-lock brakes, and Automatic Brake Hold. The manufacturer’s N-Series diesel specifications identify these systems and can help buyers compare available equipment. Anti-lock braking helps reduce wheel lockup during hard braking, which can help the driver maintain steering control. Stability control can assist in certain loss-of-control situations, especially when road conditions change or a load shifts. Airbags provide another layer of protection during a collision, but they work alongside seat belts, not in place of them. Ask the dealer to confirm the exact safety equipment on the truck you are considering. Also inspect brake condition, warning lights, tire condition, and load securement practices. Electronic safety systems cannot correct excessive speed, poor weight distribution, worn components, or cargo that has not been secured properly. Check Tire-Pressure Monitoring, LED Lights, and Daytime Running Lights Tires and lighting affect both vehicle control and how easily other road users can see a commercial truck. A tire-pressure monitoring system can alert the driver when pressure falls outside the expected range. That warning gives the crew an opportunity to inspect the tire before a minor issue affects handling, fuel use, or roadside reliability. LED headlamps can provide clear illumination, while daytime running lights help make the truck more noticeable in traffic. These features are useful for contractors who leave before sunrise, return after dark, or work near active roads. The N-Series gas truck information lists tire-pressure monitoring and LED lighting among the available equipment. Drivers should still complete a walkaround before each shift. Check tire pressure, tread, valve stems, lamps, lenses, reflectors, and wiring. Pay particular attention after installing a dump body, utility body, liftgate, or other equipment that may affect lighting placement or add electrical connections. Review Cameras and Available Lane, Braking, and Cruise Assistance A camera system can improve awareness around the truck, especially when a box, utility body, or other upfit creates areas the driver cannot see directly. Rearview camera support may help when backing toward a dock, driveway, or job site. Drivers should still check mirrors, complete a walkaround, and use a spotter when conditions call for one. Selected N-Series configurations may offer an Advanced Driver Assistance System package. According to the N-Series diesel specifications, available features can include Lane Departure Warning, Automatic Emergency Braking, Following Distance Warning, and Full-Range Adaptive Cruise Control. Ask whether these systems are installed on the specific truck, since availability can vary by model year, cab, chassis, and package. During the test drive, check how warnings appear, where controls are located, and whether the system settings suit your routes. Driver assistance should support attentive driving rather than replace it. Compare Seating, Climate Control, Controls, and Storage Driver comfort matters when a crew spends most of the day moving between jobs. The NPR cab is designed for long workdays, with durable fabric seats and a practical commercial interior. During a test drive, check seat adjustment, steering-wheel position, pedal placement, mirror visibility, and access to frequently used switches. Climate control is also important for drivers working in hot, cold, or dusty conditions. Test the heating, air conditioning, ventilation, and windshield defrosting functions. Look for storage that can hold paperwork, phones, gloves, personal items, and small tools without interfering with the driver’s movement. The N-Series gas truck specifications describe a spacious cab with durable seating and a two-tone gray interior. Compare regular-cab and crew-cab layouts based on your crew size and payload needs. A crew cab can carry additional workers, while a regular cab may leave more available capacity for equipment and materials. Complete Service Inspections and Upfit Safety Checks Safety equipment works best when the entire truck is maintained as one system. Establish a routine for checking brakes, tires, lights, mirrors, seat belts, warning systems, fluid levels, and windshield condition. Drivers should also confirm that doors latch correctly, steps remain secure, and cargo is restrained before leaving the yard. An upfit can change the truck’s weight distribution, visibility, center of gravity, and overall dimensions. After installing a dump body, utility body, shelving, liftgate, or hydraulic equipment, inspect the body mounts, wiring, hydraulic lines, reflectors, work lights, and backup alarms. Confirm that each component is secure and does not interfere with required safety equipment. Review the manufacturer’s N-Series warranty information and specifications with the dealer and upfitter. Keep records of inspections, repairs, and modifications. These records can help confirm that the completed truck remains within its GVWR, axle ratings, tire ratings, and equipment requirements. How Do You Match Isuzu NPR Specifications to the Work? The right Isuzu NPR configuration depends on more than engine output or the payload listed in a brochure. Consider the complete workday: how far the truck travels, how often it idles, what it carries, where it operates, and which body or equipment it needs. A window installer may need enclosed storage and easy access, while a landscaper may need a dump body, tool compartments, and capacity for dense materials. Start by reviewing the truck’s regular duty cycle. Frequent stops and short trips place different demands on the powertrain than long regional routes. Then account for the body, passengers, tools, fuel, and cargo before choosing a chassis. The Isuzu N-Series specifications can help you compare available wheelbases, body lengths, ratings, and chassis details. Choose Gas or Diesel for Mileage, Idling, Routes, and Duty Cycle Gas and diesel NPR trucks can both serve commercial fleets, but each may suit different work patterns. A gasoline engine can be a practical choice for local and regional routes with frequent starts, stops, and lighter loads. It may also work well for businesses that need a flexible chassis for multiple commercial bodies and prefer fueling at locations equipped for gasoline. Diesel may suit businesses that regularly carry heavier loads, travel longer routes, or operate under sustained demand. Its torque characteristics can support loaded acceleration and hill climbing, while diesel fuel economy may favor high-mileage use. Idling habits matter as well. Compare expected fuel use, maintenance requirements, service access, and purchase cost with your truck dealer before choosing. The N-Series gas truck information offers a useful starting point for comparing applications. Configure the NPR for Moving, Delivery, and Hauling The standard NPR is generally suited to lighter commercial work, including local delivery, package delivery, catering, food service, small moving jobs, light construction, and utility work with lighter equipment. Its cab-over design can help drivers see corners and position the truck in alleys, neighborhoods, loading areas, and busy commercial streets. For movers and delivery companies, evaluate body length, interior height, rear-door opening, and loading equipment together. A box body with a liftgate may make it easier to handle furniture, appliances, and packages, but the body and liftgate also use part of the available payload. Haulers should include ramps, racks, tie-downs, and other securement equipment in the weight calculation. Review the differences between the Isuzu NPR and NPR-HD before choosing a chassis for a specific load. Configure the NPR-HD for Construction, Landscaping, and Heavy Cargo The NPR-HD may be a better choice for applications that regularly carry construction materials, tools, equipment, bulk products, or other dense cargo. Construction contractors may pair it with a dump body, flatbed, or stake body. Landscapers may need capacity for mulch, soil, pavers, plants, and power equipment. Commercial relocation companies can also benefit from additional capacity when transporting heavy furnishings or equipment. Do not treat the NPR-HD rating as permission to load without limits. The body, accessories, occupants, and cargo must remain within the truck’s GVWR and axle ratings. Tires, brakes, suspension, and weight distribution must also suit the completed vehicle and its regular loads. If your business carries heavy materials only occasionally, compare the purchase and operating costs of the NPR-HD with the loads you expect throughout the year. A dealer can help match the chassis to your typical cargo rather than your heaviest possible load. Choose Service Bodies for Maintenance and Contractors A service or utility body can turn an NPR into a mobile workspace for maintenance teams, electricians, plumbers, HVAC technicians, and general contractors. Side compartments keep hand tools, parts, and safety equipment organized. The center area can hold compressors, generators, ladders, or other job-specific equipment. This arrangement can reduce trips back to the shop while keeping essential equipment close to the crew. Before ordering a service body, list everything the crew carries during a normal week. Include drawers, shelving, ladder racks, compressors, welders, tanks, spare parts, and safety gear, not just the primary tools. Isuzu supports several commercial body types, including landscaping, dump, refrigerated, and box van bodies. Each option changes empty weight, axle loading, and center of gravity. Ask the dealer and body manufacturer to confirm chassis fit, mounting method, final payload, and clearance for all accessories. Match Body Access and Cargo Dimensions to Window and Painting Work Window installers and painters often need a truck that protects materials while keeping supplies easy to reach. An enclosed body can carry glass, frames, ladders, drop cloths, sprayers, trim, and finishing supplies, but the interior layout must match the longest and most fragile items. Measure racks, shelves, doors, and partitions before selecting the body. Advertised cubic capacity does not show whether the truck can accommodate a long window frame or a bulky sprayer. Body length is another important consideration. Depending on the model and wheelbase, N-Series configurations can support body lengths of approximately 10 to 24 feet. Use the published Isuzu body-length specifications to narrow your options, then confirm the cab-to-axle measurement and rear overhang with the upfitter. A low step height and wide rear or curbside door may help crews load supplies safely at homes, offices, and job sites. Reserve Payload for Future Equipment and Cargo Payload planning should include more than the cargo you carry today. Add the body, liftgate, racks, partitions, toolboxes, fuel, passengers, and personal protective equipment before estimating the remaining working capacity. Actual payload varies with the truck’s equipment and body type, so a figure from a general specification sheet may not match the finished vehicle. Leave room for new services and heavier jobs when possible. A contractor who starts with hand tools may later add a generator, compressor, trailer equipment, or another crew member. The NPR-HD is often listed with approximately 7,000 to 8,000 pounds of payload capacity, but the final rating depends on the specific build. Confirm the door-jamb label, VIN records, axle ratings, and final build sheet before purchase. Your dealer can calculate the completed truck’s usable payload after the body and equipment have been installed. What Should You Check on an Isuzu NPR Specification Sheet? An Isuzu NPR specification sheet gives you the numbers needed to match a truck to your work. It helps you compare engine options, confirm weight limits, plan an upfit, and avoid paying for capacity you will not use. For landscapers, movers, contractors, painters, window installers, haulers, and maintenance crews, the right configuration depends on more than horsepower. Body weight, tools, passengers, cargo, towing, and jobsite access all affect the final choice. Specifications can vary by model year, cab configuration, wheelbase, engine, and body application. Use the sheet for the exact VIN or chassis you are considering, then compare it with the manufacturer’s N-Series specifications. A commercial truck dealer or qualified upfitter can also review the proposed body and equipment before you place an order. Confirm Engine Output, Fuel, Transmission, and Emissions Equipment Start by confirming the engine, fuel type, horsepower, torque, transmission, and drivetrain. Depending on the configuration and model year, the Isuzu NPR may use a 6.6-liter V8 gas engine rated at 350 horsepower and 425 lb-ft of torque. Diesel models may use a 5.2-liter turbocharged four-cylinder engine, with output listed at 215 horsepower and 452 lb-ft of torque at 1,850 rpm. Make sure the sheet identifies the exact engine rather than relying on a general NPR description. Gas power may suit shorter routes, frequent stops, and buyers who prefer easy access to gasoline. Diesel can make sense for higher annual mileage, heavier daily use, and demanding low-speed work. Check the automatic transmission, axle ratio, emissions equipment, fuel tank capacity, and required fluids. These details affect service planning and operating costs, so compare the exact chassis with Isuzu’s gas truck specifications. Verify GVWR, GAWR, Curb Weight, Payload, GCWR, and Towing Check every weight rating, not just the advertised payload. GVWR is the maximum permitted weight of the completed truck, including the chassis, body, fuel, occupants, tools, and cargo. GAWR shows the maximum load for each axle. Curb weight tells you how much capacity remains after equipment is installed, while GCWR covers the combined weight of the truck and trailer. A standard NPR may have a 12,000-pound GVWR, while an NPR-HD may reach 14,500 pounds. The rating for the specific chassis takes priority, however. Published payload figures can change with the cab, wheelbase, engine, tires, body, and optional equipment. Weigh the body, liftgate, shelving, compressor, water tank, or dump equipment before estimating usable cargo capacity. Also confirm the towing rating, hitch rating, tongue-weight limit, and trailer-brake requirements. A truck can have enough engine power to pull a trailer while still exceeding an axle or combined-weight limit. Review Isuzu’s diesel specifications, then verify the final ratings on the door label and build sheet. Measure Wheelbase, Cab-to-Axle Distance, Body Size, and Clearance Wheelbase affects body length, turning space, weight distribution, and jobsite access. Depending on the model and cab configuration, NPR wheelbases may include 109, 132.5, 150, and 176 inches. Match the wheelbase to the body you plan to install instead of choosing the longest available frame by default. Cab-to-axle distance is equally important. It indicates the space available behind the cab and helps the body manufacturer select a suitable length. A body that is too long can create excessive rear overhang or place too much weight behind the rear axle. A body that is too short may waste cargo space or interfere with equipment placement. Measure the proposed body’s exterior length, width, height, interior dimensions, door opening, and floor height. Compare those measurements with parking spaces, loading areas, garage doors, and jobsite entrances. The N-Series diesel specifications provide a useful starting point, but the final chassis drawing should control your order. Check Turning Space, Dock Height, Ground Clearance, and Overhang A truck that meets its weight requirements may still be difficult to use if its dimensions do not suit your routes. Check the turning diameter, front and rear overhang, overall height, and overall width. These measurements matter when a mover backs into a residential driveway, a landscaper enters a narrow property, or a contractor works between buildings. Dock height deserves special attention for box and refrigerated bodies. Measure the loading dock, body floor, and liftgate platform together. If the truck sits too high or low, loading carts and equipment becomes more difficult. For construction and landscaping work, compare ground clearance with the surfaces you regularly cross, including gravel, curbs, ramps, and uneven lots. Review the truck’s height against garage doors, low branches, warehouse entrances, and overhead utilities. Roof-mounted equipment, ladder racks, exhaust components, and liftgates can change the final dimensions. Ask the upfitter for a completed drawing that shows the body, equipment, clearance, and overhang before approving the build. Match the Body, PTO, Electrical System, Hitch, and Auxiliary Equipment The body and equipment must work with the chassis, not simply fit on top of it. List the body type, body weight, mounting method, center of gravity, and expected cargo distribution. Common NPR applications include box, refrigerated, dump, landscape, flatbed, stake, utility, and service bodies. The body manufacturer should confirm compatibility with the frame, wheelbase, axle ratings, and mounting points. If you need a dump body, crane, compressor, liftgate, or hydraulic tool system, check whether the truck supports a power take-off, hydraulic pump, and required control hardware. Confirm PTO location, available torque, operating speed, and clearance around the transmission and frame. Electrical requirements matter too. Review battery capacity, alternator output, auxiliary circuits, lighting, trailer wiring, and provisions for inverters or additional equipment. For towing, confirm the hitch class, receiver size, wiring, brake controller, and tongue-weight rating. Have the dealer and upfitter review Isuzu’s body builder information so the completed truck follows applicable installation guidance. Review Service Intervals, Warranty, Parts, and Local Support A specification sheet should lead to a practical ownership plan. Ask which engine oil, filters, coolant, transmission fluid, and diesel emissions fluids the truck requires. Confirm inspection intervals for brakes, tires, suspension, belts, hoses, batteries, and emissions components. Your service schedule should reflect the actual duty cycle, including idling, short trips, heavy loads, dusty roads, and frequent stop-and-go driving. Review warranty coverage for the chassis, engine, transmission, emissions equipment, and factory-installed options. Terms can vary by component, model year, mileage, and use, so read the written coverage instead of relying on a general sales description. Isuzu’s commercial vehicle warranty information can help you identify covered systems and plan ownership costs. Local parts and service access matter as well. Ask whether the nearest qualified facility can handle the truck, body equipment, diagnostics, and warranty work. For a contractor or delivery operator, repair time can affect scheduled jobs and customer commitments. Before purchasing, identify service locations, mobile repair options, parts availability, and the maintenance support offered by the selling dealer. Validate Door-Jamb Ratings and the Final Upfit Build Sheet Use the door-jamb label as the final reference for the completed chassis ratings. It should identify the vehicle’s GVWR, front and rear GAWR, tire information, and required inflation pressures. Compare those figures with the proposal, VIN records, and manufacturer documentation. If the label does not match the paperwork, pause the purchase until the discrepancy is explained. The final upfit build sheet should list the body, body weight, equipment, mounting hardware, fuel, batteries, liftgate, shelving, tanks, toolboxes, and other additions. It should also show axle loads, remaining payload, center-of-gravity information, and changes to the electrical or hydraulic systems. Ask the upfitter to confirm that the completed truck stays within every applicable rating. Before delivery, inspect the body mounts, fasteners, wiring, lighting, tires, brakes, safety equipment, and cargo-securement points. Weigh the finished truck when practical, both empty and in its normal working condition. Keep the door-label information, build sheet, scale ticket, warranty documents, and service records together. These records help your team load the truck correctly and give the service department useful information for future repairs. Frequently Asked Questions What is the difference between the Isuzu NPR and NPR-HD? The standard NPR has a 12,000-pound GVWR and suits lighter commercial applications. The NPR-HD has a 14,500-pound GVWR, giving it more capacity for heavy bodies, dense materials, equipment, and larger loads. Your choice should depend on the completed truck weight, cargo, body, and axle ratings. Should I choose a gas or diesel Isuzu NPR? The gas model may fit local routes, frequent stops, moderate mileage, and businesses that prefer familiar gasoline service. The diesel model may be a better match for longer routes, sustained operation, heavier loads, and frequent grade climbing. Compare fuel use, service needs, emissions equipment, and local repair support before deciding. How much payload can an Isuzu NPR carry? Payload varies based on the chassis, cab, engine, wheelbase, body, liftgate, tools, passengers, and accessories. Published figures may range from roughly 5,000 to 8,000 pounds across NPR and NPR-HD configurations. Always confirm the exact remaining payload using the door-jamb label, build sheet, and a loaded weight calculation. Which body style is best for my business? Box bodies work well for movers and delivery crews, while dump and landscape bodies suit construction and landscaping work. Flatbeds and stake bodies provide open space for equipment and materials. Utility and service bodies are useful for maintenance teams and contractors, while enclosed bodies can protect windows, paint supplies, tools, and other products. What should I review before buying an Isuzu NPR? Check the engine, transmission, GVWR, front and rear axle ratings, curb weight, payload, towing capacity, wheelbase, cab-to-axle measurement, and body compatibility. Also review the final upfit weight, equipment requirements, warranty, service access, and completed truck dimensions. Have a qualified commercial truck dealer and upfitter verify the configuration before purchase.