Lou Bachrodt’s Tri-County Truck

Complimentary Delivery in the State of Florida

Blog

How Much Does Truck Upfitting Cost? Key Price Factors

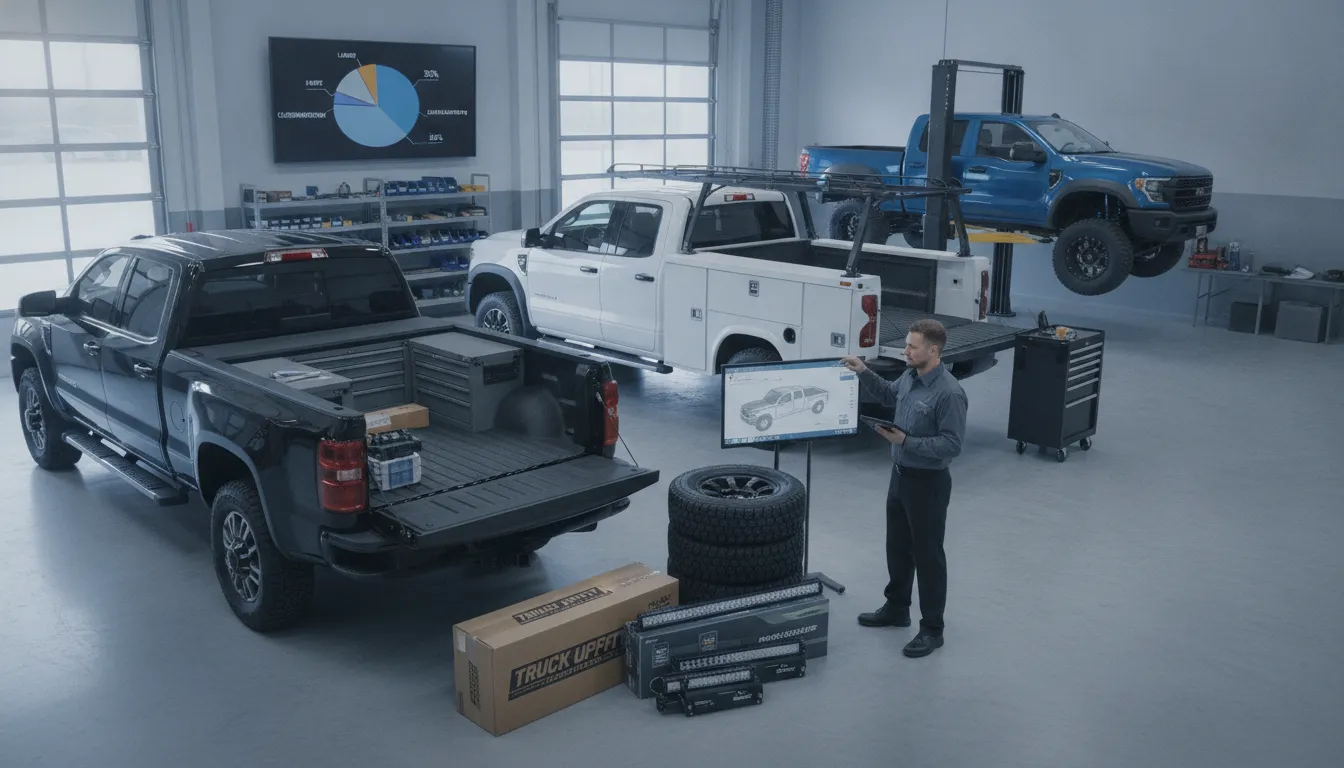
Pickup trucks and upfitting equipment in a workshop, showing factors that affect truck upfitting cost.

Upfitting a work truck is a major purchase, and a low equipment price doesn’t always mean a lower total cost. Installation, freight, custom fabrication, wiring, and compatibility work can all affect what you pay. If you’re researching how much does truck upfitting cost, begin by listing what your crew carries, how often the truck is loaded, and where it works. A hauler, painter, landscaper, and construction contractor may need very different setups. With a clear scope, you can request comparable quotes, check payload needs, and focus your budget on equipment that supports the work instead of features your crew may rarely use.

Key Takeaways

  • Choose equipment for everyday jobs: Match the body, storage, and accessories to your crew’s regular tasks and cargo.
  • Verify the complete setup: Have your dealer or upfitter confirm chassis compatibility, payload, and safe load capacity.
  • Compare the full cost: Review itemized quotes, installation, upkeep, downtime, and financing terms before approving the upfit.

What Is Truck Upfitting—and Why Does It Matter?

Turn a heavy-duty truck into a job-ready vehicle

Truck upfitting means adding equipment or modifying a truck to suit the work your business does. A Chevrolet, Isuzu, or Hino chassis can be fitted with a service body, flatbed, dump body, storage, racks, lighting, and other job-specific features. The goal is to create a truck that carries the right tools and materials, keeps them secure, and supports the tasks crews handle each day.

For a landscaper, that might mean organized tool storage and room for outdoor equipment. A window installer may need racks to carry long, fragile materials, while a contractor could need a durable bed for hauling supplies. As this overview of truck upfitting explains, the right equipment turns a basic truck into a platform built around its intended use.

Match the setup to the work, crew, and workload

Before choosing equipment, list the jobs the truck will handle and what the crew needs to carry, load, and access. Consider typical load size, how often the truck will be loaded, how many people will use it, and whether the work takes place on paved roads, rough job sites, or both.

A moving company may prioritize cargo space and tie-downs. A maintenance crew may need organized compartments for tools and parts, while a hauler may focus on payload and load security. The right setup can make loading easier, protect equipment, and reduce wasted space. Avoid adding features simply because they are available: extra equipment can add weight and cost without helping the crew’s daily work. Matching a truck body to the job helps keep the build practical.

Confirm compatibility with Chevrolet, Isuzu, or Hino chassis

An upfit must fit the truck’s specific make, model, and chassis configuration. Chevrolet, Isuzu, and Hino trucks have different dimensions and capacity options, so a body or piece of equipment designed for one setup may not work with another. Compatibility matters for bodies, liftgates, cranes, hydraulic systems, and other components.

Share the truck’s specifications and intended workload with your dealer or upfitter before approving a build. Ask them to verify fit and account for the equipment’s weight when checking available payload. They can also identify any chassis changes or installation requirements early. Confirming upfit compatibility with the truck chassis helps prevent unexpected modifications and keeps the finished vehicle suited to the work.

How Much Does Truck Upfitting Cost?

Truck upfitting costs vary with the body, equipment, installation work, and truck configuration. Use published prices to set an initial budget, then request an itemized quote for your Chevrolet, Isuzu, or Hino chassis and the work it needs to handle.

Compare costs for flatbeds, service bodies, and dump bodies

One commercial truck upfit guide from Donoho Chevrolet lists flatbed and service body upfits at around $60,000 each. Treat those figures as general reference points, not guaranteed prices for your truck. Body size, materials, storage options, chassis configuration, and installation can all affect the final cost.

A flatbed can work well for crews hauling bulky materials or equipment, while a service body offers enclosed storage for tools and supplies. Dump bodies have different cost factors, including body capacity, construction, hydraulics, and chassis compatibility. When comparing options, focus on the loads you carry and the tasks your crew performs. Ask for quotes based on matching specifications so you can compare the equipment and work included.

Budget for crane bodies, suspension upgrades, and specialized equipment

Specialized equipment can add considerably to an upfit’s cost. A utility truck, for example, may need a crane body, welder, compressor, drawer system, or hydraulic circuit. Each item can add equipment, mounting, and installation expenses. Costs for roll-off trucks can also vary with the hoist type, spreader system, and central hydraulics, as outlined in The Upfit Insider’s commercial truck guide.

Suspension upgrades may be appropriate for some applications, but the right setup depends on the truck, its payload, and the equipment it will carry. Ask the upfitter to identify which items are necessary and which are optional. Also confirm how added equipment affects payload capacity and whether the chassis can support the complete setup safely.

Separate equipment costs from installation, freight, and fees

The equipment price may not cover everything required to put the truck to work. Ask for separate line items for the body and equipment, fabrication, installation labor, freight, wiring, hydraulic work, and applicable fees. Installation costs can vary with the complexity of the job and the expertise required, as explained in Big Tex Trailer World’s guide to truck upfitting.

Check whether the quote includes mounting hardware, connections, testing, and any changes needed to make the equipment compatible with your truck. If an item is not included, ask what it will cost and whether it could affect the completion date. Itemized quotes make it easier to compare the same scope of work and understand the full price before you approve the upfit.

Treat published prices as estimates, not guaranteed quotes

Published prices are useful for early planning, but a final quote should reflect your truck, equipment, and intended use. Standard packages may cost less than custom setups, while added fabrication or specialized equipment can affect both price and lead time. One Upfit Insider comparison of standard and custom packages estimates standard packages can cost 20 to 30 percent less, but actual savings depend on the package and vehicle.

Before requesting a quote, share your chassis details, payload needs, equipment list, and typical work. Ask what could change the price or delivery schedule, and have the agreed scope documented. Reviewing Adrian Steel’s fleet upfitting advice can help you consider operational needs before settling on an equipment package.

What Shapes a Truck Upfit Quote?

An upfit quote depends on more than the body or equipment you choose. It also reflects your truck’s specifications, the work your crew does, and the labor and parts needed to complete the installation. When requesting a quote, describe your day-to-day jobs and provide the truck’s year, make, model, and configuration. Clear details help an upfitter recommend equipment that fits your work and your Chevrolet, Isuzu, or Hino truck.

Vehicle use, payload needs, and workload

Start with what the truck will carry and how your crew will use it. A landscaper hauling mowers, tools, and materials has different requirements from a mover securing household goods or a contractor transporting job-site equipment. Note how often the truck is loaded, the typical weight and size of its cargo, and whether it works on roads, job sites, or both.

Payload is a key part of the discussion. The truck must carry the body, equipment, passengers, and cargo without exceeding its rated capacity. Share your typical workload with the upfitter so they can help match the setup to your jobs. A workload-focused truck upfit can combine trade-specific equipment and protective features to suit the demands of daily work.

Chassis, cab, capacity, and equipment compatibility

The truck’s chassis and cab affect which bodies and accessories will fit. Chevrolet, Isuzu, and Hino trucks come in different configurations, so a quote should be based on your specific vehicle, not just its make. Wheelbase, cab-to-axle measurement, frame layout, and available capacity can all influence which equipment is suitable.

Compatibility matters for individual components, too. A service body, liftgate, crane, or storage system may need particular mounting points, clearance, or power connections. Provide the truck’s year, make, model, and configuration, and ask the upfitter to confirm fit before you approve the quote. This helps identify required adapters or other changes early, rather than after parts arrive or installation begins.

Equipment type, size, materials, and durability

The equipment you select can change the quote considerably. A basic flatbed may cost less than a service body fitted with shelves, drawers, lighting, and compartments. Dimensions and materials also matter. For example, aluminum can help limit added weight, while steel may be a suitable choice for demanding applications where strength is a priority.

Think about how your equipment will handle frequent use, weather, road conditions, and the cargo your crew carries. A truck upfitting cost guide identifies equipment, materials, and labor as factors that influence project costs. Ask for the quote to list the equipment’s dimensions, materials, finish, and included accessories. These details make it easier to compare proposals and spot differences in what each one covers.

Custom fabrication, hydraulics, electrical work, and integration

Custom fabrication can add design time, materials, and specialized labor to an upfit. A standard body with common storage options is usually simpler to install than a setup made for unusual cargo or tools. Hydraulics for a dump body, wiring for work lights, and connections for powered equipment can also require extra components and installation steps.

Ask how each system will connect to the truck and work alongside the other equipment. Wiring may need protection from wear and the elements, while hydraulic equipment requires suitable connections and controls. Discussing these needs before the work begins helps the upfitter plan the full installation. A report on in-house truck upfitting describes how bringing work in-house can help a company manage quality and turnaround. Your own quote will depend on the project’s specific requirements.

Installation labor, freight, lead times, and scope changes

Labor costs depend on the amount and complexity of the installation. Fitting a standard body may take less work than adding custom storage, routing electrical wiring, or connecting hydraulic equipment. Freight, shop fees, and other charges may also affect the total. Ask the upfitter to list these costs separately so you can see what the quoted price includes.

Confirm expected parts arrival and installation timing, especially if you need the truck for scheduled work. Ask what might delay completion and how changes will affect the price or delivery date. Adding a rack or changing compartment layouts after approval can require new parts or labor. An itemized quote with agreed specifications gives you a clear record of the project scope and a useful basis for reviewing any proposed changes.

Which Upfits Suit Different Jobs?

The best truck upfit is the one that fits the work your crew does every day. A landscaper hauling mulch and mowers needs a different setup from a contractor carrying tools to a job site or a window installer transporting fragile materials. Start by listing what the truck carries, how often the crew loads and unloads, and where the vehicle operates. Those details help narrow down the right body, storage, racks, and equipment.

Then check that the complete setup works with the truck’s chassis and payload capacity. The body and added equipment count toward the truck’s weight, leaving less capacity for materials, tools, and crew. This matters whether you’re outfitting a Chevrolet, Isuzu, or Hino. Ask your dealer or upfit partner to review the proposed configuration for your specific truck before you approve a quote.

It also helps to involve the people who will use the vehicle. Drivers and technicians can point out where they need quicker access, more secure storage, or a better way to load materials. Their input can keep the setup practical and help you focus your budget on equipment that supports the work.

Landscaping: carry tools, materials, and outdoor equipment

Landscaping crews often carry a mix of bulky materials, power equipment, and hand tools. A dump body can simplify unloading soil, mulch, or gravel. A flatbed may suit crews that transport pallets, mowers, or larger equipment. Toolboxes, racks, and tie-down points can keep smaller gear organized and help secure equipment between sites.

Before choosing a body, consider the materials’ weight, how the crew unloads them, and whether the truck travels over rough ground. A heavier upfit reduces the payload available for cargo, so confirm the capacity of the complete truck setup. Some trade-specific truck upfits combine work equipment with protective features and structural considerations. Use your crew’s regular workload, not an occasional unusual job, as the starting point for your equipment list.

Moving and hauling: manage cargo capacity and secure loads

Moving and hauling businesses need a setup that makes cargo easy to load, protects it in transit, and helps keep it secure. A flatbed can carry large or irregular items, while an enclosed body may be a better fit for goods or equipment that need shelter from weather. Side rails, tie-down points, and suitable load restraints can help keep cargo in place.

Estimate the weight and dimensions of the loads your crew typically handles. Remember that the truck’s available payload must account for the body, equipment, and cargo together. Flatbeds are used across industries for their versatility, as this overview of fleet truck upfits describes. Ask your upfit partner to confirm the truck and body are suited to your usual loads, and make sure your crew knows how to secure each type of cargo.

Construction and contracting: prioritize payload and job-site durability

Construction and contracting crews may carry heavy materials, tools, and equipment across demanding job sites. A dump body can help with loose materials, while a flatbed offers an open deck for larger loads. A service body provides compartments for tools and parts. Depending on the work, specialized equipment such as a crane, compressor, or welder may also be useful.

Plan the setup around the tasks each truck performs. Consider payload, access to equipment, and the conditions crews encounter on site. Every addition affects vehicle weight and remaining capacity, so review the full configuration before ordering. This commercial truck upfitting guide outlines equipment commonly used for utility and mechanic trucks. Confirm that the body and equipment fit the specific Chevrolet, Isuzu, or Hino chassis, and that the finished truck can carry its expected load.

Window installation and painting: secure long or delicate materials

Window installers may need to transport glass, frames, ladders, and specialized tools. A rack designed for long materials, paired with suitable supports and tie-downs, can help keep items secure during travel. Painters may need enclosed storage for sprayers, ladders, drop cloths, and supplies, along with shelving or bins for smaller items.

Think about what your crew carries most often and how they load it at each stop. Racks should support materials properly while leaving room for safe loading and unloading. Storage should keep delicate or costly equipment protected and easy to reach. Purpose-built truck and van upfits can include roof racks, drawers, shelving, and parts storage. Ask your upfit partner to confirm equipment placement, load limits, and compatibility with your truck before work begins.

Maintenance: organize tools and keep supplies accessible

Maintenance crews need to find tools and parts quickly, sometimes in the middle of a service call. A service body with lockable compartments can protect equipment, while drawers, shelves, and labeled bins help keep supplies organized. If technicians use compressors, generators, or other powered equipment, include those needs in the plan so the body and electrical system can be configured accordingly.

Start by listing the tools and parts technicians use on a typical call. Note what needs secure storage, what should be within easy reach, and whether any equipment needs a dedicated mount. This helps avoid paying for compartments that do not match your inventory. Upfit costs can include labor, materials, and equipment, so ask for a clear scope. This guide to truck upfit planning offers a useful starting point for identifying those needs.

Choose equipment crews will use

An extensive equipment list may look impressive, but each addition should solve a real work problem. Ask drivers and technicians what slows them down, which tools they carry daily, and what is difficult to load or access. Their feedback can help you prioritize practical features, such as a specific rack, compartment, or tie-down location.

Review the proposed setup against the crew’s regular routes and tasks. Equipment should fit the truck, remain accessible, and support safe loading and unloading. Consider how the body affects cargo protection, loading time, downtime, and operating costs. The right setup is not necessarily the one with the most features. It is the one that helps the crew work efficiently without adding equipment they rarely use. This truck body selection guidance also recommends matching equipment to how operators use the vehicle.

How Do Customization and Installation Affect Cost?

Customization and installation can add significantly to a truck upfit quote. The final cost depends on the equipment you choose, how it fits the chassis, and the labor needed to install and integrate it. Start with the tasks your crew handles most often, then ask for an itemized estimate for the truck and equipment you’re considering.

Add storage, shelving, drawers, racks, and tie-downs

Storage additions can make tools and materials easier to organize, but their size, materials, and installation all affect cost. Shelving, drawers, racks, and toolboxes can be configured for different jobs, from carrying landscaping equipment to keeping maintenance parts within reach. Tie-downs and cargo dividers may also be useful for securing loads.

Make a list of what your crew carries and how often they need it. Then ask the upfitter to confirm that each storage component fits the body, allows easy access, and works within the truck’s payload limits. The estimate should separate equipment from installation and materials. Upfitting costs can include all of these elements, so an itemized quote helps you see what drives the price.

Plan for work and warning lights, plus other safety equipment

Work lights can help crews see clearly on job sites, while warning lights may be useful for roadside work or other situations where added visibility matters. Cameras, spotlights, and related equipment can add to the price, especially if installation requires new wiring, controls, or connections to existing systems.

Consider where the truck will operate and what tasks the crew performs before choosing lighting and safety equipment. Ask which components are included, where they will be mounted, and whether the installation requires additional electrical work. Requirements can vary by vehicle use and location, so confirm what applies to your operation. Lighting, cameras, and other equipment can affect both the equipment cost and the installation scope.

Budget for suspension changes, hydraulics, and protective enclosures

Some jobs call for upgrades beyond a new body or storage system. Depending on the truck’s tasks and expected loads, the upfit may include suspension changes, hydraulic equipment, or a power take-off system. Protective enclosures can help shield tools and components from weather, dust, and job-site debris. Each addition can require extra parts, installation time, and compatibility checks.

Talk through your loads and daily work with the upfitter before selecting these options. A truck used to haul materials may need a different setup from one that operates equipment. Confirm that proposed changes suit the specific Chevrolet, Isuzu, or Hino chassis and its payload rating. Some upfit packages combine storage, suspension, hydraulics, and lighting, but the right configuration depends on your work and budget.

Ask how installation affects labor, timing, and cost

The price of equipment is only part of the quote. Installation labor depends on the work involved: mounting a standard component may be relatively direct, while custom fabrication, hydraulic connections, or electrical integration can take more time and specialized skills. Freight, parts availability, and coordination between the dealer and upfitter may also affect the schedule.

Request a written estimate that lists equipment, labor, freight, and other charges separately. Ask when the truck is expected to be ready and what could change the price or timeline, such as revised specifications or a fitment issue. A setup that does not match your crew’s daily routine can also affect work efficiency over time. Work Truck Online’s upfitting guidance explains why it’s worth assessing the design as well as the initial cost.

Confirm inspections, warranties, service, and vehicle warranty considerations

Before approving an upfit, ask what inspections or final checks are included and who will confirm the truck is ready for work. Clarify warranty coverage for the body, equipment, and installation, including where to go for repairs. Ask about replacement parts and service support, too, so you know what help is available if a component needs attention.

Talk with the truck dealer about possible warranty considerations before installation, and request written details from the relevant parties. Coverage can depend on the component, the work performed, and the cause of a problem. If resale value matters to your business, ask whether equipment can be removed, transferred, or adapted later. Selecting an upfit that remains useful over time may help preserve the vehicle’s resale value.

How Can Businesses Budget for Truck Upfitting?

A realistic upfit budget includes more than the body or equipment price. Consider installation, vehicle compatibility, maintenance, operating costs, and the time the truck may be out of service. For landscapers, movers, construction crews, and other businesses, planning around actual job needs helps ensure the finished truck is useful without paying for features that go unused.

Prioritize essential equipment over optional upgrades

Start by listing what the truck must carry and do every workday. A landscaping crew might need room for equipment and materials, while a contractor may need secure tool storage and a setup suited to demanding job sites. Separate essential items from upgrades that can wait, then price the essentials first.

A standard package may cost less and arrive sooner than a custom build, but confirm that it fits your work and truck. Compare the cost and lead-time trade-offs of standard and custom upfits before choosing. If you’re purchasing a Chevrolet, Isuzu, or Hino, ask whether the package is designed for that specific chassis and configuration. You can consider optional equipment later, once crews have used the truck and you know what would make a meaningful difference.

Review fleet needs, driver feedback, and maintenance records

Before requesting quotes, look at how your trucks are used. Review common job types, routes, loads, and recurring equipment problems. Ask drivers which tools are difficult to access, where materials need better protection, and what would make loading or unloading easier. Their feedback can help you identify practical improvements rather than guessing at what a crew needs.

Maintenance records can reveal repeated repairs or wear that may affect your choice of body or equipment. If you manage several trucks, compare the needs of different crews instead of assuming every vehicle should have the same setup. Also consider whether the upfit will suit the truck’s future role. Work Truck Online’s upfitting guide recommends considering how an upfit may help maintain or enhance vehicle value. Matching the setup to real fleet needs can help avoid spending on features that don’t solve a problem.

Compare itemized quotes with matching specifications

Give each upfitter the same specifications, including body type, dimensions, materials, storage, lighting, and installation requirements. Ask for an itemized quote that separates equipment, labor, freight, and other charges. This makes it easier to compare proposals and spot costs that one vendor may have excluded.

Ask each vendor to list assumptions, exclusions, and optional items. Confirm that the proposed body and equipment are compatible with your truck’s chassis and intended payload. The right body can affect loading efficiency, cargo protection, downtime, and operating costs, as Work Truck Online explains. Before approving a quote, check that each vendor is pricing the same scope of work. If specifications differ, ask for revised quotes so you can make a fair comparison.

Budget for installation, maintenance, compatibility work, and contingencies

The equipment price is only one part of the bill. Include installation labor, freight, and any work needed to connect or mount the equipment. Depending on the setup, this could include electrical connections, hydraulics, or changes to existing components. Labor costs can vary with the complexity of the job and the skills required, as Big Tex Trailer World’s truck upfitting guide notes.

Ask what maintenance the equipment will need, how often it is recommended, and whether replacement parts and service are readily available. Set aside a contingency for unforeseen compatibility issues or scope changes. Ask the dealer or installer what could affect the estimate and delivery schedule. A budget that covers both installation and ongoing care gives you a clearer picture of the cost of putting the truck to work.

Account for added weight, fuel use, lead times, and downtime

Bodies, racks, storage, and accessories all add weight, which reduces the capacity available for tools, materials, and cargo. Ask for the completed upfit’s weight and confirm the truck can carry its expected load within its rated limits. Also ask how the added weight may affect fuel use and operating costs.

Confirm equipment availability, installation time, and the expected date the truck will be ready. If it will be out of service, plan how the crew will cover scheduled work in the meantime. A lower purchase price may not be the best fit if the configuration costs more to operate or causes extended downtime. Work Truck Online cautions that a one-size-fits-all approach can become more expensive over a fleet’s working life. Compare the full cost of ownership, not only the initial quote.

Skip equipment crews are unlikely to use

Before approving an accessory, ask who will use it, how often, and which tasks it supports. A specialty rack, drawer system, or attachment may be worthwhile if crews rely on it every day. If it will rarely leave the truck, its cost, added weight, and maintenance needs may be hard to justify.

Talk with drivers and supervisors, then check work orders or job records to see what crews regularly carry. Prioritize equipment that makes common tasks safer, more organized, or easier to complete. A focused setup can still leave room for future changes if the team’s needs shift. Adrian Steel’s fleet upfitting advice emphasizes planning around day-to-day performance. Choosing equipment based on actual work helps keep the budget focused on tools and features crews will use.

What Costly Upfitting Mistakes Should Businesses Avoid?

A truck upfit should suit the work, the crew, and the chassis it will be installed on. A mismatch can mean added costs, reduced payload, or equipment crews rarely use. Before approving a quote, review these common mistakes and ask your dealer or upfitter how the proposed setup will perform in day-to-day service.

Choosing equipment before checking payload and use

Start with the jobs the truck needs to handle, then choose the body and equipment. A landscaper carrying mowers and materials has different needs from a window installer transporting long, fragile products or a contractor carrying heavy tools. Think about typical loads, how often you carry them, and how the crew will load and secure them.

Check the truck’s payload capacity before selecting equipment. The body and accessories count toward the vehicle’s weight, leaving less capacity for materials, tools, and passengers. The right body can also improve loading efficiency and cargo protection, as Work Truck Online explains. Confirm the setup fits your Chevrolet, Isuzu, or Hino chassis before committing.

Overlooking weight, load distribution, and fuel-efficiency impacts

Every addition adds weight. A heavy body, crane, or storage system reduces the capacity left for your crew’s tools and materials. Weight placement matters as well: an unbalanced load can affect handling and place extra strain on the truck. Ask your upfitter how the proposed setup affects the truck’s weight ratings and load distribution, and confirm the working payload after installation.

Added weight may also affect fuel use over the truck’s service life. Consider your daily routes, typical loads, and how often the crew will use each feature. Mickey Truck Bodies recommends including equipment weight in efficiency planning. This can help you decide whether a component earns its place or adds operating costs without enough practical value.

Underestimating labor, freight, or compatibility work

Equipment is only part of the quote. Installation may require fabrication, wiring, hydraulic work, or adjustments to fit a particular cab and chassis. Freight, shop fees, and integration work can also affect the final cost. Ask for an itemized estimate that separates equipment, installation, and additional charges.

Clarify what the labor covers and whether the shop expects extra compatibility work. A service body, liftgate, or other equipment may require specific mounting or electrical connections. The Big Tex Trailer World guide to truck upfitting notes that labor costs vary with the complexity of the work and the expertise it requires. Ask the shop to document possible added costs and get approval before work outside the agreed scope begins.

Assuming one package suits every truck and crew

A package that works for one truck may not suit another vehicle or crew. A maintenance team may need organized storage for tools and parts, while a hauling crew may prioritize cargo access and tie-downs. Chassis, cab configuration, payload, and daily tasks all affect which equipment makes sense.

Standard packages can be a useful starting point when several trucks need similar setups. Still, compare the package details with your crew’s actual work. Ask which components can be changed and whether the package fits your Chevrolet, Isuzu, or Hino configuration. A setup tailored to each truck’s role can help avoid paying for equipment that goes unused or leaving workers without features they rely on. Gather input from drivers and crew leads before settling on a package.

Choosing the lowest quote without checking its inclusions

A low quote may not cover the same work as a higher one. One estimate may include installation, freight, wiring, and safety equipment, while another lists only the body and basic mounting. Compare estimates line by line, using matching vehicle details and equipment specifications. Ask each provider about warranties, delivery estimates, and charges that could arise during installation.

Check whether the quote includes all necessary parts and labor, and get exclusions in writing. A lower initial price may lead to added expenses if essential work is left out or the equipment does not fit the truck. Work Truck Online cautions that a one-size-fits-all approach may cost more over a fleet’s life. Review the full scope and expected service life, not just the first number on the page.

Judging the investment by upfit price alone

The least expensive setup may not deliver the best value if it slows crews down, needs frequent repairs, or does not support the work. Consider how the upfit will affect daily tasks: Can workers reach tools easily? Does the body protect equipment? Can the truck carry typical loads safely? Practical details like these can affect productivity and operating costs over the life of the vehicle.

Compare the upfront price with expected durability, maintenance, downtime, and how long the truck will remain in service. Factor in delivery timing, too: a truck waiting for essential equipment may be unavailable for scheduled jobs. Adrian Steel recommends including upfitting in procurement planning, rather than treating it as an afterthought. Consider the full cost of ownership before choosing a setup for your business.

How Do Safety and Long-Term Value Affect the Investment?

An upfit is part of your truck’s working setup, so its value depends on more than the purchase price. The right body and equipment can help your crew carry tools and materials safely, get through daily tasks efficiently, and keep the truck available for work. Before approving a quote, consider how the proposed setup affects payload, access, visibility, maintenance, and the vehicle’s expected working life.

Start with the jobs your truck will handle most often. A landscaping crew carrying mowers and materials has different needs from a window installer transporting long, fragile products or a contractor hauling heavy equipment. Share those details with your dealer or upfitter, then ask how each piece of equipment affects the complete vehicle. A setup that costs less upfront may require more repairs, add time to routine tasks, or contribute to downtime. Reviewing total ownership costs, rather than comparing equipment prices alone, gives you a clearer basis for choosing.

Check payload limits, weight distribution, and load restraints

Every body, accessory, tool, and load adds weight. Before choosing an upfit, check the truck’s payload capacity and axle ratings. The fully loaded truck must remain within its limits, so include the weight of your crew, equipment, and materials in your estimate. Ask the upfitter how the proposed body and accessories will affect remaining payload and how weight will be distributed across the chassis.

Plan for securing cargo, too. Tie-down points, racks, and lockable compartments can help keep equipment in place during travel. This matters whether you carry landscaping materials, construction supplies, or tools between service calls. Review payload and axle limits with your dealer or upfitter before finalizing the configuration.

Match the body and equipment to the chassis

The body needs to suit both the work and the truck. Chevrolet, Isuzu, and Hino chassis come in different configurations and capacity ratings, so confirm that the proposed body, mounting system, and equipment fit the specific vehicle. Provide the make, model, wheelbase, cab configuration, and intended use when requesting a quote.

Compatibility affects more than installation. A poorly matched setup can reduce usable payload, limit access to equipment, or require additional modifications. Ask which chassis-specific components and labor the quote includes. If your workload may change, discuss whether the setup can accommodate future equipment. A body selected for loading, cargo protection, and operating needs can support better day-to-day use, as Work Truck Online’s upfitting overview explains.

Consider visibility, safe access, lighting, and secure storage

Picture a typical workday and consider how your crew will use the truck. Can workers reach frequently used tools without climbing over cargo or lifting awkwardly? Are supplies easy to find and return to their places? Compartments, steps, grab handles, and work lights can make equipment easier to access and help reduce unnecessary reaching.

Visibility and secure storage matter at the job site, too. Warning lights and reflectors can help make the truck more visible, while properly secured tools and materials are less likely to shift in transit. Choose storage around the work: window installers may need racks for long, delicate products, while maintenance crews may prefer organized compartments for small parts. Adrian Steel’s upfitting guidance offers practical considerations for improving access and reducing clutter.

Weigh upfront costs against durability, productivity, and maintenance

When comparing quotes, look beyond the initial price. Ask about materials, construction, finishes, maintenance requirements, and replacement parts. A truck used on demanding construction sites may need a more durable setup than one carrying lighter tools between residential jobs. Check whether the components are designed for your expected workload and how repairs could affect the truck’s availability.

Consider the time your crew spends loading, unloading, and locating equipment. Well-planned storage can make daily tasks more straightforward; a layout that does not fit the work may create delays that repeat throughout the truck’s service life. Work Truck Online notes that upfit design can affect driver efficiency over time. Compare that potential impact with the upfront cost when reviewing your options.

Consider uptime, vehicle life, resale value, and total ownership costs

Include more than the upfit invoice in your budget. Account for installation, maintenance, repairs, fuel use, and any time the truck will be out of service during the work. Added weight may affect operating costs, and equipment that does not suit the vehicle or workload may lead to additional wear. Ask your dealer or upfitter how the proposed setup could affect service needs and expected vehicle use.

A durable, practical upfit may also make a truck useful to a future buyer, though resale value depends on the vehicle’s condition and market demand. Treat resale as one factor, not a guaranteed return. To compare options, estimate the expected costs of owning and operating the truck alongside the upfit price. Adrian Steel’s total-cost guidance can help you identify costs to consider before committing.

What Financing Options Can Help Pay for a Truck Upfit?

A truck upfit can turn a heavy-duty Chevrolet, Isuzu, or Hino into a work-ready vehicle, but the cost of a body, equipment, and installation can add up. Financing may help spread that expense over time and keep cash available for payroll, fuel, repairs, and other operating costs. The right option depends on how much you need to finance, how long you plan to keep the truck, and whether ownership matters to your business.

Start by asking your dealer which financing arrangements are available for your truck and upfit. Confirm whether the proposed financing can cover the truck body, modifications, installation, and related services, or whether you’ll need separate arrangements. Then compare written offers using the same equipment specifications. Look beyond the monthly payment to the down payment, interest, fees, total amount paid, and any limits on how you can use or modify the vehicle.

It also helps to consider the truck’s expected working life and your business’s cash flow. A payment plan that fits your budget today should still make sense if work slows down or the truck needs maintenance. Before signing, ask a qualified financial or tax professional to review the terms and explain how the arrangement may affect your business.

Compare equipment loans, leases, and in-house financing

An equipment loan lets your business pay for an upfit over time while working toward ownership. Depending on the lender, the loan may cover a body, vehicle modifications, or service contracts along with other truck-related equipment. International’s overview of truck financing describes how financing can include these costs.

A lease may call for less money upfront, but it can include restrictions on use, modifications, or ownership at the end of the term. Some dealers also offer in-house financing, which may combine the truck and upfit in one application or payment plan. Ask each provider for the interest rate, fees, term, down payment, ownership conditions, and any limits on equipment changes. Compare offers with the same upfit specifications so you can see what each one covers.

Weigh monthly payments against total costs and ownership goals

A lower monthly payment may be easier to manage, but a longer term can mean paying more overall. Ask for a written breakdown that lists the down payment, interest, fees, payment schedule, and total amount due. Compare the full cost with the practical value of the upfit, such as less time spent locating tools or fewer trips to pick up materials.

Think about whether you plan to keep the truck and equipment for several years. A loan may suit a business that wants to own its upfit, while a lease may fit a replacement plan that involves changing trucks more often. Oakmont Capital Services discusses ownership considerations for equipment financing. Your cash flow, contract terms, and tax situation all matter, so review the complete agreement before choosing based on the monthly payment alone.

Match financing terms to the truck’s expected working life

Aim to match the repayment period with how long you expect to use the truck and its equipment. A longer term can reduce payments, but you could still owe money after the truck or upfit needs major repairs or replacement. Consider the expected service life of the body, crane, hydraulics, racks, and other components, as well as the truck itself.

Lenders may consider the chassis, mileage, condition, type of upfit, and business plan when deciding whether to offer financing and what terms to set. TrueCore Capital outlines factors lenders may review. Ask your dealer to confirm that the upfit fits the Chevrolet, Isuzu, or Hino chassis and the work you expect it to handle. This can help you choose a term that fits your truck replacement plans and day-to-day workload.

Review cash flow, credit requirements, and potential tax implications

Before applying, estimate what your business can comfortably afford each month. Include insurance, fuel, maintenance, existing vehicle payments, and seasonal changes in revenue. Ask the lender which records it needs, such as credit history, time in business, financial statements, or a down payment. If your business is newer, gather paperwork early and ask whether a different down payment or term could change the offer.

Tax treatment varies by financing structure, equipment, and business circumstances. Don’t assume a loan or lease will qualify for a particular deduction. Include potential tax effects in your comparison, then confirm them with a qualified professional. TrueCore Capital’s guidance on truck financing notes that lenders may review a business plan as part of an application. A clear plan can help explain how the truck and upfit will support your work.

Consult a qualified financial or tax professional

Before you sign, ask an accountant or tax professional to review the financing agreement. Share the payment schedule, itemized upfit quote, and details about how your crew will use the truck. A qualified advisor can explain potential effects on taxes, cash flow, and business records, and point out terms you may want to clarify.

If you’re comparing multiple offers, give your advisor each one so they can assess the terms side by side. Ask your dealer whether financing includes installation, what the quote covers, and how changes to the equipment could affect the final price or schedule. Reviewing both the financing and the upfit scope helps you understand the commitment before the truck goes to work.

What Should You Confirm Before Approving a Quote?

Before approving a truck upfit quote, make sure it spells out what you’re buying, how the work will affect your truck, and what support comes afterward. A clear, itemized quote helps you compare options and plan for downtime. It should also match the truck’s chassis and your crew’s daily work, whether you’re hauling materials, moving equipment, or carrying tools to job sites.

Which equipment, materials, and installation tasks does it include?

Ask for an itemized list of the body, equipment, materials, and labor included in the quote. A landscaper, for example, may need a service body, tool drawers, racks, and tie-downs. A construction contractor may need a dump body, reinforced suspension, or hydraulic equipment. Confirm dimensions, materials, finishes, and any electrical or hydraulic connections.

Check whether the price includes removing existing equipment, fabrication, mounting, wiring, testing, and delivery. Make sure the quote identifies any items that are optional or priced separately. An upfit should be planned around your routes and tasks, not just a parts list. These truck upfit package examples show how storage, suspension, equipment, and safety features can be combined to suit a job.

What could change the final cost or delivery schedule?

Ask what could change the final price or completion date. Custom fabrication, backordered parts, freight, additional wiring, and unexpected chassis compatibility work can all affect the schedule or cost. Find out whether the quote is fixed or an estimate, how long it remains valid, and whether you’ll approve added work before it begins.

Get the expected start and completion dates in writing, along with any assumptions behind them. A standard package may cost less and take less time to install than a custom build, but availability and your truck’s specifications matter. Published comparisons of standard and custom upfit timelines are useful for planning, but ask the upfitter for dates based on your specific truck and equipment.

Does the setup meet payload and safety requirements?

Confirm that the finished truck will stay within its rated payload and other applicable vehicle limits. The body, equipment, tools, crew, and cargo all add weight. Ask how the upfitter calculated the expected load and whether it will be distributed appropriately across the chassis. This check is especially important when you’re adding a crane, heavy storage, or a dump body.

Discuss safe access, visibility, lighting, tie-downs, and secure storage for the materials your crew carries. The body and equipment should fit your Chevrolet, Isuzu, or Hino chassis as well as the work you do. Before approving the quote, ask what documentation will confirm the completed setup meets its specifications. Truck upfitting guidance offers helpful considerations for body selection, cargo protection, and everyday use.

What service, warranty, and maintenance support is available?

Ask which parts and labor are covered, how long coverage lasts, and where you can get service. Clarify who handles repairs: the truck dealer, equipment manufacturer, or upfitter. If you’re concerned about how an installation could affect your vehicle’s warranty, ask the dealer to explain the coverage before authorizing work.

Find out what routine maintenance the equipment needs and whether replacement parts are easy to obtain. For crews that rely on their trucks every day, accessible tools and organized storage can make routine tasks more efficient. Ask who to contact if a component needs adjustment or repair, and whether service appointments could take the truck out of use. Upfit planning advice from Adrian Steel explains how organization and access can support smoother work on site.

Can you replace or adapt equipment as needs change?

Consider whether the setup can accommodate new tools, materials, or services as your business changes. Ask which racks, drawers, partitions, and accessories can be moved or replaced. Find out whether future updates would require new fabrication, wiring, or mounting hardware. If you operate multiple trucks, ask whether components can be standardized across vehicles with compatible chassis and body configurations.

Any change should be checked against payload, weight distribution, and safety requirements. A modular setup may make it simpler to adjust storage, but added equipment still needs to suit the truck. Ask the upfitter to document what was installed and note any compatibility requirements. That record gives your service provider useful information when you replace equipment, add accessories, or plan an upfit for another truck.

Frequently Asked Questions

How do I choose the right upfit for my business? Start with the jobs your crew handles most often. List the tools, materials, and equipment they carry, along with how they load and access them. A dealer or upfitter can use those details to recommend a setup that suits your work and truck.

Will an upfit reduce my truck’s payload capacity? Yes. The body and added equipment count toward the truck’s weight, leaving less capacity for passengers, tools, and cargo. Ask for the completed upfit’s weight and confirm that your typical loads stay within the truck’s rated limits.

Can any truck body fit a Chevrolet, Isuzu, or Hino truck? No. Fit depends on the truck’s specific model, chassis, cab, and configuration. Share those details with your dealer or upfitter so they can check compatibility before you approve a build.

What should I look for in an upfit quote? Check that the quote lists equipment, materials, installation, freight, and any electrical or hydraulic work. Confirm what is excluded, how long the estimate is valid, and what could affect the final price or completion date.

Can truck upfitting be financed? Some dealers and lenders offer financing for truck equipment or related costs. Ask what the financing covers, then compare the down payment, interest, fees, repayment term, and total amount you’ll pay.

Recommended Posts

Technician inspecting an Isuzu commercial truck in a service bay

Certified Isuzu Truck Mechanics: What to Expect

Certified Isuzu truck mechanics should explain the training that applies to your model. They should also explain the tests behind a repair and the parts chosen for that truck. A diesel shop that works on many brands can still miss an Isuzu-specific step. Ask how the shop matches the technician, the procedure, and the part to the vehicle in front of them. Call the service department Bring the model, model year, mileage, and a short description of the concern. Ask whether the technician has worked on that Isuzu and which service information the shop uses. A clear answer on those points is more useful than a general claim that the shop services commercial trucks. What certified Isuzu truck mechanics should be able to show A certificate or manufacturer-related qualification means a technician completed defined training or showed knowledge in a set area. It does not promise a perfect repair on every visit. Ask which training covers your truck and the job being discussed, then ask who will do the work. Be specific about the vehicle. Share the model, model year, engine details if you have them, mileage, and the concern in plain words. Ask whether the shop has seen that Isuzu model and the systems involved. An intermittent warning light needs a different plan than a truck that is only due for scheduled service. Experience with a similar box truck is not the same as experience with your configuration. An NPR used for local delivery and an FTR with a heavier body can need different checks even when the complaint sounds alike. Name the model and the body so the shop does not guess from a generic medium-duty label. Questions that separate relevant training from a general claim Which training or qualification applies to this Isuzu model and this repair? Who will diagnose the truck, and what Isuzu experience does that person have? Which service information or diagnostic tools will the shop use? Will the shop explain findings before any repair beyond the approved scope? Isuzu publishes service literature, diagnostic information, and training resources for its 1996-to-current commercial trucks through Isuzu Truck Service. That collection is a useful reference for what model-specific support looks like. It is not proof that every shop has access to it. Ask the shop which resources it actually uses on your model year. A state diesel training manual can show how specialized diesel work is structured, but it is not an Isuzu checklist. West Virginia's diesel mechanic training material covers training and qualification for maintenance, repair, and testing of certified diesel equipment in a mining setting. Review the West Virginia diesel mechanic training manual only as an example of defined training, not as a guide for your truck. Use that outside example as a comparison, not as a standard your shop must quote. The practical question is narrower. Can the person on your truck point to Isuzu service information for the system being tested. And can they explain the result in words you can file with the unit? How a shop should diagnose the truck Good diagnostic work starts with the symptom and the truck's history. The technician then uses inspection and tests to narrow the cause. Ask which checks are planned, whether a stored code is only one piece of the evaluation, and how the shop will explain findings before more work is approved. A code can point toward a system. It is not a complete diagnosis by itself. A useful conversation separates the fault you can see, the suspected cause, and the proposed repair. Before you approve work, ask what was confirmed, which test supports the recommendation, and which other causes still need a check. Also ask whether the shop will call you before it goes past the approved scope. That limit matters when a first test leads to a deeper inspection. You should hear the new finding and the added cost before that work starts. Write the authorization limit in the same note as the complaint. A cap such as "call me before any work past the initial inspection" keeps a long diagnostic visit from turning into a surprise repair. If the truck is down and the route cannot wait, say that too, so the shop knows which checks come first. What to have ready before the first call Write down the model, model year, mileage, and any recent repair. Describe the symptom, when it started, and whether it is constant or intermittent. Note whether it changes with load, temperature, route, or a cold start. Say whether the truck is safe to drive to the shop. If you run several trucks, name the exact unit so notes stay with that vehicle. This preparation does not replace an inspection. It gives the technician a cleaner starting point and keeps the first conversation focused on your truck rather than a generic diesel complaint. The same list works for a single owner-operator and for a dispatcher handling several units. Maintenance records worth keeping Ask for an itemized record of the visit. It should name the reported concern, the findings, the work performed, and the parts installed. Keep the invoice and inspection notes with that truck's history. The next technician needs that context if the same symptom comes back. Before you leave, confirm any recommended follow-up, items that were inspected but not repaired, and symptoms that should trigger another visit. Use the same fields for every truck in the fleet: date, mileage, complaint, diagnosis, repair, parts, and next action. A useful fleet note also records who reported the issue and when it first appeared. Keep the original work order next to your own notes, and mark whether follow-up was completed or deferred. If the truck returns for the same symptom, that timeline helps separate a repeat problem from a new one. Do not rely on memory once the truck is back on a route. A driver may describe last month's repair differently than the invoice does. The paper record is what the next shop should trust, especially when more than one driver uses the same unit. Record field What to write down Why it helps later Truck identity Model, year, unit number, and mileage. Keeps the note attached to the right vehicle. Concern Symptom, when it started, and when it appears. Helps the next visit reproduce an intermittent fault. Findings What was confirmed, and which test supported it. Separates a stored code from a completed diagnosis. Work and parts Repair performed, and the part that was installed. Shows what was already replaced if the issue returns. Follow-up What was deferred, and when to recheck it. Stops a recommendation from getting lost in the file. Read each row as a field you can copy onto a work order. You do not need a special fleet system to start. A shared folder with one sheet per truck is enough if every visit fills the same five fields. How to confirm parts fitment Parts should be chosen for the specific truck and the specific repair. A part that looks right, or that fits a broad model name, can still be wrong for that configuration. Share the truck's identifying details and ask the service team to confirm the proposed part before it is ordered. When you compare estimates, check that they describe the same work and the same parts. A lower first number may leave out diagnosis, a component, or labor. Ask what each line includes instead of comparing totals alone. Before you approve a substitution, ask why it is proposed, whether it changes the repair, and how the installed part will be identified on the invoice. If the truck has been modified, or if it carries a nonstandard body or equipment, say so before parts are ordered. That detail can prevent a delay caused by a part that does not match the truck as it is built today. Isuzu offers both OEM parts and FleetValue parts, and it points owners toward an authorized dealer for parts support. Ask which option the shop is quoting and why it fits this repair. Genuine commercial parts support is also described on the commercial vehicle service and parts page. Fitment is also a time question. A part that has to be reordered can keep a route truck down longer than the repair itself. Ask whether the quoted part is on hand, how the shop confirmed it, and what happens if the delivered part does not match the truck. Put that answer on the estimate before you approve the job. Questions to ask before you authorize service What training is relevant to my Isuzu model and this repair? How will you diagnose the issue, and what will you report first? Which work and parts are included in the estimate? Will I approve extra work before it begins? What paperwork will I receive, and what follow-up should I plan? Share the symptoms and service history when you contact the service and parts department. If the concern is a Hino diesel rather than an Isuzu, the Hino diesel engine repair guide covers that separate question. Do not treat the two makes as the same diagnostic job. For a more useful first conversation, have the model, mileage, and any recent warning or repair ready. Say whether the truck is safe to operate and whether the concern is constant or comes and goes. If you manage several units, identify the vehicle when you call so notes stay with the right truck. Ask for a plain summary you can repeat to a driver or a dispatcher. The summary should name the confirmed fault, the recommended work, the parts, and anything left for later. If you cannot restate it, the visit is not ready for approval yet. A simple fleet process you can repeat Before you schedule, gather the model and mileage, describe the symptom in plain terms, and note when it happens. Ask about the diagnostic steps, the authorization limit, parts fitment, and the written record you will get back. After the visit, file the paperwork and track any follow-up by vehicle. That routine is the practical test of certified Isuzu truck mechanics. You are looking for a shop that can name the relevant training, explain the tests. Match the part to the truck, and hand you a record the next technician can use. Those four points tell you more than a broad promise of diesel service. Repeat the same four checks on the next visit, even when the symptom is new. Shops change, and a truck's history gets harder to reconstruct after a few undocumented repairs. A short checklist is easier to keep than a long policy nobody uses. Lou Bachrodt's Tri-County Truck in Pompano Beach services commercial trucks and stocks genuine parts for fleet work. The service desk can walk through the concern, the truck details, and the next step. Use the same checklist on every unit so the file stays consistent as the fleet grows. If you are comparing this visit with scheduled upkeep on a work truck, the commercial utility truck maintenance schedule covers routine timing. This article stays on the mechanic question: training, diagnosis, records, and fitment. Use the schedule piece when the truck is due for planned service rather than an unexplained fault. Request a service appointment Frequently asked questions Does a certificate guarantee the repair? No. A certificate shows completed training or demonstrated knowledge in a defined area. You still need to ask whether that training covers your Isuzu model and the repair being proposed. You should also see the findings before you approve extra work. What should I bring to the first service visit? Bring the model, model year, mileage, a short description of the symptom, and any recent repair paperwork. Note whether the problem is constant or intermittent, and whether the truck is safe to drive. Those details help the technician start with the right checks. How do I know a part fits my truck? Ask the shop to match the part to that truck's configuration, not only to the model name. If a substitute is proposed, ask why, whether it changes the repair, and how the installed part will be listed on the invoice. Mention any body or equipment changes before the part is ordered. What records should I keep after the visit? Keep the work order and invoice with the truck. The useful fields are the date, mileage, complaint, findings, repair, parts installed, and any follow-up that was deferred. The same fields on every truck make the next visit faster when a symptom returns. A clear service process gives fleet owners the facts they need to approve a repair and to keep a usable history on each Isuzu. Start with the truck's details, ask how the diagnosis will be explained, and keep the paperwork with that unit.

Technicians inspect a Hino box truck during scheduled maintenance in a service bay.

Hino Box Truck Maintenance Schedule: Daily Checks & Service

A maintenance reminder is only useful when it matches the truck it’s meant for. Hino box trucks can differ by model year, engine, drivetrain, and installed equipment, so copying a schedule from a similar vehicle can lead to missed or mistimed service. The hino box truck maintenance schedule in your owner’s manual and applicable Hino service information should guide your plan. From daily walkarounds to scheduled inspections, a consistent routine helps landscapers, movers, contractors, and other businesses spot issues and plan shop visits around busy workweeks. This guide explains how to confirm your truck’s requirements, keep useful service records, and account for demanding routes and heavy-duty use. Key Takeaways Verify the right maintenance plan: Match the schedule to your Hino’s model year, engine, and configuration, using its owner’s manual or official service information. Plan service around real use: Record mileage, engine hours, and service history, then ask a qualified technician how heavy loads, dusty sites, or frequent stops affect maintenance needs. Make inspections part of the workday: Check the truck before driving, document concerns, and arrange service promptly if you notice leaks, warning lights, brake changes, or unusual performance. What Hino Box Truck Maintenance Schedule Should You Follow? Match the schedule to the truck’s model year, engine, drivetrain, and configuration Before setting service reminders, confirm your truck’s model year, engine, drivetrain, and configuration. Hino box trucks that look alike may have different requirements, so match the schedule to the vehicle identification details and the correct manual. Don’t rely on a schedule for a similar truck. Include body equipment and modifications in your planning. A liftgate or other installed equipment may need its own inspections. If you’re unsure which schedule applies, share the truck’s details with a Hino service professional. Metro Hino’s maintenance guidance notes that service needs can vary by model, load, and driving conditions. Use the owner’s manual and official Hino guide as definitive sources Use the owner’s manual and the applicable Hino maintenance guide to check service intervals and procedures. These references are specific to truck models and may include warranty-related requirements. Somerville Hino’s maintenance overview points readers to Hino guides for different models and truck classes. Keep the correct guide accessible to the people who inspect the truck and arrange service. If an interval or task is unclear, confirm it with an authorized Hino dealer or qualified service provider before proceeding. Having the right reference on hand helps your team plan shop visits and gives technicians a useful starting point. Track mileage, engine hours, calendar time, and inspection requirements Record the truck’s mileage, engine hours, and service dates. Depending on the maintenance guide, a task may be due based on distance, operating time, calendar time, or an inspection requirement. Engine hours can be especially useful for trucks that idle often or make frequent stops. Keep a log showing what was inspected, repaired, or replaced, along with the next due date. Store invoices and inspection records with the truck or in a shared fleet system, so drivers and managers can find them quickly. Consistent records help you plan service, spot recurring problems, and give your repair provider a clearer picture of the truck’s history. Avoid applying generic intervals to every Hino truck Online maintenance tips can offer general guidance, but don’t treat one interval as a rule for every Hino box truck. Requirements differ by model and operating conditions, and an article may discuss only one task. An oil-change interval, for example, shouldn’t determine when to replace filters or inspect brakes and other components. Check each task against the guide for your truck. Confirm whether it calls for an inspection, adjustment, fluid change, or part replacement. If your truck carries heavy materials, works dusty construction sites, or follows demanding routes, ask a Hino service professional whether severe-duty guidance applies. That keeps the maintenance plan specific to your vehicle and its workload. What Should You Check Daily? A daily inspection gives you a chance to catch visible problems before your Hino box truck heads out on a job. For landscapers, movers, contractors, and other crews that rely on their trucks, a few minutes of checking can help prevent an issue from disrupting the day or putting people at risk. Follow your company’s inspection process and the instructions in the owner’s manual. The correct procedure can vary by model, equipment, and truck configuration, so use the manual for details such as how to check fluid levels and operate installed equipment. Don’t rely on a quick glance alone: walk around the truck, check the cab and dashboard, and note anything that looks, sounds, or feels different. If you find a problem, report it through your company’s maintenance process before driving. A truck that may be unsafe should remain out of service until a qualified person has assessed it. Keep clear inspection notes, including the mileage and the details of what you noticed. That information helps a technician investigate the issue and gives your team a record of recurring concerns. Check tires, wheels, lights, mirrors, and visible damage before driving Walk around the truck and look for tire cuts, bulges, embedded objects, or signs of low pressure. Check wheels for visible damage and missing or loose wheel nuts. Use a tire gauge when your inspection procedure calls for one, and compare the reading with the specification for your truck. Test the headlights, turn signals, brake lights, and hazard lights. Clean and adjust the mirrors, then check that the windshield and windows provide a clear view. Look over the body and undercarriage for fresh damage or loose parts. During startup, pay attention to unusual noises, changes in exhaust sound, or reduced engine performance. Hino service guidance recommends watching for these changes, since they may point to a problem that needs professional attention. Look for leaks and check fluid levels as the manual directs Before starting the truck, look beneath it for fresh drips or puddles. Check visible hoses and connections for signs of leakage, and note fluid around the engine, transmission, steering, cooling, or hydraulic components. A leak can signal a developing problem, even if the truck appears to run normally. Check fluid levels using the procedure in the owner’s manual. The correct method varies by fluid and truck configuration. Park on level ground when instructed, use the specified dipstick or reservoir markings, and never open a hot cooling system. Report low levels or visible leaks so they can be assessed. Leaks involving coolant, transmission fluid, power steering, or hydraulics deserve prompt attention, as truck repair guidance explains. Test brakes, steering, horn, and dashboard warning indicators Confirm that the horn works and that the steering responds normally. Check the parking brake and service brakes in a safe area, following your workplace procedure. Notice any pulling, vibration, unusual pedal feel, or squealing and grinding sounds. Watch the dashboard during startup. Warning indicators should follow their normal startup sequence. If a light stays on or appears while driving, report it and follow the instructions in the owner’s manual. Don’t dismiss a soft brake pedal or a change in stopping distance. These can signal a serious brake issue. Heavy-duty truck repair advice identifies brake noise, a soft pedal, and longer stopping distances as reasons to arrange prompt service. Secure cargo and inspect box doors, liftgates, and installed equipment Make sure cargo is stable and secured with suitable tie-downs or restraints. Check that the load is distributed appropriately and cannot shift, fall, or block your view while driving. Inspect box doors, latches, hinges, and seals. Confirm that each door closes and locks securely. If the truck has a liftgate, look for visible damage, leaks, or worn components. Operate it only if you’re trained and can do so safely. Check other installed equipment, such as ramps, racks, or toolboxes, and secure it before departure. Regular inspections can help limit downtime and repair costs, according to Hino maintenance guidance. Record concerns and take unsafe trucks out of service Record defects as soon as you find them. Include the date, mileage, warning lights, unusual sounds, and the location of any leak or damage. Specific notes help your fleet manager or service technician understand what happened and determine what to inspect. Report concerns through your company’s maintenance process, even if the truck still seems to operate normally. Do not drive a truck if a problem could affect safe operation, such as unreliable brakes, a serious fluid leak, a damaged tire, or a steering fault. Follow your workplace procedure for taking it out of service and arranging an inspection. A clear maintenance process helps drivers recognize when a truck needs attention, as truck repair guidance recommends. Which Maintenance Tasks Should You Schedule? A dependable Hino box truck maintenance plan covers more than engine oil. Schedule regular checks for filters, fluids, brakes, tires, steering, suspension, cooling, electrical components, and emissions equipment. The exact requirements depend on your truck’s model, engine, configuration, and operating conditions, so use the owner’s manual or official Hino service information to confirm intervals and specifications. Keep a record of the work performed, mileage, and any recommended follow-up. That makes it easier to plan service around your routes and keep your truck ready for the next job. Change engine oil and filters at the specified intervals Engine oil lubricates moving parts and helps manage heat and contaminants. Over time, it wears down, so change the oil and filter according to the schedule for your specific truck. The right interval, oil grade, and filter can vary by model and engine. As a reference, Somerville Hino’s maintenance guidance recommends an oil change every 5,000 kilometers, but that figure should not replace the interval in your owner’s manual. If you regularly idle, carry heavy loads, or work on demanding routes, ask a Hino service professional whether your use affects the schedule. Record the date, mileage, oil type, and filter used after each service. Inspect or replace fuel, engine air, and cabin filters as directed Filters help keep contaminants out of the engine and support proper airflow and fuel delivery. Check and replace each filter as directed in your owner’s manual. For example, Metro Hino’s filter guidance suggests inspecting engine air filters every 15,000 kilometers and replacing them if clogged or damaged, with fuel-filter replacement every 20,000 to 30,000 kilometers. These are reference intervals, not a universal schedule for every Hino. Dusty roads, construction sites, and debris-heavy work areas can make more frequent inspections worthwhile. Check the manual for cabin-filter requirements, if your truck has one, and use filters that meet the specifications for your model. Check transmission, driveline, and differential fluids on schedule Transmission, driveline, and differential fluids help protect gears and other moving parts from friction and wear. Check their condition and service intervals according to the owner’s manual. Requirements vary by transmission and drivetrain, and some checks may need to be performed by a technician. Metro Hino’s maintenance timeline lists 40,000 to 60,000 kilometers as a general transmission-fluid reference, but your truck may have different requirements. Confirm the correct fluid specification and service timing before arranging work. During service, ask the technician to check for leaks and note whether the fluid needs inspection, replacement, or further diagnosis. Inspect brakes, tires, steering, and suspension at prescribed intervals Brakes, tires, steering, and suspension affect how your truck stops and handles, particularly when it’s carrying tools, equipment, or materials. Follow the inspection intervals in the manual, and watch for visible issues during daily checks. Look for tire damage or uneven wear, brake noise, vibration, pulling, or changes in handling. Metro Hino’s brake maintenance guidance recommends regular brake inspections every 10,000 to 15,000 miles, depending on driving conditions. Confirm the appropriate interval for your model and use. A qualified technician can measure brake wear and check components that are difficult to inspect during a walkaround. Arrange prompt service if stopping distances increase or the truck handles differently. Maintain the cooling system, battery, electrical components, and emissions equipment Check coolant level and condition as directed by the manual, and inspect hoses, belts, and the radiator area for leaks or damage. Only check coolant when the engine is cool, and use the specified type. Hino maintenance tips also recommend checking fan-belt condition and tension. Include the battery, terminals, wiring, lights, and other electrical components in scheduled inspections. Keep emissions equipment in good working order, too. Don’t ignore warning lights, unusual exhaust sounds, or changes in engine performance. If a warning appears, arrange a proper diagnosis rather than replacing parts based on guesswork. Record inspections, repairs, and any follow-up service. Confirm whether each task requires inspection, adjustment, fluid, or part replacement A maintenance schedule may call for different work at different service visits. A component might need inspection only, or it may need adjustment, fresh fluid, or replacement. Before approving service, ask what the job includes and which items will be checked, especially for brakes, belts, filters, and emissions components. This helps you understand what’s been done and when the truck is due for attention again. Share any new symptoms with the technician, including unusual exhaust noise or reduced engine performance. Franks Hino’s service guidance recommends professional attention for exhaust concerns. Keep records of mileage, work performed, parts and fluids used, and any recommendations for follow-up. How Do Operating Conditions Change Service Intervals? A Hino box truck’s service needs depend on how it works, not just how many miles it travels. Stop-and-go routes, long idling periods, dusty sites, and heavy loads can call for closer attention to maintenance. Check severe-duty guidance for stop-and-go routes, idling, and frequent short trips Landscaping, moving, and delivery work often involves frequent stops, extended idling, and short trips. In these conditions, mileage alone may not reflect how hard the truck has worked. Track engine hours as well as mileage, and check the owner’s manual for severe-duty maintenance guidance. Depending on the truck and its use, some service tasks may be due sooner than they would be for regular highway driving. Metro Hino’s maintenance guidance notes that service needs vary with the model, load, and driving conditions. Use the guidance to identify what to confirm, then follow the schedule specified for your truck. Account for dust, construction sites, heavy loads, and towing Dust from construction sites, gravel roads, and landscaping work can affect air filters and other components. Heavy cargo and towing place added demands on the engine, brakes, tires, suspension, and drivetrain. When reviewing maintenance needs, consider the work your truck does every day, including the weight it carries and the surfaces it travels. Between scheduled services, watch for visible leaks, tire wear, or changes in braking and handling. Follow the manual’s instructions for inspecting filters and other components, since service requirements depend on the truck. Hino maintenance tips also stress the importance of keeping steering and suspension systems in good condition, especially when a truck regularly works on rough routes. Ask a Hino service professional if demanding use requires more frequent service If your truck spends most of its time in demanding conditions, ask a Hino service professional to review its maintenance schedule. Share the model year, engine, configuration, typical load, route conditions, idling time, mileage, and engine hours. These details help the technician assess whether the standard schedule fits the truck’s workload. Keep records of inspections, repairs, mileage, and engine hours. Good records make it easier to spot recurring issues and plan service around busy periods. A technician can also clarify whether a task calls for inspection, adjustment, a fluid change, or part replacement. Routine maintenance can help reduce breakdown risks and downtime, but use the owner’s manual and qualified service advice to determine the right intervals for your truck. Which Warning Signs Need Prompt Hino Service? A change in how your Hino box truck sounds, handles, or performs deserves attention. Catching a problem early can help prevent a breakdown during a delivery or job. If the truck feels unsafe to drive, pull over somewhere safe and arrange an inspection before continuing. Address leaks, overheating, and rising temperature readings Look beneath the truck for fresh oil, coolant, transmission fluid, or diesel fuel. A leak can lower fluid levels and lead to overheating or damage to key components. Make a note of the fluid’s color and where you saw it, then contact a qualified service provider. Adding fluid may help temporarily, but it won’t fix the source of the leak. Keep an eye on the temperature gauge while driving. If it rises above its usual range or an overheating warning appears, pull over safely and shut off the engine when conditions allow. Continuing to drive may cause further damage. A heavy-duty truck repair checklist identifies leaks and overheating as reasons to arrange prompt service. Respond to brake noise, a soft pedal, or longer stopping distances Squealing or grinding noises, a brake pedal that feels soft, or longer stopping distances all warrant prompt attention. These changes can affect your ability to stop safely, particularly when the truck carries tools, materials, or a full load. Don’t wait until the next scheduled service if the brakes feel different than usual. If braking changes significantly, park the truck safely and arrange an inspection. Avoid continuing the route until a technician has checked the system. Regular inspections can help identify worn or damaged components before they compromise safe operation. Review these truck brake warning signs to understand which symptoms call for urgent attention. Investigate warning lights, unusual engine or exhaust noises, and reduced performance Pay attention to dashboard warning lights, especially when they appear alongside rough running, a change in exhaust sound, loss of power, or a sudden drop in fuel economy. Note when the warning appeared and what the truck was doing. If a critical light comes on or the truck runs poorly, stop in a safe location and contact a service professional. Rattling, knocking, hissing, or a change in exhaust tone may point to an engine or exhaust-system issue. Don’t dismiss a new sound simply because the truck still runs. A Hino service and repair guide advises owners to watch for changes in noise, exhaust tone, and engine performance. Check uneven tire wear, handling changes, starting trouble, and electrical faults Uneven tire wear, pulling to one side, vibration, or loose-feeling steering can signal a tire, suspension, or steering problem. These issues may affect control, especially with a heavy load. Check for visible tire damage and arrange an inspection if the truck handles differently than usual. Hino maintenance guidance stresses the importance of keeping steering and suspension systems in good condition. Starting trouble, dim lights, flickering displays, or recurring electrical warnings may point to a battery, charging, or wiring fault. Note when the issue occurs and which components are affected. If the truck won’t start reliably, avoid repeated attempts and contact a technician. Testing the battery and charging system can help identify the problem before it interrupts a workday. Why Follow the Hino Box Truck Maintenance Schedule? A Hino box truck may carry tools to a job site, furniture to a customer, or materials between locations. When the truck is out of service, schedules and business operations can suffer. Following the maintenance schedule for your specific model helps you keep key systems in good condition, plan service ahead, and spot concerns before they disrupt a workday. Use the owner’s manual and Hino service information to confirm required intervals, and keep a record of inspections and repairs. Regular care supports dependable operation and can help manage the truck’s long-term costs, as Franks Hino explains. Support safe braking, handling, and dependable operation A loaded box truck needs reliable brakes, responsive steering, and tires in good condition. Scheduled inspections give a technician the opportunity to check these systems, identify wear, and recommend repairs. Drivers can also watch for changes between service visits, such as brake noise, a soft pedal, pulling to one side, or unusual vibration. Report these signs promptly and follow your company’s procedure for removing a truck from service if it may be unsafe to drive. Routine inspections and timely repairs help support safe, dependable operation on routes and at work sites, as Franks Hino’s service guidance describes. Protect engine, transmission, fuel, and emissions-system performance The engine, transmission, fuel system, and emissions equipment all affect truck performance. Following the correct service intervals helps keep these systems maintained according to the manufacturer’s guidance. Depending on the truck, scheduled work may include changing oil and filters, checking fluids, or inspecting emissions components. Arrange an inspection if a warning light comes on or you notice unusual exhaust, reduced power, or a change in fuel use. Addressing exhaust-system issues promptly can help maintain fuel efficiency and prevent related engine damage, as Franks Hino notes. Catch wear early to reduce breakdown risks, repair costs, and downtime Routine service can reveal wear while there is still time to plan a repair. For example, an inspection may identify brake components that need attention before they affect stopping performance. If your business relies on its truck to move tools, materials, or furniture, planned shop time is generally easier to work around than an unexpected breakdown. Keep track of inspection findings and ask your service provider which repairs need immediate attention and which can be scheduled. Metro Hino’s brake maintenance guidance explains how early detection can help prevent more serious problems. Support fuel efficiency, vehicle longevity, and maintenance-record requirements Keeping up with scheduled service can help maintain fuel efficiency and extend a truck’s useful life. It also gives your team a clear service history to reference when planning future work or preparing the vehicle for resale. Save receipts and record the service date, mileage, engine hours when available, work completed, and parts replaced. Check the owner’s manual and warranty information for any recordkeeping requirements that apply to your truck. Metro Hino’s routine maintenance guidance describes how regular care can support engine life, reduce downtime, and help with warranty compliance. Where Can You Find the Official Hino Maintenance Schedule? Consult the owner’s manual and official Hino maintenance information Start with the owner’s manual for your specific truck. It outlines the recommended maintenance tasks and intervals, along with inspection guidance. If the manual is missing, ask a Hino dealer or use Hino’s official service resources to find the correct documentation. Avoid relying on a schedule from another truck, even if it looks similar. Regular inspections and preventive maintenance help keep a truck safe and dependable, and can reduce the chance of breakdowns, costly repairs, and missed work. That matters when your box truck carries tools, materials, or customer orders to a job site. Somerville Hino’s maintenance guide explains why following a regular service plan is important. Confirm requirements using the truck’s model, year, engine, and configuration Before setting service reminders, confirm your truck’s model, model year, engine, drivetrain, and chassis configuration. Hino box trucks can have different maintenance requirements, so an interval that applies to one vehicle may not suit another. Check the manual’s vehicle details against your truck’s information to make sure you’re using the right schedule. How you use the truck matters, too. Frequent stops, long periods of idling, heavy loads, and demanding routes can affect service needs. If you’re unsure whether your work conditions call for a different maintenance approach, ask a qualified technician. Metro Hino’s maintenance guidance recommends following the schedule for your specific model and considering how the truck is operated. Check Hino service publications or ask an authorized dealer or qualified service provider For details beyond the owner’s manual, check Hino’s service publications. The Hino service information page provides access to on-demand materials, including owner manuals, repair manuals, wiring diagrams, service bulletins, and technical tips. Choose publications that match your truck, and consult a qualified technician if you’re unsure how to apply a procedure. An authorized Hino dealer or qualified service provider can help confirm the correct schedule and explain specific requirements. When you call, have the truck’s model year, engine, configuration, mileage, and typical workload ready. Details such as dusty job sites, heavy loads, or frequent stop-and-go driving help the technician make a more relevant recommendation. Keep the correct schedule and maintenance records with the truck Once you’ve confirmed the schedule, keep a copy in the truck or in a shared digital file that drivers and service staff can access. Record the date, mileage, and engine hours when the schedule calls for them, along with the work completed, parts used, and any concerns that need follow-up. These notes make it easier to plan upcoming service and give technicians useful history when they inspect the truck. For a fleet, assign someone to review the records and arrange service before tasks come due. Keep inspection notes and repair invoices with the maintenance history so your team can spot recurring issues and plan around shop time. Consistent care and recordkeeping can help manage downtime and long-term ownership costs, as Franks Hino’s service guidance notes. Frequently Asked Questions How often should I service my Hino box truck? The right interval depends on your truck’s model, engine, configuration, and workload. Check the owner’s manual or Hino service information for each maintenance task, and ask a qualified technician whether your driving conditions affect the schedule. Do engine hours matter if I track mileage? Yes. If your truck spends a lot of time idling or making frequent stops, engine hours can help show how much work it has done. Record hours, mileage, and service dates so you can compare them with the requirements in your maintenance guide. What should I do if I find a problem during a daily inspection? Write down what you noticed, including the date and mileage, and report it through your company’s maintenance process. If the issue could affect safe operation, such as a brake fault, damaged tire, or serious leak, keep the truck out of service until it has been assessed. Should a liftgate or other installed equipment be included in the maintenance plan? Yes. Liftgates, ramps, and other equipment may have separate inspection or service requirements. Check the equipment manufacturer’s instructions and include those tasks in your truck’s maintenance records. Where can I find the correct maintenance schedule for my truck? Start with the owner’s manual and Hino service information that match your truck’s model year, engine, and configuration. If you can’t confirm which guide applies, contact a Hino dealer or qualified service provider with the truck’s details and typical workload.

White commercial cutaway van prepared for a business upfit

Cutaway Van for Sale: How to Choose the Right Configuration

Shopping for a cutaway van for sale is not only a matter of choosing the newest chassis or the lowest advertised price. The right truck has to fit the work your business performs every day. Wheelbase, gross vehicle weight rating, payload, body design, and upfit compatibility all affect how well the vehicle carries equipment, protects cargo, and works at the job site. New and used options can both make sense when they are matched to the application. Talk with a commercial truck specialist What is a cutaway van? A cutaway van starts with a van-based cab and chassis. The front portion includes the cab, engine, controls, and front body structure, while the rear is left open for a separate body to be installed. That design gives a business more flexibility than a standard enclosed cargo van. The finished vehicle may become a delivery body, shuttle, service body, box body, or another purpose-built configuration. The chassis is only the starting point. The body, equipment, passengers, tools, fluids, and cargo all contribute to the finished vehicle's weight. That is why a buyer should decide how the truck will be used before comparing stock numbers. A cutaway that works well for light deliveries may not be the right choice for a contractor carrying heavy equipment or for a passenger-focused application. How should you define the work before looking at a cutaway van for sale? Begin with a written description of a normal workday. Note what the vehicle will carry, where it will travel, and how often it will be loaded. Consider both today's needs and realistic growth over the expected ownership period. For example, a delivery operator might record the largest package, number of stops, and whether returns or pickups add weight on the trip home. A maintenance contractor can list the technicians, tools, parts bins, and machines that usually travel together. Body use: Decide whether the truck will support deliveries, service calls, equipment transport, passengers, or a combination of tasks. Payload: List tools, inventory, parts, passengers, fuel, fluids, shelving, lifts, and other equipment that will be on board. Loading: Identify whether workers will load from the rear, curb side, or both sides. Think about ramps, liftgates, doors, and interior access. Travel: Consider tight city streets, parking areas, highways, construction sites, and any route restrictions. Future needs: Leave room for additional shelving, a generator, refrigeration, or other equipment if the business is likely to expand. Translate this list into a short must-have specification and a separate nice-to-have list. That distinction helps avoid paying for dimensions or equipment that do not improve the work. It also gives a dealer a clearer starting point when discussing chassis and body choices. Why does wheelbase matter? Wheelbase is the distance between the front and rear axles. It affects the vehicle's overall length, turning behavior, body length, weight distribution, and available cargo space. A shorter wheelbase may be easier to maneuver in urban areas and crowded job sites. A longer wheelbase can provide room for a larger body or a more useful equipment layout. Wheelbase should be considered with the body dimensions, not by itself. A long body placed too far behind the rear axle can create poor weight distribution. A body that is too short may leave valuable capacity unused. Ask how the proposed body length, rear overhang, door placement, and equipment location work together on the specific chassis. Think about daily access as well. If drivers regularly use narrow streets, small parking lots, or residential driveways, maneuverability may be more important than maximum interior volume. If the truck spends most of its time making scheduled deliveries or carrying bulky equipment, additional body length may be more valuable. Before choosing, compare the complete vehicle length with the actual spaces where it will park, turn, and load; a paper dimension is useful only when it matches the route. What is GVWR, and how does it affect your choice? GVWR means gross vehicle weight rating. It is the maximum allowed operating weight of the completed vehicle, including the chassis, body, passengers, fuel, tools, cargo, and installed equipment. The vehicle should not be configured or loaded beyond that rating. The Federal Motor Carrier Safety Administration explains commercial vehicle weight requirements and related safety rules in its regulations resource; check the rules that apply to your vehicle and operation. GVWR is different from curb weight. The difference between the completed vehicle's empty weight and its GVWR is the practical capacity available for people and cargo. Body construction and upfit equipment reduce that available capacity. A heavy body, liftgate, shelving package, refrigeration unit, or generator can use a meaningful portion of the rating before the first package or tool is loaded. Ask for the expected completed weight, not only the chassis rating. A dealer or upfitter can help review the body specification and intended equipment. You should also confirm that the front and rear axle ratings support the planned load distribution. A vehicle that technically has room on paper may still need careful placement of heavy items. Keep the ratings and the completed weight with your comparison notes, rather than relying on a broad model description. How do you estimate payload? Make a complete payload list before selecting a configuration. Start with the people who will ride in the vehicle. Then add cargo, tools, spare parts, fuel, fluids, racks, shelving, compressors, tanks, liftgates, and any other permanent or temporary equipment. Use the highest normal load rather than an unusually light day. If a service business carries a consistent inventory of parts and tools, include that inventory. If a delivery business returns with unsold goods or collects materials along the route, account for those conditions as well. A small reserve is useful because businesses often add equipment after purchase. For a practical estimate, write down each item and its weight from a label, specification sheet, or measured record where available. Separate permanent equipment from cargo that changes by route, then include the people who may ride together. Add the amounts and compare the total with capacity remaining after the body and installed equipment. If an item's weight is unknown, flag it for confirmation instead of treating it as zero. Repeat the calculation for the heaviest likely shift, not just the average trip. Payload is not just a sales specification. It affects braking, tires, suspension, handling, and the useful life of the vehicle. Overloading can also make the truck harder to control and may reduce room for future changes. The safest comparison is based on the completed vehicle and the actual work it will perform. Which body is right for the job? The body should support the way workers load, secure, and access materials. A delivery body may prioritize enclosed storage and organized shelving. A service body may emphasize exterior compartments and fast access to tools. A shuttle or passenger body may require a different interior layout and seating plan. The best configuration depends on the business process, not a generic label. For a service operation, consider how often technicians need a tool. Frequently used items should be easy to reach without unloading the entire body. For deliveries, measure the largest typical package and review door openings, floor height, and interior clearance. For equipment transport, check ramp angles, tie-down points, and whether the body can accommodate the machine's width and weight. Walk through a normal task in sequence. Where does the worker stand to unload? Can the item needed first be reached without moving everything else? Does the door open fully in the places the vehicle will use? A quick sketch of shelves, bins, equipment, and access paths can expose a poor layout before it becomes a permanent upfit. Body materials also matter: a lighter body may preserve more payload for cargo, while a durable body may be worthwhile for demanding job sites. Ask how it is mounted, how repairs are handled, and whether replacement parts or service support are available. What should you check for upfit compatibility? An upfit is equipment added to the chassis after or during the vehicle build. Examples include shelving, racks, liftgates, refrigeration, partitions, ramps, tool compartments, and specialized service equipment. Before choosing a cutaway van for sale, confirm that the chassis can accept the planned upfit without creating a weight, clearance, or balance problem. Bring the upfitter into the conversation early when the application is specialized. Share the intended body dimensions, equipment weight, power requirements, and access needs. Check mounting points, available electrical capacity, rear axle loading, door clearance, and the effect of the completed body on overall length. It is also useful to ask whether the vehicle is already upfitted or whether the body will be installed after purchase. A ready-to-work truck can save time, but the existing layout must suit the business. A chassis that needs an upfit may provide more control over the final configuration, though the buyer should account for scheduling, installation, and total cost. Request a written list of what is included and what remains to be installed, so equipment gaps do not emerge after delivery. Should you buy new or used? New and used cutaway vans each have practical advantages. New inventory may offer the latest chassis, a clean starting point, and a body selected for the current application. Used inventory may offer a lower purchase price or a completed body that is already suited to the work. Neither choice is automatically better; condition and fit are more important than age alone. Comparison point New cutaway Used cutaway Configuration More opportunity to select chassis and body together Existing body and equipment may shorten the path to work Condition review Review the build specification and upfit quality Review maintenance, wear, damage, and prior use carefully Budget Usually requires a larger initial investment May reduce the initial purchase cost, depending on condition Availability May involve ordering or an available new unit Can provide a faster option when the right truck is in inventory When reviewing a used vehicle, inspect the frame, suspension, tires, brakes, body mounts, doors, floor, wiring, and signs of water intrusion. Ask how the vehicle was used and whether the body or equipment was modified. Review service documentation when available. A professional inspection can help identify concerns that are not obvious during a short walk-around. Operate doors and access panels, look for uneven wear or repairs, and confirm that installed accessories function as expected. When reviewing a new vehicle, confirm the complete build rather than relying on a stock photo or a short description. Ask for the chassis rating, wheelbase, body dimensions, equipment list, and expected completed weight. If comparing configurations, review cutaway model information and search available inventory as part of the process. A listing is a starting point; confirm the specific vehicle's equipment and fit before deciding. What questions should you ask before buying? A focused set of questions can prevent an expensive mismatch. Bring your payload list and describe the routes and job sites the truck will serve. Ask for answers about the finished configuration, not just the base chassis. What is the wheelbase, body length, and overall vehicle length? What are the GVWR and front and rear axle ratings? What is the completed empty weight after the body and equipment are installed? How much payload remains for people, cargo, tools, and future additions? Is the body included, and was it designed for this chassis? Which upfits are already installed, and which would need to be added? For a used truck, what service and ownership records are available? Can the truck be inspected and evaluated for the planned application? Also compare the ownership plan. Ask about service access, parts availability, warranty terms that apply to the specific vehicle, and the expected delivery timeline. If financing is part of the purchase, review the complete terms rather than comparing only the monthly payment. Tri-County's commercial vehicle financing resources can be a starting point for that conversation. How can you compare two cutaway configurations? Put both vehicles on the same worksheet. Record wheelbase, GVWR, completed empty weight, estimated payload, body dimensions, equipment, mileage if used, and known service needs. Then score each vehicle against the actual job: loading, maneuverability, access, capacity, and ability to support future equipment. For instance, one option may have a shorter body and easier access in crowded delivery areas, while another offers room for additional shelving. Ask which difference changes a workday and which merely looks appealing in a listing. Mark each item as essential, beneficial, or unnecessary, then note any cost or installation work still required. This makes tradeoffs visible and helps a buyer explain the decision to other people involved in the purchase. Do not let a lower price hide a poor fit. A truck that cannot carry the normal load may require an early replacement. A configuration with unnecessary length or equipment may tie up money without improving productivity. The best value is the vehicle that supports the work reliably while leaving a sensible margin for changing needs. Schedule a test drive What is the next step when you find a cutaway van for sale? Bring your work description, payload list, and preferred body use to the dealership. Review the chassis and upfit together, confirm the ratings, and inspect the finished vehicle before committing. With the right questions, you can choose a cutaway van that fits the job now and remains useful as your business grows.