
Lou Bachrodt’s Tri-County Truck

Complimentary Delivery in the State of Florida

Blog

Service Body Truck Specifications and Dimensions: Buyer's Guide

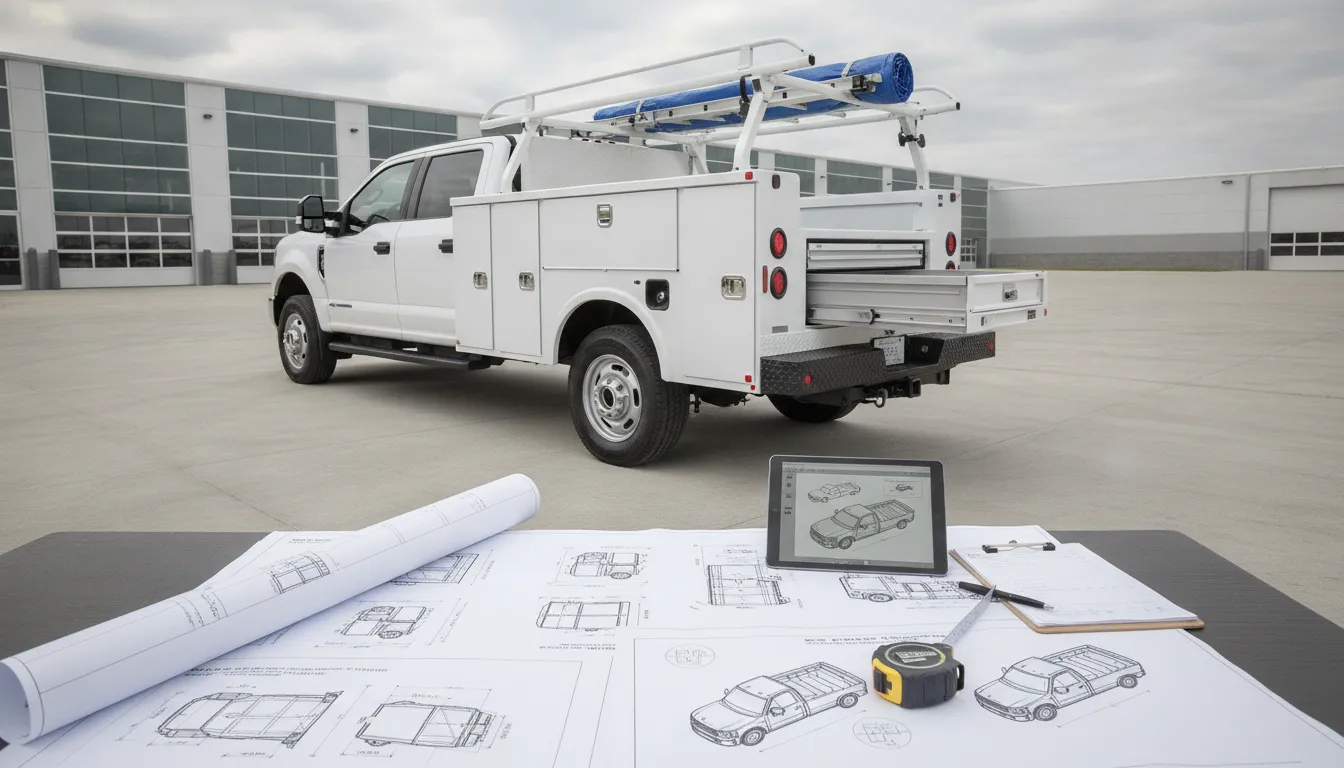
Service body truck with storage compartments and ladder rack beside blueprints showing truck specifications and dimensions.

A truck body may look roomy on the lot, yet prove awkward once you load tools, supplies, and job equipment. The measurements tell only part of the story. You also need to know whether the body fits the chassis, whether doors open where you park, and whether the completed truck can safely carry its load. Understanding service body truck specifications and dimensions helps contractors, movers, window installers, haulers, and maintenance crews make a more informed choice. We’ll cover the key measurements, storage details, and weight limits to review before purchase. You’ll also learn what to confirm with a dealer or upfitter before your Chevrolet, Isuzu, or Hino is ready for work.

Key Takeaways

  • Choose a body for your crew’s workload: List the tools, materials, and equipment you carry, then compare storage, access, and cargo space.
  • Verify chassis fit and load limits: Have a dealer or upfitter check measurements, mounting requirements, GVWR, and axle ratings for the specific truck.
  • Check the finished truck before delivery: Confirm its overall dimensions, equipment mounts, cargo security, visibility, and body condition.

What Is a Service Body Truck?

A service body truck replaces a standard pickup bed with a commercial body made to carry tools, parts, and equipment. Its layout helps crews organize frequently used gear and bring it from one jobsite to the next. Service bodies are available for heavy-duty Chevrolet, Isuzu, and Hino chassis, with configurations to suit different work and cargo needs.

How it differs from a standard pickup

A standard pickup has one open bed for cargo. A service body typically adds lockable compartments along the sides, with an open center area for larger tools or materials. This lets crews separate smaller gear from bulky loads and access many items without climbing into the bed.

Some service bodies use an enclosed design, which provides protected storage and may include interior workspace. Others keep the center area open for loading equipment from above. The service body truck buying guide describes how body style and layout shape storage and access. Before choosing, consider what your crew carries and how you load and unload it.

Built-in storage for tools, parts, and equipment

Side compartments offer dedicated places for hand tools, replacement parts, and supplies. Crews can organize gear by task, then access it from outside the truck instead of sorting through a mixed load in the bed. The center area can carry larger equipment, while enclosed body styles provide more protection from weather and unauthorized access.

Storage is especially useful when workers need different tools throughout the day. Service truck body configurations are designed to keep equipment organized and accessible. Make a list of the gear you carry regularly, then check compartment dimensions, door openings, and available ways to secure each item.

Common trades that use service body trucks

Service body trucks work well for trades that carry tools, parts, and supplies between jobs. Electricians, plumbers, HVAC technicians, equipment repair teams, utilities, municipalities, and maintenance departments commonly use them. Contractors may also find the compartments useful for keeping frequently needed tools close at hand.

For landscapers, painters, window installers, movers, and haulers, the right setup depends on the load. Crews carrying small tools and parts may prioritize compartments, while those transporting ladders, window-installation gear, long materials, or bulky equipment may need an open cargo area and specialized racks. Compare your typical load and jobsite access needs when choosing a body for a Chevrolet, Isuzu, or Hino chassis.

What Are Typical Service Body Truck Specs and Dimensions?

Service body specifications cover more than the body’s outside measurements. The body must fit the chassis and mounting points, stay within the truck’s weight limits, and provide storage that works for your crew. A body that looks like the right size may still be a poor match if its compartments are hard to access or its equipment pushes the truck beyond its payload capacity.

Start by comparing the exact body model with the truck’s chassis details. Check the body’s length, width, height, weight, compartment measurements, and mounting requirements. Then consider how accessories such as ladder racks, cranes, or toolboxes change the finished truck’s dimensions and weight. The measurements that matter most depend on where you work and what you carry. A landscaping crew may need room for long-handled tools, while a window installer may prioritize secure storage and easy access to fragile materials.

Manufacturers offer different configurations for different vehicle types and jobs, so general labels such as “standard” or “heavy duty” don’t confirm that a body will fit. Use the specifications for the specific truck and body, and have the dealer or installer verify compatibility before purchase.

Body length, width, height, and ground clearance

Service bodies are available in a range of lengths, widths, and heights. A longer or taller body may provide more storage, but it can also add weight and make the truck harder to park or maneuver on tight jobsites. Compare the body dimensions with your regular routes, storage space, and the equipment you plan to carry.

Ground clearance matters if you travel over uneven access roads, curbs, or construction sites. Check the body’s lowest point and consider how it will clear ramps and rough ground. Enclosed bodies also come in different configurations, so compare the exact measurements rather than relying on a general size description. JOMAC’s service body guide explains common body terms and configurations.

How chassis, cab-to-axle measurement, and configuration affect fit

The service body must match the truck’s chassis, frame, and mounting points. Cab-to-axle is the distance from the back of the cab to the center of the rear axle. Body suppliers use this measurement to help identify a body length that fits the truck. JOMAC’s explanation of cab-to-axle measurements offers a useful starting point.

Also check the wheelbase, cab style, and chassis specifications. A crew cab may leave less room for a body than a regular cab, even within the same truck model line. Ask the dealer or body installer to confirm the fit and mounting requirements for the exact configuration. Cab-to-axle is important, but it does not confirm compatibility on its own.

Compartment size, door openings, and usable storage

Outside measurements don’t tell you how much equipment a body can actually hold. Check the interior width, depth, and height of each compartment, as well as the door opening. A tool may fit inside a compartment but be difficult to remove if the opening is narrow or shelves limit access.

List the tools, parts, and supplies your crew carries most often, then measure bulky items before choosing a layout. Consider which items need quick access and which need secure storage. Compartment arrangement, body height, payload, and access all shape a truck’s usefulness on the job, as this service body buying guide explains. Prioritize practical access as well as storage volume.

Body dimensions vs. completed truck dimensions

A body’s listed dimensions describe the body itself, not the completed truck. The cab, bumper, mirrors, hitch, ladder rack, crane, or toolboxes may add to the vehicle’s overall length, width, or height. Those additions can affect parking, garage clearance, turning space, and access to customer sites.

Ask for the completed truck’s measurements, including any accessories that will stay installed. A service body replaces a pickup bed with a commercial body designed for organized tool and equipment storage, but the entire setup still needs to fit your workplace and routes. This overview of service and utility truck configurations can help you consider how the body’s features relate to your work.

Why specs vary by manufacturer and model

Dimensions and features vary by body manufacturer, model, material, and intended application. Two bodies with similar outside measurements may differ in compartment layout, door openings, weight, or mounting requirements. A single body line may also offer multiple configurations to fit different chassis.

Review the specification sheet for the exact body and compare it with the truck’s chassis information. Check body weight, usable compartment dimensions, payload rating, and limits for mounted equipment. Include accessories such as cranes and ladder racks in your calculations. The market includes bodies for different vehicle types and applications, as Strategic Market Research’s industry overview describes. Confirm the details with the dealer or installer before choosing a setup.

How Do Chassis Fit and Payload Affect Your Choice?

A service body needs to fit the truck chassis and safely carry the people, tools, parts, and equipment your crew uses each day. Choosing by storage space alone can leave you with a body that is too long, too heavy, or poorly matched to the truck’s axle limits. Check the chassis specifications before you select a body, then confirm the complete setup with the body manufacturer, upfitter, or truck dealer.

Start with the truck’s wheelbase, cab-to-axle measurement, Gross Vehicle Weight Rating (GVWR), and front and rear Gross Axle Weight Ratings (GAWR). Then account for the body’s weight and the load you plan to carry. The truck must stay within its GVWR overall and within the rating for each axle. Custom Truck’s service-truck buying guide explains why body weight and payload need to be considered together.

These checks apply whether you’re outfitting a Chevrolet, Isuzu, or Hino for landscaping, construction, window installation, hauling, or maintenance. Chassis options vary by model and configuration, and the right setup depends on the work. A landscape crew carrying mowers, for example, may need a different layout and weight capacity than a window installer transporting long materials. Share your typical loads and equipment list with the dealer or upfitter so they can check fit, capacity, and placement before installation.

Match body length to wheelbase and cab-to-axle measurement

A service body needs to fit the space behind the cab and align with the truck’s frame and mounting points. The cab-to-axle measurement, often called CA, is the distance from the back of the cab to the center of the rear axle. Along with wheelbase and frame details, it helps determine which body length and configuration will fit.

Don’t choose a body based only on its listed length. Ask the dealer or upfitter to verify the body against the truck’s exact cab style, wheelbase, CA measurement, and frame specifications. A mismatch can create clearance or mounting problems and affect weight distribution. SRQ Auto’s service body buying guide recommends confirming that the cab-to-axle dimensions suit the body before purchase.

Check GVWR, front and rear GAWR, and chassis limits

GVWR is the maximum allowed weight of the completed truck, including its chassis, body, occupants, tools, and cargo. GAWR sets the maximum load for each axle. Check both front and rear ratings: a heavy body or equipment concentrated at one end can overload an axle even when the truck’s total weight stays below its GVWR.

Ask for the chassis ratings and the installed body weight, then confirm the completed truck remains within every limit. Remember to include fuel, passengers, accessories, tools, and job materials in your estimate. The location of heavy items matters, too, so discuss where equipment will be mounted and stored. Custom Truck’s explanation of chassis weight limits offers useful context on why these ratings should guide your body choice.

Calculate payload for the body, occupants, tools, and equipment

Payload is the weight a truck can carry after accounting for its own weight. For a service body truck, that means planning for the body, crew, tools, parts, ladders, and any equipment or materials you regularly transport. Racks, toolboxes, liftgates, and other options also add weight, so include them in your calculation.

Check the truck’s payload information for the specific configuration, then confirm how much capacity remains after the body and equipment are installed. Leave room for heavier-than-usual loads, such as a full supply of materials or additional jobsite equipment. A thoughtful layout can also make daily work easier by keeping frequently used tools accessible. SRQ Auto’s overview of service and utility trucks discusses how storage and equipment access shape a truck’s usefulness. Keep the load within the truck’s GVWR and axle ratings.

Confirm fit with Chevrolet, Isuzu, and Hino chassis

Chevrolet, Isuzu, and Hino offer different chassis configurations, and specifications can vary between models and even between trucks of the same model. Before ordering a body, confirm the truck’s year, model, cab style, wheelbase, cab-to-axle measurement, frame details, and weight ratings. The make and model name alone aren’t enough to establish fit.

Ask the body supplier or upfitter to check the proposed setup against the exact chassis and your intended use. For example, a contractor carrying heavy equipment may need a different capacity and compartment arrangement than a maintenance crew carrying hand tools and parts. Service body choices vary by vehicle type and application, so get fit and weight compatibility confirmed for the specific truck before work begins.

Check mounting needs and body-transfer limits

A service body attaches to the truck frame, so confirm that its mounting system suits the chassis before installation. Have the upfitter check frame length and spacing, mounting points, and clearance around the cab, wheels, fuel tank, and exhaust. Special equipment, such as a crane or enclosed compartments, may require additional space, support, or mounting considerations.

If you plan to move the body to another truck later, ask whether it is designed for transfer and which chassis measurements the replacement truck must match. A transfer may require new mounts or other changes, and a body that fits one configuration may not fit another. JOMAC’s guide to service body types and features explains how body style and chassis type factor into selection. Have a qualified upfitter inspect a used body and verify compatibility before assuming it can be reused.

Which Service Body Fits Your Work?

The right service body should fit the work your crew does most often, the equipment you carry, and the places you travel. Start by listing your tools, materials, and machinery, then note which items need secure storage, weather protection, or frequent access. Consider how you load and unload, too. A crew that handles bulky materials may need an open deck, while a mobile maintenance team may value organized compartments.

Next, check the body against the truck chassis. Body weight, cargo, passengers, and mounted equipment all count toward the truck’s weight limits. Confirm that the body dimensions and mounting requirements suit your Chevrolet, Isuzu, or Hino chassis, and leave enough payload for the work you expect to do. Your route and jobsite also matter: check overall height and length, turning space, and clearance around doors or overhead obstacles.

Use the options below to narrow your choices. The best fit is the one that puts essential gear within reach, carries your typical loads safely, and works with your crew’s day-to-day routine.

Utility bodies for tools and parts

Utility bodies work well for crews that carry hand tools, parts, and equipment and need access throughout the day. Side compartments help organize smaller items, while the bed area can hold larger gear. Electricians, HVAC technicians, contractors, and maintenance teams often use this style, as SRQ Auto’s contractor guide notes.

Before choosing a layout, identify the tools you use most and check that compartment openings fit your cases and equipment. Place frequently used items where they’re easy to reach, and reserve larger spaces for bulky gear. If you carry heavy tools or supplies, include the body and its contents when checking payload and axle ratings. A practical layout can save time between jobs and help keep equipment organized.

Enclosed bodies for secure, weather-protected storage

An enclosed service body surrounds the bed area, providing covered storage for tools, parts, and equipment. It can suit crews that want cargo protected from rain, dust, or direct sun, or secured behind doors. Enclosed bodies come in different configurations, so compare dimensions and layouts rather than assuming each model offers the same space. JOMAC’s service body guide describes some of these configuration differences.

Check interior height and width against the items you plan to carry. Shelves, bins, and door placement also affect how easily you can reach equipment. If you transport long materials, such as trim or conduit, confirm they’ll fit inside or can be secured safely to an exterior rack. Add the body’s weight to your payload calculation before deciding on a configuration.

Flatbeds for oversized cargo and easy loading

A flatbed’s open deck can simplify loading bulky cargo and carrying irregularly shaped items. It may suit construction crews, haulers, and landscapers that regularly move materials, machinery, or other large loads. Flatbeds are used to carry larger items in industries such as construction and agriculture, as described in this service truck body market overview.

List the loads you carry most often, including their dimensions and weight. Then consider what you need to secure them, such as side rails, stake pockets, a headache rack, or a tarp system. An open deck offers flexibility, but cargo is exposed to weather and must be secured for travel. Check that the deck size and completed truck dimensions suit your job sites, parking areas, and regular routes.

Crane bodies for lifting equipment

A crane body can help a crew lift and position heavy equipment or materials at a job site. It may be useful for field service, equipment repair, and other work that involves moving substantial loads. Summit Bodies’ overview of service truck types explains how built-in cranes support lifting tasks.

Look beyond the crane’s rated capacity. Consider the loads you expect to lift, the crane’s reach, and the room needed to set up safely. The crane, body, cargo, and occupants all contribute to the truck’s total weight, so confirm the completed configuration meets GVWR and axle ratings. Ask how crane placement affects compartment access and visibility, and verify that the chassis and body have the appropriate mounting provisions and stabilizers for the intended work.

Match storage and access to landscaping, construction, maintenance, and painting

Choose a layout based on your crew’s regular jobs, not simply the number of compartments. Landscapers may need space for hand tools, hoses, and supplies. Construction crews may carry heavy tools and building materials, while maintenance teams often need organized parts storage. Painters may require room for sprayers, ladders, and containers. SRQ Auto’s utility truck guide recommends considering storage needs, towing demands, material weight, and chassis limits together.

Walk through a typical workday and note what you load first, use most, and unload last. Put frequently used gear in easy-to-reach spaces and check door openings against your actual equipment. This quick inventory can help you select a layout that supports your routine without adding compartments your crew won’t use.

Plan for ladders, long materials, window-installation gear, and hauling

Some equipment won’t fit neatly in standard compartments. Window installers may carry glass-handling equipment and protective materials; painters, contractors, and maintenance crews may need ladders or long stock. Haulers and landscapers may need open deck space for oversized loads. Measure these items before choosing a body, then decide whether they belong inside, on a rack, or in a separate securement system.

Check ladder rack length, height, and mounting points, along with the effect on overall vehicle clearance. Secure long materials without blocking lights, mirrors, or compartment doors. Plan stable, protective storage for window-installation gear. Finally, confirm the body and equipment fit the truck’s payload limits, and check that the completed vehicle can clear garages, jobsite entrances, and overhead obstacles.

What Features Should You Compare?

A service body should make the workday more organized, with the tools, parts, and equipment your crew needs ready when they need them. The right setup depends on the job. Landscapers may need space for outdoor power equipment, while movers and haulers may prioritize cargo capacity and secure tie-downs. Window installers often carry long, delicate materials, and painters may need compartments that keep supplies organized and protected.

Before comparing trucks, make a list of what you carry on a typical day. Include each item’s approximate size and weight, how often you use it, and whether it needs weather protection or a dedicated mount. Then consider where the truck works: tight urban streets, active construction sites, residential driveways, or unpaved properties can all affect which features are practical.

When you inspect a body, test its compartments and doors rather than relying on photos or advertised capacity. Check that racks and mounts suit your equipment, that lights and security features meet your needs, and that the body can adapt if your tools or services change. A careful comparison can help you choose a setup that works with your crew, your jobs, and your Chevrolet, Isuzu, or Hino chassis.

Compartment layout, capacity, and access

Look beyond the number of compartments. Compare their dimensions, opening sizes, shelf options, and ability to hold the tools and parts your crew uses. A compartment may appear spacious but still be too shallow for a power tool, or its opening may make bulky items difficult to remove.

Plan the layout around how you work. Keep frequently used tools within easy reach, and use larger or less accessible spaces for spare parts and supplies. An effective service body can help organize tasks and reduce unnecessary movement, as SRQ Auto notes in its comparison of service and utility trucks. Bring a few representative tools to the dealership and check how they fit. Also confirm compartment capacity and shelf ratings before loading heavy equipment.

Swing doors vs. roll-up doors

Swing doors open outward and offer broad access, which can make it easier to load bulky tools or reach items on a shelf. They need clearance beside the truck, though, so consider how they’ll work when parked near a wall, another vehicle, or equipment.

Roll-up doors move vertically and stay within the body’s footprint, making them useful where side clearance is limited. Compare the opening size, ease of operation, and access to nearby compartments when the door is open. Door style is one of several body choices, along with enclosure height and chassis type, covered in JOMAC’s guide to service body terms. Try each option in person. Check that the doors open smoothly and that your crew can reach the tools they need in the parking spaces and jobsites where the truck will work.

Ladder racks, conduit storage, and equipment mounts

If your crew carries ladders, conduit, trim, or other long materials, check how the body supports and secures them. Make sure a ladder rack fits the length and weight of your ladders, and that conduit storage keeps materials contained but accessible. Inspect equipment mounts, too, and verify they’re suitable for the weight and use of the gear you plan to carry.

Match the setup to your trade. Window installers may need a secure way to carry long profiles, while landscapers may need mounts for outdoor equipment. Painters might value organized storage for sprayers and supplies. Some crews prefer an open service body; others may find an enclosed KUV-style body better suited to their tools and parts. SRQ Auto’s contractor buying guide discusses how different trades can benefit from different body styles. Confirm rack and mount capacities with the body and chassis specifications.

Lighting, alarms, cameras, and cargo security

Good lighting helps crews see tools and work areas during early starts, late finishes, and low-light jobs. Compare compartment lights, work lights, and warning lights, and check that controls are easy to reach. If your truck operates near traffic or in crowded jobsites, ask about alarms and cameras that can support safer operation.

Consider security when tools stay in the truck between jobs. Check compartment locks, door latches, and whether the layout keeps valuable equipment out of sight. Cameras can improve visibility while reversing or positioning the truck, but their placement should account for the body and any racks or equipment. Summit Bodies’ overview of service truck equipment describes safety features such as lights, alarms, and cameras. Ask which features come with the truck, which are optional, and where you can get them serviced.

Customization and room for future equipment

Choose a body that suits your current work and can accommodate changes to your tools, crew, or services. Adjustable shelving, removable dividers, and configurable mounts can help the storage adapt over time. Ask which add-ons the manufacturer supports and whether installing them could interfere with doors, wiring, or existing equipment.

If you may replace the chassis or move the body to another truck, confirm compatibility before buying. Mounting points, dimensions, and chassis specifications can affect whether the body can be reused. Spacekap’s guide to service body features identifies transferability as a consideration for businesses planning fleet changes. Have a dealer check the body against your current Chevrolet, Isuzu, or Hino chassis, as well as any replacement configuration you’re considering. Don’t assume a body will transfer without changes, since fit and mounting requirements can vary between trucks.

How Do Body Materials Affect Weight and Durability?

Steel and aluminum service bodies affect a truck’s weight, available payload, maintenance needs, and performance over time. The best fit depends on what your crew carries, where the truck operates, and the chassis it’s mounted on. Compare the body’s specifications with the truck’s weight ratings before choosing.

Steel for demanding, heavy-duty work

Steel service bodies are built for demanding work and can be a practical choice for crews carrying heavy tools, parts, and equipment. Their sturdy construction suits frequent use on rough job sites, including construction, landscaping, and maintenance work. Summit Bodies describes steel bodies as a durable option for heavier loads and challenging applications.

Factor the body’s weight into your payload calculation, along with the weight of occupants, tools, and mounted equipment. The body’s finish matters, too. Check for damage and corrosion, particularly if the truck works around moisture, road salt, or abrasive materials. Regular inspections can help you spot wear early and determine whether the protective coating needs attention.

Aluminum for lower weight and corrosion resistance

An aluminum body can reduce upfit weight and leave more of the truck’s rated payload available for tools and materials. A commercial truck upfit guide from Donohoo Chevrolet notes that an aluminum bed may weigh about 50% less than a comparable steel bed. The actual difference varies with the body’s size, design, and features, so compare manufacturer specifications for the exact models you’re considering.

Aluminum also offers corrosion resistance, which can help on trucks exposed to rain, road salt, or damp job sites. It still needs routine checks: inspect the body, hardware, and mounting points for wear or damage. For window installers, painters, or other crews carrying bulky but relatively light supplies, a lighter body may help preserve capacity. Make sure it still offers the storage and equipment mounts your work requires.

Compare payload, maintenance, and operating conditions

Start with the body’s actual weight, then account for occupants, tools, ladders, tanks, cranes, and other equipment. Check the completed truck against its gross vehicle weight rating and front and rear gross axle weight ratings. A lighter body may leave more capacity for cargo; a heavier body may be a suitable choice when its construction matches the demands of your work.

Also consider where the truck operates and how much upkeep the body will need. A truck used daily on rough construction sites faces different conditions from one carrying supplies between residential jobs. Think about exposure to moisture and road salt, inspection needs, repair costs, and expected service life. Strategic Market Research notes that material selection can affect weight, durability, maintenance, and operating costs. Compare those factors with your workload and the truck’s ratings.

Check hardware, mounts, construction, and finish

The body material is only one part of long-term durability. Inspect the components your crew will use every day: compartment doors, hinges, latches, floors, shelving, ladder racks, and equipment mounts. Doors should open and close smoothly, latches should hold securely, and shelves should fit the tools you plan to carry. Confirm that the mounting system is compatible with the Chevrolet, Isuzu, or Hino chassis you’re considering.

When buying a used truck, look for damaged compartments, loose hardware, worn floors, corrosion, and signs of repairs or modifications. Ask how the body was mounted and whether its equipment has been changed. SRQ Auto’s service truck buying guide highlights the importance of checking body components and signs of previous commercial use. A close inspection can help you identify needed repairs before the truck goes to work.

What Buying Assumptions Can Lead to a Poor Fit?

A service body can look suitable on the lot but still fall short once you load it with tools, materials, and equipment. Compare the body and chassis as one work-ready setup, and verify key measurements and weight ratings before you commit.

Assuming service bodies share dimensions and features

Service bodies can vary in length, compartment layout, door openings, and equipment options, even when they’re mounted on similar chassis. Don’t assume a body will fit your crew’s needs because it looks like one you’ve used before. Make a list of the tools and materials you carry, then compare it with the compartments’ usable dimensions and access points. Consider how you’ll reach frequently used items during a job, and whether the body can accommodate ladders, long materials, or specialty equipment. The service body buying guide recommends evaluating the body as part of the working truck, not as an accessory. Ask your dealer to confirm the specifications for the exact truck you’re considering.

Check body condition and utility, not just chassis or mileage

A well-maintained chassis and low mileage are important, but they don’t show whether a used service body is ready for daily work. Inspect compartment floors, doors, hinges, latches, locks, and mounting points. Check for corrosion, cracks, water intrusion, and repairs that could affect storage or cargo security. Open and close every compartment, then consider whether you can access your tools without shifting other equipment. A landscaper may need room for outdoor tools, while a painter or maintenance crew may prioritize organized storage for supplies and parts. The body is part of your work area, so assess its condition and usefulness as carefully as you assess the truck.

Check payload and axle limits before choosing body size

A larger or heavier body uses more of the truck’s available payload, leaving less capacity for workers, tools, materials, and equipment. Confirm the chassis Gross Vehicle Weight Rating (GVWR) and front and rear Gross Axle Weight Ratings (GAWR). Ask for the completed truck’s weight and, where available, its axle-load information. The service body and utility truck guide covers factors such as body weight, axle layout, material, and chassis dimensions. Don’t judge capacity by body size alone. Have your dealer check that the truck’s ratings suit your expected load, including the equipment and materials you carry regularly.

Don’t treat cab-to-axle measurement as the only fit requirement

Cab-to-axle, or CA, measures the distance from the back of the cab to the rear axle. It helps identify body lengths to consider, but it doesn’t confirm that a body will fit every truck configuration. Wheelbase, frame dimensions, axle ratings, mounting requirements, and the position of fuel tanks or other components can affect compatibility. Use CA as a starting point, then have the body and chassis specifications checked together. JOMAC’s service body terminology guide explains why CA is a useful measurement when shopping for a body. For Chevrolet, Isuzu, or Hino trucks, confirm the exact configuration with your dealer before arranging installation or delivery.

How Can You Verify Fit Before Delivery?

A service body truck needs to fit more than the chassis. Before delivery, confirm that the completed truck will fit your parking space, carry the equipment your crew uses, and work at the properties and job sites you visit. These checks apply whether you’re buying a Chevrolet, Isuzu, or Hino truck.

Ask your dealer or body upfitter to confirm the final dimensions, weight, and equipment setup for the exact configuration. Reviewing these details before delivery gives you time to address fit or access concerns.

Measure the completed truck’s length, width, and height

Ask for the completed truck’s overall length, width, and height. Include anything that extends beyond the body, such as mirrors, ladder racks, cranes, or toolboxes. Compare these measurements with your garage openings, parking spaces, and storage area. Body dimensions alone won’t show how much room the finished truck needs.

Check the cab-to-axle measurement, too. It helps determine which body length works with the chassis, but it does not account for every clearance need. JOMAC’s guide to service body terms explains why cab-to-axle is an important measurement when selecting a utility body. Confirm the final measurements with your dealer, including any equipment you plan to add after delivery.

Check parking, door clearance, turning space, and jobsite access

Measure the height and width of garage doors, shop entrances, and covered parking spaces. Allow room to open compartment doors fully and move safely around the truck. If side compartments open toward a wall or fence, make sure they won’t be blocked. Consider turning space and the routes your crew uses, including narrow driveways, crowded lots, and jobsite entrances.

Share tight access points with your dealer before you finalize the setup. The service body layout affects how easily workers can reach tools and how much equipment the truck can carry, as described in this service body buying guide for contractors. If possible, compare the completed truck’s dimensions with the spaces and routes where it will work most often.

Verify finished weight and axle-load distribution

Confirm the weight of the completed truck, including the body, installed equipment, fuel, occupants, and typical cargo. Compare the total with the chassis gross vehicle weight rating (GVWR), then check the front and rear gross axle weight ratings (GAWRs). A truck can be within its GVWR while still placing too much weight on one axle.

Ask your dealer or body upfitter for the finished weight and axle-load information for the exact configuration. Estimate the tools, materials, and equipment your crew carries on a typical day, and consider the heaviest routine load. Custom Truck’s service truck buying guide explains why body weight and payload must stay within chassis limits. If your setup changes by job, plan for the heavier loads.

Test equipment mounts, cargo securement, visibility, and compartment access

Check that racks, mounts, and storage areas fit the equipment your crew uses. Try fitting ladders, long materials, window-installation gear, and other oversized items. Confirm that cargo can be secured properly and that equipment does not block lights, mirrors, or the driver’s view. Ask the upfitter for details on the capacity of mounts and tie-down points.

Open each compartment and make sure the doors provide enough clearance to reach tools and parts. Check that frequently used items are easy to access and heavier equipment can be loaded safely. A service body should help crews organize work and reach equipment efficiently, as outlined in this guide to service body and utility truck layouts. If a mount or compartment is awkward to use, discuss changes before accepting delivery.

Inspect doors, latches, mounts, fasteners, and corrosion protection during maintenance

Add the service body to regular truck inspections. Check compartment doors, hinges, and latches for smooth operation. Look for loose fasteners, movement around body mounts, and damage to shelves, floors, racks, or equipment mounts. Pay particular attention after demanding jobs or frequent loading.

Look for chipped paint, rust, or signs that moisture is reaching the body or mounting points. Follow the manufacturer’s care recommendations, and address damaged finishes or loose hardware promptly. These checks matter for new and used trucks. A contractor-focused service truck inspection guide recommends checking body components such as doors, hinges, shelving, racks, and mounts. Keep inspection notes to help your team spot recurring issues and schedule repairs.

Related Articles

Frequently Asked Questions

What should I bring when shopping for a service body truck?
Bring a list of your crew’s regular tools, materials, and equipment, including approximate sizes and weights. Photos of your current setup can also help a dealer recommend compartments, racks, and mounts that suit your work.

Can a service body fit any Chevrolet, Isuzu, or Hino chassis?
No. Fit depends on the truck’s cab style, frame, wheelbase, cab-to-axle measurement, and mounting requirements. Ask the dealer or upfitter to verify the exact truck and body combination before purchase.

How do I know if a service body truck has enough payload?
Account for the body, passengers, tools, supplies, and every installed accessory. Then confirm the completed truck stays within its GVWR and both axle weight ratings. If your loads vary, use your heaviest regular setup when checking capacity.

Which service body is best for my trade?
Choose based on what you carry and how you load it. Compartment storage may suit maintenance crews, while an open deck can work better for bulky materials. Landscapers, movers, painters, contractors, and window installers should also consider racks, securement, and jobsite access.

What should I inspect on a used service body truck?
Open every compartment and check doors, hinges, locks, floors, shelving, mounts, and racks. Look for corrosion, damage, water intrusion, and signs of repairs. Make sure the body’s layout works for your equipment, not just that it fits the truck.

Recommended Posts

Fleet manager reviewing a commercial truck’s engine bay beside the vehicle

Commercial Truck Emissions Testing: What Owners Should Check

Commercial truck emissions testing can mean different things depending on the vehicle, where it operates, and the rule or program that applies. Before you book a test or rely on a repair record, establish what is actually required for your truck and route. This guide covers the questions to ask, the maintenance information to gather, and the documents to keep; it does not determine whether a particular truck is compliant. Talk with the service team about your truck What does commercial truck emissions testing mean? The phrase may refer to an official inspection under a government program, a test required by a fleet contract, or a diagnostic evaluation used to investigate an engine or emissions-system concern. Those activities are not automatically interchangeable. A scan tool check or a repair-shop inspection may provide useful information, but it should not be treated as an official test unless the governing program accepts it and the provider is authorized where authorization is required. Start by identifying the purpose of the check. Is a public agency requiring a test? Is a customer, terminal, port, or company policy asking for proof? Are you responding to a warning light or trying to diagnose a performance issue? The answer changes which test, provider, and records matter. If the request came in writing, save it and ask the issuer to identify the rule or policy, the vehicle category it covers, the deadline, and the acceptable proof of completion. Do not assume that the words “emissions test,” “inspection,” “diagnostic,” and “maintenance” describe the same process. Ask for the name of the program, test procedure, and outcome document before authorizing work. If a shop finds a fault, an initial diagnostic result is not necessarily proof that a required test has been passed. Likewise, a maintenance invoice alone may not satisfy a separate inspection requirement. Which vehicle details should you confirm? Write down enough information to identify the exact vehicle and configuration. A business may have trucks that look similar but fall into different vehicle classes or operate under different registrations and policies. Use the registration and vehicle records rather than relying only on a model name or body style. Vehicle identity: Record the VIN, model year, make, model, registration state, and the registered owner or business. Weight and classification: Locate the manufacturer’s ratings and the classification shown on the registration or fleet records. Ask the relevant authority how it defines the category for the rule in question; do not guess from a truck’s appearance. Fuel and powertrain: Note the fuel type, engine family or engine details available in the records, and any powertrain modifications. Tell the service provider about engine or emissions-system changes. Use and route: List the states and areas where the truck is registered, garaged, dispatched, and regularly operated. Include regular interstate routes, not just the business’s main address. Purpose of the request: Keep the notice, contract clause, customer instruction, or internal fleet policy that prompted the question. This information helps an agency or qualified provider assess which requirements to check. It does not, by itself, establish that a test is required or that a truck qualifies for an exception. If a vehicle’s use has changed, such as moving from local work to regular interstate routes, ask whether that change affects the applicable obligations. How does operating location affect the answer? Registration location is important, but it may not answer every question for a vehicle that works across state lines or enters a regulated area. Rules can depend on where the truck operates, the vehicle category, its use, and the program involved. A business based in Florida should not assume that a Florida registration resolves a requirement imposed by another jurisdiction, customer, or operating site. Conversely, do not apply another state’s program to a Florida truck without confirming that it covers the vehicle and operation. For example, California has a Clean Truck Check program for heavy-duty vehicles. The California Air Resources Board says its Clean Truck Check heavy-duty inspection and maintenance regulation began in January 2023 and concerns emissions-control system testing. That California program is not evidence of a Florida requirement; it illustrates why owners need to confirm the jurisdiction and program named in a request. Read the California Air Resources Board’s Clean Truck Check enforcement overview. For Florida operations, verify the current requirements with the government office responsible for the exact program or location. If you cannot identify the responsible agency, ask the party that requested the test to provide the rule citation or official program page. Give the agency the vehicle details and route information above, and ask whether it covers that truck, what steps are required, and what documentation proves completion. Keep a dated note of the answer and any reference number or link supplied. What should you ask before scheduling a test? Call the test provider or the agency before setting a date. A short, specific conversation can prevent a truck from arriving with the wrong appointment type or missing records. Ask questions in plain language and record the answers. What exact requirement or program is this appointment for? Request its official name and the applicable vehicle class or rule. Is this an official test, an emissions-system diagnostic, or a repair evaluation? Ask what the result will say and whether it can serve as the required proof. Does the provider need approval or a particular credential? If the program specifies an authorized testing location or procedure, confirm that before booking. What test method will be used? Ask whether the truck must be presented in a certain condition and whether the engine, warning indicators, or records will be checked. What should the truck bring? Confirm whether registration, prior reports, repair invoices, fleet information, or a notice is needed. What happens if the truck does not pass or a fault is found? Ask about the report, repair documentation, retest process, and any deadlines. Do not infer a deadline; get it from the responsible program. What document will you receive? Confirm the date, vehicle identification, result, test type, and provider details that will appear on the record. Ask for the answers in writing when a deadline, repair, or customer contract depends on them. If a provider cannot explain whether its service meets the stated requirement, pause before treating the appointment as compliance testing. Confirm the test type with the agency or party that issued the request. What maintenance information can help? Maintenance does not replace a required test, but organized records can help a technician understand a concern and help a fleet manager trace what happened. Gather the latest service history, the date and mileage of recent work, prior diagnostic reports, and any records of repairs to the engine or emissions-control components. Include information about recurring warning lights, changes in power, unusual smoke or odor, and operating conditions. Describe what the driver observed without presenting a symptom as a confirmed diagnosis. Before a scheduled evaluation, follow the instructions from the testing provider or relevant program. Avoid clearing warning codes or disconnecting components just to make an indicator disappear. Such actions can remove useful diagnostic information, and they do not establish that the underlying issue has been fixed. If a truck needs repair, ask for a written estimate or work description that identifies the concern and the proposed work before authorizing it. After service, request an itemized record showing the truck identification, date, reported concern, diagnostic findings if available, work performed, and parts installed. Ask whether the provider performed an official emissions test or only a diagnostic or repair service. That distinction should be clear on the paperwork. If the fleet later needs a separate test, preserve both the repair record and the official result rather than treating one as a substitute for the other. For broader fleet upkeep, use the service department as a point of contact for maintenance questions, while confirming regulatory requirements with the agency that administers them. Tri-County Truck lists service and parts information online. A discussion about maintenance can help you plan next steps, but do not rely on a general service conversation as a regulatory determination. Which records should a fleet keep? Set up one record for each vehicle, whether it is stored electronically or in a physical fleet file. Make the record easy to retrieve by VIN or unit number. Keep the original agency notice or request alongside documents that show what the provider actually did. A record set might include: The request, regulation or program reference, and the agency or customer contact that supplied it. Vehicle registration and identification details relevant to the test. Appointment confirmation and provider information, including any evidence of authorization when the program requires it. Test report, inspection result, or diagnostic report, with its date and stated test type. Repair estimates, approvals, invoices, and parts or work descriptions related to a finding. Retest or follow-up records, if required, and written confirmation of any applicable deadline. Notes of calls or emails with the agency, provider, or requesting customer, including the date and next action. Keep the records for the period required by the applicable program, contract, or business policy. Since retention rules can differ, ask the responsible agency or contract owner how long to keep them. Do not assume a general maintenance schedule sets the legal retention period. If a truck is sold, transferred, or reassigned, make sure the business follows its record-transfer process and any instructions that apply to that file. How can you organize the process across a fleet? Assign one person to track notices, tests, repairs, and follow-up for each vehicle. A basic spreadsheet can include the unit number, VIN, registration state, vehicle category, regular operating areas, request source, test type, appointment date, result, repair status, next action, and the location of the report. Mark uncertain items as “verify” instead of recording an assumption as a settled requirement. Use a simple sequence: collect the request, identify the truck, verify the jurisdiction and test type, schedule with the appropriate provider, retain the result, arrange any necessary repair, and confirm what follow-up is due. Set reminders only after a real date or interval has been confirmed by the responsible authority or contract. This reduces the risk of using an outdated schedule or applying one truck’s requirement to every vehicle in a mixed fleet. When a truck crosses state lines, update its operating-area notes. If a new customer or worksite introduces a testing condition, add the written requirement to the vehicle’s record and ask how it applies to the truck’s classification and use. Keep operational planning separate from the compliance decision: a manager can flag a potential issue, but should not certify that a vehicle meets a rule without the required evidence. What should Florida owners verify right now? Because requirements can change and depend on facts that are not available from a model name alone, do not use a generic online checklist as the final authority. Verify the current Florida requirements applicable to the individual vehicle, its registration, and where it operates. Ask the relevant Florida agency or local authority to identify any specific testing program and whether the truck’s weight class, fuel, business use, or route changes the answer. If the truck regularly operates outside Florida, verify each relevant jurisdiction separately. Before closing the question, make sure you can answer these four points: who requires the test; which rule or policy applies; whether the service is an official test or a diagnostic; and what record proves the required step is complete. If any answer is unclear, ask the issuing party or responsible agency for clarification in writing. Do not claim that maintenance, a passed diagnostic check, or an appointment alone guarantees compliance. If you are also planning service or replacing a work vehicle, Tri-County Truck provides online information about new Isuzu commercial trucks and available inventory. You can also use the dealership’s contact page to ask where to direct a general vehicle or service inquiry. These resources can help with dealership questions; confirm regulatory interpretations with the agency that administers the rule. Review service department information What questions do truck owners ask about emissions testing? Is a diagnostic scan the same as an official emissions test? Not necessarily. A diagnostic scan can help identify system information or a fault, while an official test follows the method and requirements of a specific program. Ask the provider what service it performed and confirm with the responsible program whether that result is accepted as proof. Does a Florida-registered truck need an emissions test? Do not determine that from registration alone. Confirm current requirements for the truck, its use, and every relevant operating location with the responsible government office or the party making the request. If the truck travels outside Florida, ask about those jurisdictions too. What if a truck fails or has an emissions warning light? Keep the report and ask the provider what it found, what repair is recommended, and whether a retest or other follow-up is specified. Confirm the deadline and acceptable proof with the agency or party that required the test. A warning light alone does not identify the cause, so avoid treating a suspected fault as a confirmed diagnosis. How long should emissions-related records be kept? Follow the retention period in the applicable rule, contract, or business policy. If the period is not stated in the request, ask the responsible agency or contract owner. Keep the test record with related repair and follow-up documents so the fleet can show the sequence of events. Commercial truck emissions testing is easier to manage when you first establish the applicable vehicle, location, and test type, then keep a clear record of each decision and result. Verify current requirements with the responsible authority before treating any maintenance visit or test report as proof of compliance.

Two white commercial trucks parked at a South Florida service shop while two technicians talk between them

Florida Commercial Truck Requirements

Adding a work truck in Florida is more than choosing a payload rating and putting it to work. The vehicle's GVWR, how it is used, where it travels, what it carries, and whether it pulls a trailer can affect registration, insurance, licensing, inspections, and maintenance records. A practical review of florida commercial truck requirements starts with the state definition of a commercial motor vehicle. That covers a vehicle used on public highways in commerce with a GVWR of 10,000 pounds or more. It also includes a vehicle designed to transport more than 15 passengers including the driver, or a vehicle used to transport hazardous materials under the Hazardous Materials Transportation Act. See Florida Statutes section 316.003. Then confirm registration, insurance, the CDL class, and the inspection schedule with current Florida and federal authorities. Call Tri-County Truck at (954) 971-4022 to match a truck to the weight rating your route requires. The first step is identifying whether the truck falls within that definition at all. That answer is not based on a pickup's nickname or its advertised ton rating alone, so start with the vehicle label and its actual business use. Florida commercial truck requirements start with the truck For a Florida business, the first question is not whether a truck is marketed as a half-ton, three-quarter-ton, or one-ton model. The key questions are how the vehicle is rated, what it is designed to carry, and whether it is used on public highways in commerce to transport people or cargo. Florida's ordinary business-hauling definition covers a vehicle used on public highways in commerce to haul passengers or cargo. It applies if the truck has a GVWR of 10,000 pounds or more. It also applies if the vehicle is designed to transport more than 15 passengers including the driver, or if it hauls hazardous materials under the Hazardous Materials Transportation Act. Read the current threshold in Florida Statutes section 316.003(14); special statutory exceptions may apply to particular uses. Florida uses 10,000 pounds. The federal interstate line often cited by FMCSA generally starts at 10,001 pounds for property-carrying vehicles. To check a particular truck, read the manufacturer certification label in the driver-side door jamb. Look for the gross vehicle weight rating (GVWR), not the sales listing or the "three-quarter-ton" nickname. That label is the rating for that specific truck and its equipment. Is a 3/4-ton truck a commercial vehicle? Not automatically. A 3/4-ton pickup can fall within Florida's commercial motor vehicle definition if its door-jamb certification label meets the applicable threshold or if its design or use fits another part of the definition. The sticker and whether the truck is actually used in commerce decide the question, not the "3/4-ton" name by itself. That classification also does not mean every truck over 10,000 pounds requires a commercial driver's license. CDL requirements depend on separate vehicle, combination, passenger, and hazardous-material rules. If the classification affects your operation, review the vehicle label and the way the truck is used before relying on a general ton-rating shortcut. Pick the registration and USDOT path For Florida commercial truck requirements, start with where the truck operates and how it is used. A truck that stays within Florida generally follows the ordinary Florida registration path. Once it crosses state lines, the registration question can change even when the truck is relatively light. The table below is a practical way to identify the path to investigate before you gather paperwork. Registration and USDOT paths by operating situation Situation What to line up Stays in Florida Ordinary Florida registration, plus the applicable USDOT requirements for a covered commercial motor vehicle. Interstate over 26,000 pounds, 3+ axles, or combination over 26,000 pounds Apportioned registration through IRP, with Florida as the base jurisdiction when the business meets Florida's base requirements. IRP provides an apportioned plate and cab card valid for 12 months. Lighter interstate point-to-point Confirm whether IRP registration or a trip permit applies. Weight alone does not settle the question for a truck making interstate point-to-point trips. Any covered CMV Register for a USDOT number when required and display it on the power unit. Keep the registration updated every two years, including when no information has changed. The IRP threshold is not just a 26,000-pound rule. An interstate power unit is apportionable when its gross vehicle weight is over 26,000 pounds, when it has three or more axles regardless of weight, or when the truck and trailer together exceed 26,000 pounds. The FLHSMV IRP guidance also sets the Florida base-jurisdiction test. You need a Florida place of business staffed by carrier employees during regular hours, or Florida residency for the carrier or an officer, plus three proofs. Florida renews apportioned registration on a staggered schedule from January through October, with no grace period after the renewal month ends. For USDOT details, including the difference between interstate and intrastate registration treatment, use the FLHSMV Florida USDOT number guidance. The Florida registration checklist owns the document list, so use that post when you are ready to identify what to gather rather than treating this overview as a paperwork guide. Insurance questions to ask by weight For a Florida business owner, the first insurance conversation should start with the truck's gross vehicle weight, or GVW, and how the vehicle is used. Florida Statutes section 320.01 and section 627.7415 define the vehicles and financial-responsibility categories that matter here. Do not assume the same amount applies to every commercial truck; ask the insurer which Florida or federal minimum applies to this vehicle and operation. The added amount is $50,000 per occurrence from 26,000 pounds up to but not including 35,000. It is $100,000 from 35,000 up to but not including 44,000, and $300,000 at 44,000 pounds or more. Florida additional liability amounts by gross vehicle weight GVW or federal category Question or Florida amount 26,000 pounds or more but less than 35,000 $50,000 per occurrence. This is added liability for injury and property damage. 35,000 pounds or more but less than 44,000 $100,000 added liability for injury and property damage. 44,000 pounds or more $300,000 added liability for injury and property damage. Subject to 49 CFR part 387 Ask the insurer for the federal minimum. Do not guess it. Ask the insurer which Florida GVW bracket and statutory category the truck falls in. Then ask whether the operation is subject to the federal financial-responsibility rules in 49 CFR part 387. The applicable Florida or federal minimum depends on the vehicle and operation, so do not assume a commonly quoted dollar amount applies to every truck or that requirements automatically stack. Keep the conversation focused on the actual vehicle and use. Have the insurer confirm the coverage requirements in writing, including whether any other insurance requirement applies. A violation of this Florida provision is a noncriminal traffic infraction, which is another reason to resolve the question before the truck goes to work. Match the driver to the license class For Florida commercial truck requirements, start with the vehicle's weight and the trailer it will pull. The driver may need a commercial driver's license (CDL), but a truck being used for business does not automatically require one. Florida's CDL classes are based on the vehicle combination, weight rating or weight, and certain endorsements. Florida CDL classes at a glance Class When it applies Class A A combination with a GVWR or GVW of 26,001 pounds or more when the towed vehicle has a GVWR or GVW of more than 10,000 pounds. Class B A single vehicle with a GVWR or GVW of 26,001 pounds or more, including a vehicle towing 10,000 pounds or less. Class C A vehicle under 26,001 pounds when an endorsement is required, such as for placarded hazardous materials or certain passenger vehicles. These categories come from the current Florida Statutes section 322.54. A Florida CDL applicant must be at least 18 and a Florida resident. Drivers younger than 21 are limited to intrastate operation only, according to the FLHSMV commercial driver license requirements. That is an interstate-operation restriction, not simply a rule about whether a trip crosses the state line. Who is exempt from having a CDL in Florida? Many straight trucks under 26,001 pounds do not require a CDL when they are not hauling placarded hazardous materials and are not designed to carry 16 or more people. Those are examples of the conditions that can affect the license analysis, not an exhaustive list of endorsements or exemptions. That does not mean the vehicle is outside commercial-vehicle rules. It may still need commercial registration, a USDOT number, or inspections. Confirm the truck's ratings, use, cargo, and passenger capacity before assigning a driver or buying equipment. Set the inspection and maintenance plan Periodic inspection is part of keeping a commercial truck in service, not a task to leave until something feels wrong. Under the 49 CFR 396.17 periodic inspection rule, a carrier must not use a commercial motor vehicle unless the covered components passed an inspection at least once in the preceding 12 months. Proof has to be on the vehicle. That can be the inspection report, or a sticker or decal that identifies the vehicle when it is not otherwise clearly marked, shows the inspection date, identifies the carrier by name and address, and certifies that the vehicle passed inspection. If you operate a truck and trailer combination, plan for each unit. The truck, each trailer, and a converter dolly when applicable need their own periodic inspection documentation. Mark the date so the next visit is booked before the 12 months run out. Keep the proof on the truck, not only in an office file. A simple maintenance file also helps keep the operating checklist current. Record: the inspection date and where the proof is kept on the truck; what was serviced or repaired; and when the work was completed and by whom. For a practical routine between inspections, see our commercial utility truck maintenance schedule. Tri-County Truck at 1801 West Atlantic Boulevard can inspect and service your truck after the purchase, including trucks bought elsewhere. The shop does not file registrations or provide legal advice, so confirm regulatory questions with the appropriate authority. When service is due, review commercial truck service in Pompano Beach. Service hours are Monday through Friday, 8:00 a.m. to 6:00 p.m., and Saturday, 8:00 a.m. to 2:00 p.m. Put the checklist in the order you will actually use Read the door sticker for the truck's GVWR, then decide whether Florida's 10,000-pound commercial motor vehicle definition applies, using the Florida statute as your reference. Decide whether the truck will stay in Florida or cross state lines, because that operating plan helps determine whether you are looking at ordinary registration or IRP registration and related requirements. If the truck is a covered CMV, confirm that the USDOT number is displayed as required and put the two-year update on your calendar, even if nothing about the operation changes. Ask your insurer which weight bracket under Florida Statutes section 627.7415 applies and whether 49 CFR part 387 also applies to your operation. Match the driver to the truck. Class A is the heavy combination, Class B is the heavy straight truck, and Class C is the lighter vehicle that needs an endorsement. The age floor is 18 for Florida-only work and 21 for trips that leave the state. Book the periodic inspection so the required proof is on the truck before it works, and start a maintenance file that keeps inspection and service records together. If you are still choosing the truck, make GVWR part of the buying conversation. It can change insurance, licensing, and inspection later. Our guide on how to choose a used work truck covers the selection side. Commercial truck financing in Pompano Beach covers the payment side. Frequently Asked Questions What qualifies as a commercial motor vehicle in Florida? Florida's definition includes a vehicle used on public highways in commerce to transport passengers or cargo when its GVWR is 10,000 pounds or more. It also covers certain passenger vehicles and vehicles used to transport hazardous materials. See Florida Statutes section 316.003. Is a 3/4-ton pickup automatically a commercial vehicle? No. The 3/4-ton label alone does not decide the answer. Check the manufacturer's door-sticker GVWR and consider how the truck is used. The rating and use together help determine which commercial-vehicle requirements apply. Does every commercial truck driver need a CDL? No. Florida's Class A and Class B thresholds generally begin at 26,001 pounds, with Class A applying to qualifying combinations that tow more than 10,000 pounds and Class B applying to qualifying single vehicles. Class C can apply below 26,001 pounds when a required endorsement is involved. Review section 322.54 for the applicable class. How old must a driver be to operate a commercial truck? Florida CDL applicants must be at least 18. A driver under 21 is restricted to intrastate operation, so the driver cannot operate interstate under that restriction. Confirm current licensing details with FLHSMV. How often does a commercial truck need a periodic inspection? Each commercial motor vehicle must pass a periodic inspection at least once during the preceding 12 months, and the required documentation must be carried on the vehicle. In a truck-and-trailer combination, each unit needs its own inspection. See 49 CFR 396.17. Talk through the truck before it goes to work Florida commercial truck requirements depend on the sticker, the route, and the load, not on a model name. If you are still choosing the truck, the sales desk at Tri-County Truck can walk through the GVWR and the body you need. If the truck is already in the fleet, service can book the inspection. The shop does not file registrations or sell insurance. Call (954) 971-4022, or see hours and directions in Pompano Beach.

Fleet manager checking a commercial truck before an inspection

Commercial Truck DOT Inspection: A Fleet Preparation Guide

A commercial truck DOT inspection is easier to prepare for when drivers and fleet managers use a consistent review before the vehicle is presented. A pre-inspection walk-around cannot replace the official inspection, required maintenance, or a qualified repair. It can help your team notice visible concerns, collect records, and address issues in an orderly way. Begin with the truck’s identity and paperwork, then work through safety equipment, brakes, tires, lights, and reported defects. Talk with the service team What does a commercial truck DOT inspection cover? Federal motor carrier rules address inspection, repair, and maintenance of commercial vehicles. Part 396 states that each commercial vehicle, including each segment of a combination vehicle, must receive a periodic inspection at least once every 12 months. The Missouri Department of Transportation’s reproduction of Part 396: Inspection, Repair, and Maintenance provides the rule text. Confirm current requirements and applicable procedures with the appropriate regulator or a qualified compliance professional. Preparation is not a prediction of an inspector’s decision. A walk-around may reveal a damaged lamp or tire, but it cannot establish the condition of every internal component. Requirements and inspection details can depend on the vehicle configuration and operation. Use an applicable checklist and treat it as a way to organize attention, not as proof that a truck meets every requirement. It also helps to distinguish the official periodic inspection from routine driver checks and maintenance work. A driver may identify a new symptom between formal inspections. A technician may diagnose and repair a system. Each has a different role; one does not automatically replace the others. Keep the records that apply to your operation and ask when a rule or procedure is unclear. How should you organize a pre-inspection review? Choose a safe, level location and follow company procedures for securing the vehicle. Use a checklist suited to the truck, trailer or combination, and installed equipment. Do not crawl under a vehicle, handle hot or pressurized components, or conduct a running check without the right training, equipment, and safe procedure. Bring in a qualified person for checks outside the driver’s role. Identify the vehicle. Record unit number, date, odometer reading, and the name or role of the person conducting the review. Confirm which trailer or equipment is part of the inspection. Gather the relevant records. Locate maintenance entries and prior inspection reports under your organization’s process. Make a note of missing or unclear information rather than trying to reconstruct it from memory. Follow one route. Start at the front, move down one side, around the rear, then along the other side. Include the cab and accessible equipment. A repeatable path makes skipped areas less likely. Record observations as you go. Note the exact location and behavior: for example, “left rear turn signal did not illuminate during test,” rather than “lights bad.” Escalate concerns. Route uncertain or safety-related findings to the responsible fleet manager or qualified technician. Follow policy and law on whether the vehicle must be held from operation. Assigning roles makes the review more useful. A driver may report a change in steering or braking, while a manager checks whether the report was logged and routed. A technician handles diagnosis and repair within their qualifications. Decide in advance who can authorize a return to service under company procedures, so a defect does not disappear in a verbal handoff. Which safety equipment should you check? Check that required emergency and safety equipment is present, accessible, secured, and apparently serviceable. The precise items depend on the vehicle and operation, so rely on requirements applicable to your fleet instead of assuming every truck carries an identical kit. Confirm any required fire extinguisher is secured and appears serviceable. Review its gauge, condition, and inspection information as applicable. Check warning devices, including reflective triangles where required, for presence, damage, and accessibility. Inspect seat belts for cuts, fraying, damaged hardware, and secure mounting. Confirm that buckles latch and release. Check mirrors for cracked glass, loose mounts, and obstruction. Adjust them for the intended view before departure. Test wipers and washers. Inspect blades and windshield for damage or dirt that could interfere with visibility. Look for loose objects or equipment in the cab that could obstruct controls, exits, or the driver’s view. Think about usability as well as presence. An emergency item buried beneath cargo may be difficult to reach when needed. A belt that is present but will not latch is not ready for use. Record missing or damaged items, correct them as appropriate, and check the result rather than closing the item merely because it was reported. How can you review brakes and related components? Brakes are safety-critical and should not be judged by appearance alone. During a basic review, note warning indicators, unusual sounds, visible damage, air leaks where applicable, or any change in pedal feel or braking response reported by the driver. Inspect accessible hoses, lines, chambers, and connections for damage, rubbing, leaks, or insecure mounting without placing yourself in an unsafe position. For an air-brake vehicle, use manufacturer instructions and your organization’s qualified procedures for operational checks. Do not improvise a test or adjust components unless properly trained and authorized. A warning light, air-pressure concern, dragging, pulling, vibration, or altered stopping behavior needs prompt assessment by a qualified technician. Follow your fleet’s process for holding the vehicle when a concern may affect safe operation. Ask for details that can help diagnose a reported symptom. When did it begin? Does it happen during a turn, at a certain speed, while loaded, or after the truck has been parked? Is there a warning, sound, smell, or change in pedal feel? The driver’s account is not a diagnosis, but precise observations are more useful than a general “brakes seem off.” When a concern is intermittent, write down when it occurs and whether anyone else observed it. Avoid repeated road tests by an unqualified person just to reproduce the symptom. Give the information to the technician and follow the technician’s safe diagnostic plan. After repair, retain the work record and confirm the original report has been addressed through your process. What tire and wheel conditions deserve attention? Check tires across the vehicle, including inner tires where they can be reached safely. Look for cuts, bulges, exposed cords, uneven wear, lodged objects, leaks, and evidence of contact with a fender or nearby component. A quick glance cannot reliably measure inflation. Use a suitable gauge when appropriate, with the tire maker’s or vehicle maker’s specifications and procedures. Look for visibly damaged or mismatched tires and signs of pressure loss. Review tread condition and wear patterns. Uneven wear can point to alignment, suspension, inflation, or operating issues that need qualified diagnosis. Inspect accessible wheels for cracks, deformation, missing fasteners, and rust trails or other clues that deserve closer examination. Check for tire-to-body contact and confirm fitted mud flaps or fenders are secure. Use a consistent route so you cover each wheel position, not just the outside tires. For a tandem arrangement, make a simple diagram or checklist with positions such as left front, right front, inner dual, and outer dual. Mark the location of a concern precisely; “rear tires” is less helpful than “right rear outer tire, sidewall bulge.” Never remove a wheel or work beneath a truck without proper equipment and training. If pressure is outside the specified range or damage appears structural, follow fleet procedure and obtain qualified assistance before returning the vehicle to service. Do not treat adding air as a complete response to a suspected leak or damage. A technician can determine what inspection or repair is appropriate and whether a recurring wear pattern needs further investigation. Which lights and visibility items should you test? Operate relevant lighting functions and, when possible, have a second person confirm them from outside. Check headlights and high beams, turn signals, hazard flashers, brake lamps, tail lamps, clearance and marker lamps, and other installed lamps. Confirm that lenses are present, reasonably clean, and not obscured by dirt, cargo, or a loose cover. A practical sequence prevents confusion: switch on one function at a time, name it aloud, and have the helper confirm the corresponding lamps. Then use the turn signals and brakes while the helper checks front and rear. If alone, use a safe reflection or other suitable method where practical, but do not assume a lamp works merely because its dashboard indicator is lit. Follow company procedure for reliable confirmation. Look for flickering or intermittent operation as well as a complete failure. Note whether the issue changes when a connector or housing is gently checked; do not pull wiring or open components without authorization. Inspect reflectors and conspicuity markings where fitted. Check windshield, mirrors, and any visibility-supporting camera or sensor for damage or obstruction. Repair electrical faults rather than relying on a lamp that works only sometimes. What records should a fleet manager gather? Organize inspection and maintenance information by vehicle, with dates and enough detail to show what was reported, what was inspected, and what action followed. Before a scheduled inspection, check that records are retrievable under your company’s process. Do not create or backdate paperwork to make a file look complete. If information is missing, identify the gap and determine the proper next step. Depending on the vehicle and operation, useful records may include prior inspection reports, repair orders, maintenance entries, and documentation for specialized equipment. Check the rules that apply to your fleet for required contents and retention periods; a general preparation guide cannot establish every operator’s obligations. The federal rule text linked above is a starting point, not a substitute for confirming which provisions apply. When a driver reports a defect, preserve the report and document the response. Include the vehicle, date, specific condition, person notified, and follow-up action. If a repair is deferred, record the reason and decision according to policy, then follow applicable safety and maintenance procedures. Good records can also reveal repeat patterns, such as recurring lamp failures or uneven tire wear across the same unit. Before the vehicle is presented, use a short file check: Does the report correspond to the correct unit? Are dates and repair descriptions legible? Is there a record of follow-up for an earlier defect? Is the document easy for the responsible person to locate? This is an organization check, not an invitation to alter records or infer compliance from a tidy folder. How should you describe and resolve visible defects? Separate what you observed from what you think caused it. “Right rear marker lamp does not illuminate” is more useful than “electrical system is bad.” Record the unit, location, date, and whether the issue was confirmed. A photograph may help when company policy allows, but it does not replace diagnosis, repair, or required documentation. Route concerns according to potential safety impact and company policy. A damaged mirror, leaking line, unsecured part, or tire with visible structural damage needs prompt attention. Do not decide that a concern is harmless simply because the truck has completed previous trips. If policy or applicable rules require a hold, keep the truck out of service until the required decision and corrective work are complete. Close the loop after repair. Match the repair record to the original report, check that the reported issue was addressed, and record any follow-up needed. If a concern cannot be reproduced, retain the report and the technician’s findings rather than erasing the concern. A clear history lets the next driver and manager know what was found and what was done. What common preparation mistakes should you avoid? Rushing the walk-around: use a consistent route and leave enough time to examine each area. Assuming yesterday’s condition is today’s condition: repeat checks at required intervals and respond when a driver reports a change. Checking only the exterior: include the cab, equipment, records, and relevant operating observations. Ignoring intermittent faults: record when they happen and arrange appropriate diagnosis even if a quick check does not reproduce them. Treating a checklist as a repair: a checked box does not correct a defect; track the issue through the proper resolution. Using a generic checklist as the whole rulebook: match the checklist to the vehicle and applicable requirements. Assuming preparation guarantees an outcome: only the authorized inspection process determines whether applicable requirements are met. A rushed review often fails at handoffs. A driver may tell one supervisor about a defect, while the repair coordinator never sees the report. Use a written log or approved system, identify who owns each open item, and set a clear follow-up step. At the end of the shift or review, compare open concerns against the vehicle’s status under company procedures. How can a fleet make the review repeatable? Build preparation into normal fleet operations rather than waiting until an inspection date is near. Assign responsibility, keep vehicle-specific checklists available, teach drivers how to report changes, and review defect logs for recurring patterns. Make sure the person coordinating repairs can see reports and confirm status under company procedures. For example, if several drivers report marker-lamp failures over a short period, record which units and lamp positions are involved, when repairs occurred, and whether the same issue returned. A pattern may justify asking a qualified technician to look beyond the individual lamp and assess the relevant wiring, mounting, or environmental exposure. Do not assume the cause from the log alone. For tire concerns, compare location and wear pattern across inspection notes. If wear repeatedly appears in one position, preserve the observations and ask a technician to assess possible causes such as alignment or suspension condition. Replacing a tire may address the immediate item but may not explain why the pattern returned. The record helps the technician see the sequence without turning a visual review into a diagnosis. Fleet managers can also review the process itself. Are drivers using the latest checklist? Are defect reports reaching the repair coordinator? Are completed repairs being matched back to the original concern? Do recurring items get reviewed rather than handled as isolated incidents? These questions help improve consistency without promising a particular inspection result. When should you ask a technician to inspect the truck? Ask a qualified technician when a review reveals a possible safety issue, a driver reports changed handling or braking, warning indicators appear, or a check requires expertise or tools beyond approved fleet procedures. Provide the unit number, symptom, location, timing, and any warning or sound observed. Clear information helps the technician start with the relevant concern. Tri-County Truck offers commercial vehicle service and maintenance. Fleet teams can review service and parts information or request a service appointment. Service work can support maintenance readiness, but no service provider can promise an official inspection will produce a particular result. When planning service, share prior repair history and any symptoms that return after work is completed. Ask what checks or repairs are proposed, what the technician found, and what documentation will be available for your records. The fleet remains responsible for following its procedures and confirming the applicable regulatory requirements. Request a service appointment How can you prepare for different fleet situations? A single-truck business and a multi-unit fleet may use the same basic sequence but need different handoffs. An owner-driver may complete the observation and contact a technician directly. In a larger fleet, the driver reports the condition, a manager logs it, and a repair coordinator tracks it to closure. In both cases, record facts clearly and follow the applicable safety process. Consider a truck scheduled for a morning route with a lamp reported out the previous evening. The manager should confirm whether the concern was checked and resolved, not rely on a message that says “fixed.” The driver or assigned person can verify the relevant function safely, and the repair record should be retained. If the fault remains or recurs, escalate it instead of treating the earlier note as proof of correction. For a vehicle with specialized equipment, add checks for the equipment that is part of the operation and make sure the checklist reflects the configuration. If the truck is part of a combination, identify the relevant units and records rather than assuming the power unit’s file covers everything. When unsure about a requirement, confirm it with the authority or a qualified compliance professional. Preparation is most useful when it produces accurate observations, timely decisions, and traceable follow-up. Keep the walk-around focused, use qualified help for technical questions, and leave formal compliance decisions to the applicable inspection and regulatory process.