

Lou Bachrodt’s Tri-County Truck

Complimentary Delivery in the State of Florida

Blog

Truck Body Upfit Checklist: Plan the Right Work Truck

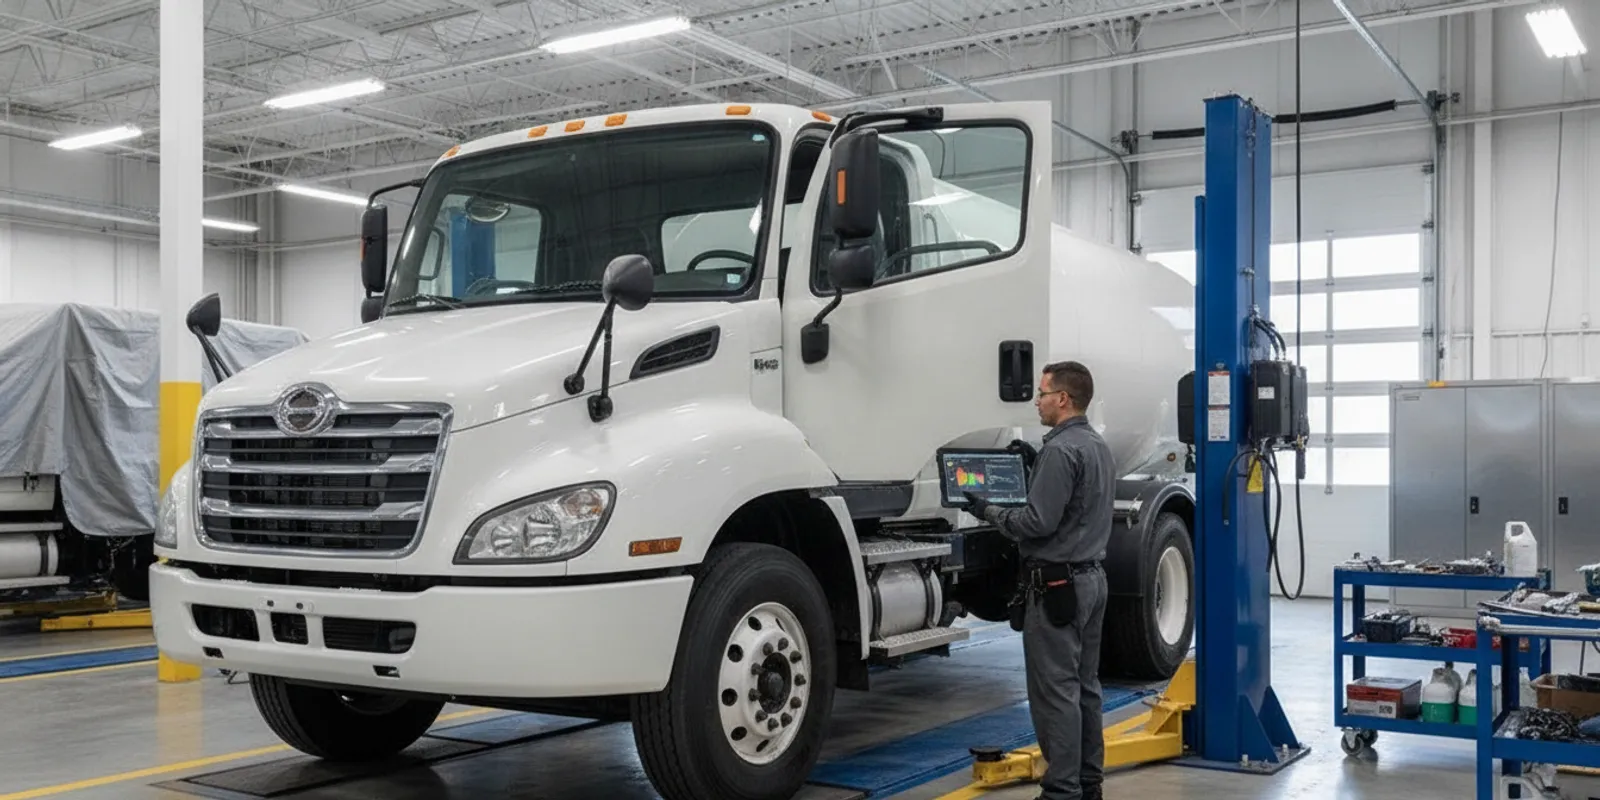
Commercial work truck with a custom body parked at a job site

A truck body upfit checklist can help you turn a general need for a work truck into a clear specification an upfitter can act on. Before choosing a body, write down the work the truck must do, the equipment it must carry, and the conditions it will face. Then check weight, dimensions, mounting, power, safety, service access, and future needs as one connected plan.

Talk with our truck team

A body that looks right in a photo can still be a poor fit if the truck cannot carry the loaded equipment, reach the work area, or leave room for maintenance. This checklist is meant for business owners and fleet managers preparing to discuss a new or replacement work truck with a dealer or upfitter. Bring the answers you have; mark the rest as questions to resolve before approving a build.

What work must the truck do every day?

Start with actual jobs, not a body name. List the routine tasks and the less common jobs that the truck still needs to handle. A contractor may need to carry tools and materials, while a mobile repair crew may need parts storage, a work surface, and equipment that stays secure while traveling. Those differences change the body, compartments, and mounting plan.

  • What work will the truck perform most often, and what tasks happen only occasionally?
  • Will it serve one crew or be shared among drivers and job types?
  • What tools, materials, machines, and personal protective equipment must travel with it?
  • Will items be loaded by hand, forklift, crane, ramp, or another method?
  • Where will the truck work: paved lots, narrow streets, construction sites, or uneven ground?
  • Does the crew need to reach supplies from the curb side, rear, or both sides?

Walk through a typical workday. Note where the truck parks, how often the crew stops, what gets unloaded first, and which items need to stay accessible. If possible, ask the people who will use the truck to identify daily frustrations with the current setup. Their practical observations can reveal that a frequently used tool needs a dedicated exterior compartment, or that a particular piece of equipment must be removed without unloading everything else.

Be specific about exceptions. “Carries tools” is not enough to size storage. Record the largest and heaviest items, their dimensions, how they are secured, and whether they need to remain upright or protected from weather. Photos of the current loadout, equipment labels, and a simple sketch can help make the conversation concrete.

How do you choose the body type and truck?

Choose the work requirements first, then compare body types and truck configurations that can meet them. A box body can enclose cargo and provide weather protection. A platform or flatbed can make side loading and carrying irregular materials easier. A dump body is designed for hauling and unloading loose material. A cab-and-chassis gives an upfitter a base for a body designed around a particular operation. Each option involves different access, weight, height, and equipment tradeoffs.

Use actual inventory pages as a starting point, not as a substitute for a build review. You can compare box trucks, flatbed trucks, dump trucks, and cab-and-chassis trucks. The right category depends on your equipment and tasks; confirm that the specific truck and planned body can work together.

Bring these selection questions to the dealer or upfitter:

  • Is the proposed chassis available in the wheelbase, cab style, and configuration the body requires?
  • Will the body support the loading and unloading method used by the crew?
  • Does the body need weather protection, lockable storage, open access, or a combination?
  • Could the truck’s overall height, width, or length limit access to a job site, garage, or route?
  • What tradeoffs arise if you prioritize capacity, maneuverability, storage, or access?

Do not select a body based only on its empty appearance or advertised capacity. The complete truck must fit its intended load, and the chassis, body, and installed equipment must be considered together.

How should you check payload and weight?

Weight is one of the most important parts of an upfit plan. Start by building a realistic list of everything the truck will carry in service: body, installed equipment, tools, materials, crew, and other cargo. Include items that are easy to overlook, such as drawers, racks, spare tires, fuel or fluid containers, and equipment that is mounted permanently. Use measured or documented weights where possible instead of rough guesses.

Ask the dealer and upfitter to review the chassis weight ratings and the expected completed-truck weight. Confirm how the planned load affects available payload and how weight is distributed across the axles. A truck may appear to have room for more cargo while a particular axle or component is already near its applicable limit. Get the final weight and capacity assumptions in writing, and verify them for the actual configuration rather than relying on a generic example.

Weight itemWhat to includeQuestion to confirm
Base vehicleCab, chassis, and installed factory equipmentWhat is the weight of this exact configuration?
Body and upfitBody, racks, lift equipment, boxes, and attachmentsWhat is the estimated completed weight?
People and suppliesDriver, passengers, tools, parts, and typical cargoWhat load should the truck be planned to carry routinely?
Weight placementWhere heavy items sit and how loads are distributedHow will the configuration affect axle loading?

Separate the everyday load from the heaviest credible load. A truck that only fits the lightest scenario may leave the business short when a full crew and equipment travel together. At the same time, avoid specifying capacity for a hypothetical load without checking whether the selected chassis and body can support it. Have the professionals involved reconcile the expected load with the vehicle’s ratings and the intended use.

Which dimensions and clearances should you measure?

Measure the items the truck must carry and the places it must enter. Record the longest, tallest, widest, and heaviest pieces of equipment. Note whether items need extra room to be removed, opened, operated, or secured. Then compare those measurements with the proposed body’s usable interior or deck dimensions; exterior dimensions alone do not describe the space available for work.

  • Load dimensions: Measure equipment in its transport position and account for handles, hoses, or attachments that extend beyond it.
  • Door and compartment access: Check opening size, swing clearance, and whether a person can reach the item without unloading neighboring cargo.
  • Route and site clearance: Check garages, covered loading areas, gates, low branches, narrow approaches, and tight turning areas that matter to your routes.
  • Working clearance: Allow space for ramps, stabilizers, liftgates, doors, or other equipment to deploy safely where the truck will be parked.
  • Interior or deck layout: Consider usable length and width after wheel wells, partitions, tie-downs, and installed fixtures are accounted for.

Make a basic scale drawing if several pieces of equipment must fit together. A floor plan can show what must be fixed in place, what needs a clear path, and which items need frequent access. For a box body, test the layout against the actual opening and interior constraints. For a platform body, plan tie-down positions and how the load will be approached. For a dump body, consider how equipment or accessories could affect loading and unloading.

Ask the upfitter to confirm the final outside measurements and the usable working space. If the truck will enter a building, compare its complete height with the measured clearance and leave practical room for changes in the site surface or approach. Do not assume that a nominal body size guarantees that a particular machine or pallet will fit.

What equipment needs to be mounted?

Make a mounting list before the body design is finalized. Include each tool, rack, tank, compressor, generator, ladder, lift, storage unit, or other accessory, even if it will be added later. For every item, document approximate weight, dimensions, mounting location, how often it is used, and whether it must be removed or serviced. Share manufacturer instructions or mounting requirements when you have them.

Ask how the proposed mounting points connect to the body or chassis, whether the installation affects access to components, and how the load will be restrained in transit. Heavy objects should not be placed wherever a convenient surface happens to be; their position affects weight distribution and the design. Confirm that the planned fastening and restraint approach is appropriate for the equipment and its use.

Plan storage around workflow. Frequently used equipment may need to be reachable from outside, while sensitive or valuable tools may need secure, weather-protected storage. Separate clean supplies from dirty or wet tools if the work calls for it. Decide whether shelves, drawers, dividers, or bins are needed, and confirm that they will remain usable after doors, wiring, and other installed items are in place.

What electrical and power needs should you define?

List all powered equipment and how it will be used. Note whether each item runs from the vehicle, a separate power source, or a portable battery; record its voltage or other requirements from the equipment documentation. Include lighting, warning or work lights, charging points, pumps, refrigeration, communications equipment, and tools that may operate while the truck is parked. Do not assume that a convenient outlet or sufficient power will be available without a design review.

  • Which devices need power, and how many may run at the same time?
  • Will the equipment operate while driving, while parked, or in both situations?
  • Where should controls, outlets, connectors, and charging points be placed for safe access?
  • Are wiring runs protected from weather, abrasion, heat, moving parts, and routine service work?
  • Does the installation require a separate power source or specialist review?

Provide the equipment specifications to the dealer or qualified installer and ask who is responsible for confirming the electrical design. Document the intended use and any limits the crew must follow. A neat installation should be serviceable: labels, accessible connections, and a clear layout make it easier to understand the system later.

How can you plan safety and daily access?

Safety is part of the layout, not a final accessory decision. Think about how drivers and crew members enter the cab, climb to a deck, open compartments, load equipment, and work around traffic or other machinery. Ask the upfitter to identify relevant safety features for the chosen body and equipment, and to explain how they should be used and maintained.

  • Can the crew reach regularly used tools without climbing on an unsafe surface or moving heavy cargo?
  • Are steps, handles, and access points practical for the people who will use them?
  • Can doors and compartments be opened without blocking a walkway or creating an avoidable hazard?
  • Are loads restrained for travel, and can the crew inspect restraints during normal operations?
  • Do visibility, lighting, mirrors, cameras, alarms, or warning devices need to be addressed?
  • Can installed accessories be operated only when the truck is positioned and secured as intended?

Discuss the complete vehicle and operation, not just the body in isolation. Have the dealer or upfitter explain any operating instructions, limitations, inspections, or training that apply to the installed equipment. Requirements can depend on the truck, its use, and where it operates, so verify the rules relevant to your situation with the appropriate authorities. The Federal Motor Carrier Safety Administration is an official starting point for federal motor-carrier safety information; ask a qualified professional which requirements apply to your vehicle and operation.

Will the upfit leave room for service?

A truck must be maintainable after the body and accessories are installed. Ask which service points need routine access and whether the body, storage, wiring, or mounted equipment could make that work difficult. Consider the cab, engine compartment, batteries, tires, lights, fluid checks, and any equipment-specific service needs. Have the upfitter and service team discuss access before approving a design, especially if an accessory sits close to a component that must be inspected or repaired.

Clarify how removable panels, doors, covers, and equipment are accessed, and whether a technician will need special tools or steps. Ask whether the planned installation changes the normal process for lifting, towing, or working on the truck. Keep installation diagrams, equipment manuals, wiring information, and final configuration details with the vehicle’s service records. If the truck needs ongoing maintenance, review the relevant service and parts information as part of planning where support will fit into fleet operations.

How should you plan for future changes?

Think beyond the first job assigned to the truck. A business may add tools, change crews, or take on work with different storage and power needs. No design can anticipate every future change, but you can decide which elements should remain adaptable. For example, ask whether storage can be rearranged, whether a mounting area should remain clear, or whether wiring capacity and access should allow a later approved addition.

Flexibility has tradeoffs. Extra structure, electrical capacity, or modular storage may add weight, cost, or complexity. Ask the upfitter to distinguish what is included in the proposed build from what is merely possible later. Do not count on a future accessory fitting without confirming its weight, dimensions, mounting, power needs, and effect on ratings at that time.

Also consider how the truck will be reassigned or replaced. A body tailored to one specialized task can be the right choice, but it may not suit another crew. Discuss which parts are fixed, which can be removed, and what changes would require a new safety or weight review. The goal is not to make every truck serve every purpose; it is to understand the consequences of the configuration you choose.

What should you bring to the dealer or upfitter?

Use this final list to prepare for a productive build discussion and to capture decisions before work begins:

  1. A description of the truck’s daily jobs, routes, sites, and loading methods.
  2. A written inventory of crew, tools, cargo, equipment dimensions, and estimated weights.
  3. Photos or a sketch of the current setup, with examples of what works and what does not.
  4. Preferred body style and a short explanation of why it fits the work.
  5. Required storage, mounting locations, access points, tie-downs, and weather protection.
  6. Electrical and power requirements, supported by equipment documentation where possible.
  7. Important route, garage, site, and working clearances.
  8. Service-access needs and any equipment that must be removed or inspected regularly.
  9. Questions about completed weight, payload, axle loading, operating instructions, and applicable requirements.
  10. A list of possible future changes, separated from what the truck must do on day one.

Before you approve a specification, ask for a written description of the truck, body, major equipment, expected completed dimensions, and weight assumptions. Confirm who is responsible for each part of the installation and what information will be delivered with the finished truck. Resolve unknowns before build approval when they could change the body, capacity, wiring, or mounting layout.

What is the best way to use this checklist?

Start with the job, gather measurements and equipment details, and treat every unknown as a question for the dealer or upfitter. Compare the complete proposed configuration against the real load, daily workflow, route clearances, safety needs, and service plan. Tri-County Truck can help you explore available work-truck configurations and discuss what to confirm for your operation. Review available inventory and bring your checklist when you are ready to talk through the truck.

Discuss your work-truck needs

A little preparation helps the dealer and upfitter focus on a truck that supports the work, carries its intended load, and makes sense for the people who will use it every day.

A truck body upfit checklist can help you turn a general need for a work truck into a clear specification an upfitter can act on. Before choosing a body, write down the work the truck must do, the equipment it must carry, and the conditions it will face. Then check weight, dimensions, mounting, power, safety, service access, and future needs as one connected plan.

Call (954) 971-4022 to discuss your work-truck needs

A body that looks right in a photo can still be a poor fit if the truck cannot carry the loaded equipment, reach the work area, or leave room for maintenance. This checklist is meant for business owners and fleet managers preparing to discuss a new or replacement work truck with a dealer or upfitter. Bring the answers you have; mark the rest as questions to resolve before approving a build.

What work must the truck do every day?

Start with actual jobs, not a body name. List the routine tasks and the less common jobs that the truck still needs to handle. A contractor may need to carry tools and materials, while a mobile repair crew may need parts storage, a work surface, and equipment that stays secure while traveling. Those differences change the body, compartments, and mounting plan.

  • What work will the truck perform most often, and what tasks happen only occasionally?
  • Will it serve one crew or be shared among drivers and job types?
  • What tools, materials, machines, and personal protective equipment must travel with it?
  • Will items be loaded by hand, forklift, crane, ramp, or another method?
  • Where will the truck work: paved lots, narrow streets, construction sites, or uneven ground?
  • Does the crew need to reach supplies from the curb side, rear, or both sides?

Walk through a typical workday. Note where the truck parks, how often the crew stops, what gets unloaded first, and which items need to stay accessible. If possible, ask the people who will use the truck to identify daily frustrations with the current setup. Their practical observations can reveal that a frequently used tool needs a dedicated exterior compartment, or that a particular piece of equipment must be removed without unloading everything else.

Be specific about exceptions. “Carries tools” is not enough to size storage. Record the largest and heaviest items, their dimensions, how they are secured, and whether they need to remain upright or protected from weather. Photos of the current loadout, equipment labels, and a simple sketch can help make the conversation concrete.

How do you choose the body type and truck?

Choose the work requirements first, then compare body types and truck configurations that can meet them. A box body can enclose cargo and provide weather protection. A platform or flatbed can make side loading and carrying irregular materials easier. A dump body is designed for hauling and unloading loose material. A cab-and-chassis gives an upfitter a base for a body designed around a particular operation. Each option involves different access, weight, height, and equipment tradeoffs.

Use actual inventory pages as a starting point, not as a substitute for a build review. You can compare box trucks, flatbed trucks, dump trucks, and cab-and-chassis trucks. The right category depends on your equipment and tasks; confirm that the specific truck and planned body can work together.

Bring these selection questions to the dealer or upfitter:

  • Is the proposed chassis available in the wheelbase, cab style, and configuration the body requires?
  • Will the body support the loading and unloading method used by the crew?
  • Does the body need weather protection, lockable storage, open access, or a combination?
  • Could the truck’s overall height, width, or length limit access to a job site, garage, or route?
  • What tradeoffs arise if you prioritize capacity, maneuverability, storage, or access?

Do not select a body based only on its empty appearance or advertised capacity. The complete truck must fit its intended load, and the chassis, body, and installed equipment must be considered together.

How should you check payload and weight?

Weight is one of the most important parts of an upfit plan. Start by building a realistic list of everything the truck will carry in service: body, installed equipment, tools, materials, crew, and other cargo. Include items that are easy to overlook, such as drawers, racks, spare tires, fuel or fluid containers, and equipment that is mounted permanently. Use measured or documented weights where possible instead of rough guesses.

Ask the dealer and upfitter to review the chassis weight ratings and the expected completed-truck weight. Confirm how the planned load affects available payload and how weight is distributed across the axles. A truck may appear to have room for more cargo while a particular axle or component is already near its applicable limit. Get the final weight and capacity assumptions in writing, and verify them for the actual configuration rather than relying on a generic example.

Weight itemWhat to includeQuestion to confirm
Base vehicleCab, chassis, and installed factory equipmentWhat is the weight of this exact configuration?
Body and upfitBody, racks, lift equipment, boxes, and attachmentsWhat is the estimated completed weight?
People and suppliesDriver, passengers, tools, parts, and typical cargoWhat load should the truck be planned to carry routinely?
Weight placementWhere heavy items sit and how loads are distributedHow will the configuration affect axle loading?

Separate the everyday load from the heaviest credible load. A truck that only fits the lightest scenario may leave the business short when a full crew and equipment travel together. At the same time, avoid specifying capacity for a hypothetical load without checking whether the selected chassis and body can support it. Have the professionals involved reconcile the expected load with the vehicle’s ratings and the intended use.

Which dimensions and clearances should you measure?

Measure the items the truck must carry and the places it must enter. Record the longest, tallest, widest, and heaviest pieces of equipment. Note whether items need extra room to be removed, opened, operated, or secured. Then compare those measurements with the proposed body’s usable interior or deck dimensions; exterior dimensions alone do not describe the space available for work.

  • Load dimensions: Measure equipment in its transport position and account for handles, hoses, or attachments that extend beyond it.
  • Door and compartment access: Check opening size, swing clearance, and whether a person can reach the item without unloading neighboring cargo.
  • Route and site clearance: Check garages, covered loading areas, gates, low branches, narrow approaches, and tight turning areas that matter to your routes.
  • Working clearance: Allow space for ramps, stabilizers, liftgates, doors, or other equipment to deploy safely where the truck will be parked.
  • Interior or deck layout: Consider usable length and width after wheel wells, partitions, tie-downs, and installed fixtures are accounted for.

Make a basic scale drawing if several pieces of equipment must fit together. A floor plan can show what must be fixed in place, what needs a clear path, and which items need frequent access. For a box body, test the layout against the actual opening and interior constraints. For a platform body, plan tie-down positions and how the load will be approached. For a dump body, consider how equipment or accessories could affect loading and unloading.

Ask the upfitter to confirm the final outside measurements and the usable working space. If the truck will enter a building, compare its complete height with the measured clearance and leave practical room for changes in the site surface or approach. Do not assume that a nominal body size guarantees that a particular machine or pallet will fit.

What equipment needs to be mounted?

Make a mounting list before the body design is finalized. Include each tool, rack, tank, compressor, generator, ladder, lift, storage unit, or other accessory, even if it will be added later. For every item, document approximate weight, dimensions, mounting location, how often it is used, and whether it must be removed or serviced. Share manufacturer instructions or mounting requirements when you have them.

Ask how the proposed mounting points connect to the body or chassis, whether the installation affects access to components, and how the load will be restrained in transit. Heavy objects should not be placed wherever a convenient surface happens to be; their position affects weight distribution and the design. Confirm that the planned fastening and restraint approach is appropriate for the equipment and its use.

Plan storage around workflow. Frequently used equipment may need to be reachable from outside, while sensitive or valuable tools may need secure, weather-protected storage. Separate clean supplies from dirty or wet tools if the work calls for it. Decide whether shelves, drawers, dividers, or bins are needed, and confirm that they will remain usable after doors, wiring, and other installed items are in place.

What electrical and power needs should you define?

List all powered equipment and how it will be used. Note whether each item runs from the vehicle, a separate power source, or a portable battery; record its voltage or other requirements from the equipment documentation. Include lighting, warning or work lights, charging points, pumps, refrigeration, communications equipment, and tools that may operate while the truck is parked. Do not assume that a convenient outlet or sufficient power will be available without a design review.

  • Which devices need power, and how many may run at the same time?
  • Will the equipment operate while driving, while parked, or in both situations?
  • Where should controls, outlets, connectors, and charging points be placed for safe access?
  • Are wiring runs protected from weather, abrasion, heat, moving parts, and routine service work?
  • Does the installation require a separate power source or specialist review?

Provide the equipment specifications to the dealer or qualified installer and ask who is responsible for confirming the electrical design. Document the intended use and any limits the crew must follow. A neat installation should be serviceable: labels, accessible connections, and a clear layout make it easier to understand the system later.

How can you plan safety and daily access?

Safety is part of the layout, not a final accessory decision. Think about how drivers and crew members enter the cab, climb to a deck, open compartments, load equipment, and work around traffic or other machinery. Ask the upfitter to identify relevant safety features for the chosen body and equipment, and to explain how they should be used and maintained.

  • Can the crew reach regularly used tools without climbing on an unsafe surface or moving heavy cargo?
  • Are steps, handles, and access points practical for the people who will use them?
  • Can doors and compartments be opened without blocking a walkway or creating an avoidable hazard?
  • Are loads restrained for travel, and can the crew inspect restraints during normal operations?
  • Do visibility, lighting, mirrors, cameras, alarms, or warning devices need to be addressed?
  • Can installed accessories be operated only when the truck is positioned and secured as intended?

Discuss the complete vehicle and operation, not just the body in isolation. Have the dealer or upfitter explain any operating instructions, limitations, inspections, or training that apply to the installed equipment. Requirements can depend on the truck, its use, and where it operates, so verify the rules relevant to your situation with the appropriate authorities. The Federal Motor Carrier Safety Administration is an official starting point for federal motor-carrier safety information; ask a qualified professional which requirements apply to your vehicle and operation.

Will the upfit leave room for service?

A truck must be maintainable after the body and accessories are installed. Ask which service points need routine access and whether the body, storage, wiring, or mounted equipment could make that work difficult. Consider the cab, engine compartment, batteries, tires, lights, fluid checks, and any equipment-specific service needs. Have the upfitter and service team discuss access before approving a design, especially if an accessory sits close to a component that must be inspected or repaired.

Clarify how removable panels, doors, covers, and equipment are accessed, and whether a technician will need special tools or steps. Ask whether the planned installation changes the normal process for lifting, towing, or working on the truck. Keep installation diagrams, equipment manuals, wiring information, and final configuration details with the vehicle’s service records. If the truck needs ongoing maintenance, review the relevant service and parts information as part of planning where support will fit into fleet operations.

How should you plan for future changes?

Think beyond the first job assigned to the truck. A business may add tools, change crews, or take on work with different storage and power needs. No design can anticipate every future change, but you can decide which elements should remain adaptable. For example, ask whether storage can be rearranged, whether a mounting area should remain clear, or whether wiring capacity and access should allow a later approved addition.

Flexibility has tradeoffs. Extra structure, electrical capacity, or modular storage may add weight, cost, or complexity. Ask the upfitter to distinguish what is included in the proposed build from what is merely possible later. Do not count on a future accessory fitting without confirming its weight, dimensions, mounting, power needs, and effect on ratings at that time.

Also consider how the truck will be reassigned or replaced. A body tailored to one specialized task can be the right choice, but it may not suit another crew. Discuss which parts are fixed, which can be removed, and what changes would require a new safety or weight review. The goal is not to make every truck serve every purpose; it is to understand the consequences of the configuration you choose.

What should you bring to the dealer or upfitter?

Use this final list to prepare for a productive build discussion and to capture decisions before work begins:

  1. A description of the truck’s daily jobs, routes, sites, and loading methods.
  2. A written inventory of crew, tools, cargo, equipment dimensions, and estimated weights.
  3. Photos or a sketch of the current setup, with examples of what works and what does not.
  4. Preferred body style and a short explanation of why it fits the work.
  5. Required storage, mounting locations, access points, tie-downs, and weather protection.
  6. Electrical and power requirements, supported by equipment documentation where possible.
  7. Important route, garage, site, and working clearances.
  8. Service-access needs and any equipment that must be removed or inspected regularly.
  9. Questions about completed weight, payload, axle loading, operating instructions, and applicable requirements.
  10. A list of possible future changes, separated from what the truck must do on day one.

Before you approve a specification, ask for a written description of the truck, body, major equipment, expected completed dimensions, and weight assumptions. Confirm who is responsible for each part of the installation and what information will be delivered with the finished truck. Resolve unknowns before build approval when they could change the body, capacity, wiring, or mounting layout.

What is the best way to use this checklist?

Start with the job, gather measurements and equipment details, and treat every unknown as a question for the dealer or upfitter. Compare the complete proposed configuration against the real load, daily workflow, route clearances, safety needs, and service plan. Tri-County Truck can help you explore available work-truck configurations and discuss what to confirm for your operation. Review available inventory and bring your checklist when you are ready to talk through the truck.

Call (954) 971-4022 to discuss your work-truck needs

A little preparation helps the dealer and upfitter focus on a truck that supports the work, carries its intended load, and makes sense for the people who will use it every day.



Recommended Posts

A commercial diesel truck in a service bay while a technician reviews its dashboard warnings

Commercial Truck DPF Cleaning: Warning Signs and Service Questions

When a diesel truck shows a DPF warning or begins limiting power, the cause is not always obvious. Commercial truck DPF cleaning may be part of the solution, but a warning light alone does not tell you whether the filter needs cleaning, a sensor needs attention, or another engine or exhaust issue is interfering with regeneration. Knowing the basics can help you describe the symptoms and ask for the right diagnosis. Talk with the service team What does a diesel particulate filter do? A diesel particulate filter, usually called a DPF, is part of the exhaust aftertreatment system on many diesel vehicles. It captures soot particles in the exhaust rather than allowing them to pass straight through. The filter is designed to collect soot temporarily and then reduce that soot through a process called regeneration. Regeneration raises the temperature in the aftertreatment system so that accumulated soot can be oxidized. The truck's controls manage the process, but the conditions needed for regeneration depend on the engine, exhaust system, operating conditions, and vehicle calibration. A driver may not notice a normal regeneration, while some vehicles display a message or change the engine's sound or idle behavior. Consult the owner information for the specific truck rather than assuming every model behaves the same way. Regeneration deals with soot; it does not make every kind of material in a filter disappear. Ash and other residues can build up over time and may require a different service approach. That distinction is one reason a technician should evaluate the system instead of treating every warning as a simple cleaning request. For general federal background on diesel emissions and emissions-control programs, see the U.S. Environmental Protection Agency. The truck's manufacturer guidance and diagnostic information are still the key references for its specific service requirements. Which warning signs should a driver notice? Drivers and fleet managers should pay attention to changes in alerts, performance, and operating behavior. A single symptom may have several possible explanations, so record what happened rather than diagnosing the cause from the cab. DPF or aftertreatment warning: Note the exact message, indicator, or warning level shown. Take a photo when safe and permitted by company policy. Reduced power or a derate: The truck may feel less responsive or have restricted engine output. A derate can indicate that the control system is protecting the vehicle or responding to a fault; it should not be treated as proof that the filter alone is at fault. Repeated or unsuccessful regeneration messages: Write down when a message appears and whether it clears, returns, or changes after the truck is driven. Changes in fuel use or operating pattern: A noticeable change is useful context, especially when it coincides with warnings, but it can have causes unrelated to the DPF. Unusual exhaust or engine behavior: Report new smells, sounds, smoke, or temperature warnings. Do not approach hot exhaust components or attempt to inspect them while the vehicle is running. Warning lights beyond the DPF indicator: Record check-engine, temperature, or other alerts too. Related faults can help explain why the aftertreatment system is not operating as expected. When a warning appears, follow the truck's manual and your fleet's safety procedures. Do not ignore a stop or service instruction, continue a route simply to force a regeneration, or attempt an improvised repair. If the message indicates that the vehicle needs attention, arrange an evaluation promptly. A clear account of the warning and the truck's recent work can make that evaluation more useful. Why might regeneration be restricted or incomplete? Regeneration depends on more than the filter itself. The engine and aftertreatment controls need the right operating conditions and reliable sensor information. If the truck's duty cycle, a fault, or another system condition prevents those requirements from being met, regeneration may not complete as intended. Short trips and extended idling Repeated short runs, frequent stops, and long periods of idling may not provide the same operating conditions as sustained work under load. For some trucks and duty cycles, that pattern can make it harder to complete a regeneration. But a route pattern is only one clue. A technician needs to compare the truck's actual use and its diagnostic data with the manufacturer's requirements. Faults elsewhere in the engine or exhaust system Sensor readings, wiring, exhaust leaks, engine performance concerns, or other aftertreatment faults can affect how the system measures conditions and manages regeneration. A warning associated with the DPF may therefore lead to checks beyond the filter. Replacing or cleaning a component without finding the cause can leave the original problem unresolved. Filter loading, ash, or damage Soot loading, ash accumulation, physical damage, and other restrictions are not interchangeable conditions. The appropriate next step depends on what inspection and diagnostic results show, along with the filter's service history and the manufacturer's procedures. A filter that is damaged or affected by another failure may need a different remedy from one that can be serviced through an approved cleaning process. Missed maintenance or unsuitable operating decisions Maintenance history can reveal whether a related issue has appeared before or whether earlier work was performed. Incorrect fluid, neglected engine service, unapproved modifications, or an attempt to clear warnings without diagnosis can complicate troubleshooting. Keep service records and tell the technician about recent repairs or changes. Do not disable or alter emissions equipment; follow applicable requirements and the vehicle maker's instructions. What information should you gather before service? A few simple notes help the service conversation begin with useful facts. They do not replace diagnostic testing, and a driver should only gather information when it is safe to do so. Identify the vehicle. Provide the truck's year, make, model, engine information if known, and current mileage or engine hours. The VIN can help a service team identify the exact configuration. Capture the warning accurately. Write down the message and any displayed code. If the display is difficult to photograph, describe the indicator and when it appeared. Describe the work pattern. Explain whether the truck mainly makes short local runs, idles for long periods, hauls under load, or recently changed routes. Note the timeline. Record when symptoms began, whether they are constant or intermittent, and whether they followed a repair, fueling event, or change in use. Bring the maintenance history. Include earlier warning events, diagnostic visits, filter service, engine repairs, and parts replaced, if known. Explain the operational impact. Tell the shop whether the truck has reduced power, cannot complete a route, or has a safety-related concern. Do not keep operating a truck against a stop instruction. If you are evaluating a replacement vehicle because a current truck no longer fits the work, comparing available new Isuzu commercial trucks or new Chevrolet commercial trucks may help you frame different operating needs. That is a separate purchasing decision, though; it does not replace diagnosis of a truck already showing an aftertreatment warning. What questions should you ask before commercial truck DPF cleaning? Before authorizing a cleaning or other repair, ask the service provider to explain what the evidence indicates and what the proposed work is intended to address. A good discussion should connect the symptoms, test results, and recommended action. What diagnostic results point to the filter as the problem? Ask which warning information, measurements, inspection findings, or fault codes support the recommendation. Request an explanation in plain language. Have related causes been checked? Ask whether the shop has evaluated relevant sensors, engine or exhaust issues, wiring, and other conditions that could restrict regeneration or create a similar warning. What type of restriction or condition was found? Clarify whether the concern is soot loading, ash accumulation, damage, or something else. These conditions can call for different next steps. What exactly does the proposed service include? Ask what will be inspected or cleaned, which procedure will be used, and whether any removal or additional repairs are included. Confirm what is not included as well. How will you verify the result? Ask what checks will be performed afterward, how the warning or fault will be evaluated, and what findings would mean that more work is needed. Could an underlying issue cause the warning to return? Ask what repairs or operating changes may be needed to address a contributing cause, and what warning signs should prompt a follow-up. What will the truck be safe to do while awaiting service? Follow the operator's manual and the shop's advice. If a warning calls for stopping, do not use a trip as a test. What is the estimated scope and cost? Request an estimate that separates diagnosis, cleaning, parts, and additional work where possible. Ask the provider to seek approval before expanding the work. Answers can vary by truck and by what testing finds. Be wary of a one-step recommendation made without asking about warning messages, vehicle use, maintenance history, or diagnostic results. Cleaning may be appropriate in some circumstances, but it should not be treated as a universal fix for every DPF-related warning. How can a fleet reduce repeat interruptions? There is no single operating routine that fits every truck. The owner's manual and manufacturer service information should guide vehicle-specific operation and maintenance. Fleet managers can still make the process more consistent by setting up a clear reporting and follow-up routine. Train drivers to report the exact message and any change in performance as soon as it appears. Keep a shared log of warning dates, vehicle use, repairs, and outcomes so repeat patterns are visible. Make sure dispatch and drivers know which alerts require stopping, prompt service, or a change in plans, based on the vehicle guidance. Review recurring short-trip or idle-heavy assignments with a qualified service professional instead of asking drivers to invent a regeneration procedure. Track whether the same fault returns after service and share that history during follow-up diagnosis. Schedule routine maintenance according to the specific truck's requirements and keep records accessible to drivers and service providers. For broader maintenance planning, consult a provider familiar with commercial vehicles and the fleet's mix of makes and models. Tri-County Truck lists commercial vehicle service and parts; when you call, describe the truck and warning and ask whether the service team can evaluate that specific concern. You can also review the dealership's hours and directions before planning a visit. What should you expect from a professional diagnosis? A professional evaluation starts with the particular truck, its complaint, and its service history. A technician may review available fault information, inspect relevant components, and compare findings with the manufacturer's diagnostic process. Which checks are appropriate depends on the vehicle and symptoms; the repair plan should follow the evidence rather than a generic recipe. Ask for a clear explanation of the findings and the next step before work begins. If the recommendation is cleaning, confirm what condition the cleaning is meant to resolve and how the result will be checked. If diagnosis points to a different fault, ask how it relates to the original warning and whether it needs to be addressed first. Also ask what follow-up is sensible if the message returns. Commercial truck DPF cleaning should be considered within the larger aftertreatment system, not as an isolated maintenance ritual. A careful history, accurate warnings, and a vehicle-specific evaluation help avoid assumptions and give a fleet a more useful basis for decisions. Contact the dealership to discuss your truck Frequently asked questions Does a DPF warning always mean the filter needs cleaning? No. A warning can reflect different conditions, including a regeneration issue, a sensor or system fault, restriction, or damage. The warning and diagnostic findings should be reviewed for the specific vehicle before deciding what service is appropriate. Can I keep driving if the truck has a DPF warning? Follow the truck's display instructions, owner information, and company safety procedures. Some alerts call for prompt service or stopping. Do not ignore a stop instruction or continue driving to force a regeneration. Can short trips affect the aftertreatment system? Operating patterns with frequent short runs or extended idling may affect whether a truck can meet the conditions needed for regeneration. The effect depends on the vehicle and its use, so discuss the duty cycle with a technician rather than applying a one-size-fits-all remedy. What should I bring to a service appointment? Bring the truck's identifying details, the warning message or code, the timeline of symptoms, a description of its work pattern, and available maintenance or repair records. Mention any change in performance and whether the warning has appeared before. When a DPF warning appears, accurate information and a vehicle-specific diagnosis are more useful than guessing at a cleaning procedure. Record the symptoms, follow the truck's operating guidance, and ask the service provider to explain the evidence behind the recommended work.

Commercial work truck prepared for delivery at a dealership

Commercial Truck Delivery Options: Questions to Ask Before Purchase

Choosing among commercial truck delivery options is about more than moving a vehicle from the lot to your business. The destination, schedule, inspection plan, paperwork and responsibility for transport all affect how smoothly the truck enters service. Confirm each detail with the dealer before purchase, especially when a project start date depends on the arrival. Ask about current delivery options What does delivery mean for your purchase? Dealers may use “delivery” to mean handing over a truck at the dealership, arranging transport to a business address, or coordinating pickup at another location. Ask what is included in the specific offer instead of relying on a general phrase. Confirm the destination, transport method, preparation included and conditions for release. Tri-County Truck’s current business information describes complimentary delivery within Florida. Verify whether the offer applies to your truck and address; do not assume a particular route, deadline or service is included. Clarify who arranges the driver or transport provider, whether the truck is driven or carried, whether paperwork is completed before handoff, and what happens if the date or destination changes. Ask which details will appear in the purchase or delivery documents. If a verbal answer affects cost, timing or responsibility, request written confirmation. Which destination should you confirm? Start with the exact delivery address, not just a city or county. A warehouse, business yard or jobsite may have different access conditions from a standard street address. Consider turning room, overhead clearance, gate width, access hours, surface condition and security procedures. Raise route restrictions or tight access before transport is scheduled. Decide who will receive the vehicle. Give the dealer or transport provider a contact name and working phone number, and make sure the recipient knows the arrival window. If the address changes, ask who must approve it and whether the new destination affects timing, availability or cost. For a fleet, specify which yard receives each unit. Vehicle configuration also matters: compare box truck options with flatbed truck options when planning access and parking. How should you compare delivery timing? Ask for the anticipated handoff date and whether it is an estimate or confirmed appointment. The truck may need preparation, final paperwork or funding confirmation before release, and a transport provider’s availability can affect the schedule. Avoid assigning a crew or promising a customer a start date based on an unconfirmed arrival. What needs to be completed before the truck can leave? When will the dealer provide a firm date or delivery window? Who will notify the recipient if the plan changes? Are deliveries limited to certain days or business hours? How much notice is needed to reschedule? Build a buffer when the truck is tied to a project launch or fleet replacement. Ask whether it will be ready for its intended use or whether registration, equipment installation, internal inspection or other work remains. If financing is involved, clarify how funding and required documents relate to release timing. Review commercial vehicle financing information and confirm transaction-specific steps directly. What should you inspect before accepting the truck? Decide who will inspect the vehicle at handoff and what that person should check. The recipient should be able to note visible concerns before signing an acceptance record. For remote delivery, ask whether pre-delivery photographs or other records can be provided and agree on how to report an issue. Compare the delivered vehicle with the purchase documents. Check vehicle identification and configuration; body, accessories and equipment included in the transaction; visible exterior and interior condition; keys and manuals; and open items promised for completion. Photograph visible concerns, record them promptly, and ask how to report a discrepancy. Keep copies of signed documents and written follow-up. Do not assume a delivery receipt changes the purchase agreement or resolves a disputed item. Which paperwork should be ready? Ask which documents the dealer will provide and which your business must arrange. Requirements depend on the transaction and vehicle, so confirm the current process with the dealer and relevant Florida authorities. Discuss the purchase agreement, title or registration documents, temporary documentation if applicable, payment or funding confirmation, and delivery or acceptance record. Check that the buyer’s business name and transaction details are correct. If someone else receives the truck, ask whether written authorization or identification is needed. Keep the signed agreement, delivery correspondence, inspection notes and receipts together. For official Florida vehicle and title information, consult Florida Highway Safety and Motor Vehicles and verify requirements for your transaction. Who is responsible for transport arrangements? Ask whether the dealer arranges transport, whether you choose a carrier, or whether your team collects the truck. If a third party is involved, confirm who selects and pays the provider, who shares schedule updates, and whom to contact if the vehicle is delayed or arrives with a concern. Establish how the truck will travel and what condition it should be in at pickup and delivery. Clarify when responsibility transfers, what records will be provided, and how to report a claim or discrepancy. Ask for applicable terms in writing. If you need transport beyond Florida, do not assume the complimentary in-state offer covers it; confirm eligibility and any arrangements or costs directly. How can your business prepare to receive the truck? Clear an appropriate parking or unloading area, share route and access instructions, and tell the recipient what to expect. For a worksite, confirm it will be staffed and accessible throughout the proposed window. Give the recipient time to inspect the truck and read paperwork rather than rushing between duties. Name one person responsible for receiving the vehicle and checking documents. Share that person’s contact details and the precise delivery location. Reserve time to compare the truck with the purchase paperwork and document its condition. List remaining tasks such as registration, equipment installation or fleet-system setup. Save dealer contact details and agree how to report delays or discrepancies. For multiple vehicles, create a separate record for each unit, including identification details, arrival date, condition notes, keys, documents and open follow-up items. Assign each vehicle to a named location and recipient before dispatch. This helps prevent paperwork or equipment from being confused between units. How can you compare delivery arrangements? Compare dealership pickup, dealer-coordinated delivery and independently arranged transport against the same questions. The options may differ in schedule control, required effort, responsibility and terms. Do not compare only by whether an option is described as complimentary; establish what it includes and what your team must do. Arrangement What to confirm Receiving task Pick up at dealership Release date, pickup hours, required documents and who may collect Arrange an authorized driver and confirm the route Dealer-coordinated delivery Eligible destination, transport method, date window and included terms Prepare access, recipient and inspection time Customer-arranged carrier Who selects and pays, timing, condition records and transfer of responsibility Coordinate arrival and retain handoff records Write down the destination, expected date, method, handoff requirements, documents and responsible parties. Mark unresolved questions, such as whether the address qualifies or whether a schedule change affects the plan. For future maintenance questions, review the dealership’s service and parts department information. How can you build a practical delivery timeline? Work backward from the date the truck needs to perform its first job. Start with expected release, then account for transport, inspection, internal setup and remaining equipment work. Treat each as a separate milestone rather than assuming arrival means the vehicle can immediately go to work. This matters when replacing a vehicle that cannot remain in service much longer. For example, a contractor expecting a truck for a Monday project should identify what must happen first: delivery or pickup, an authorized recipient, paperwork review, any required tool or body-equipment installation, and an internal operating check. If a step depends on a vendor or another department, ask for its lead time and owner. This is a planning example, not a promise that a specific delivery date can be met. Keep a milestone record with a responsible person and status. Use labels such as “requested,” “estimated” and “confirmed” so staff do not treat a tentative date as final. When a milestone slips, revise dependent plans, notify the project lead, and confirm the new handoff window. Keep the updated plan where the recipient can find it. What changes when you receive more than one truck? Ask whether units will arrive together or in separate windows, whether each has a distinct destination, and whether the team can inspect them without rushing. List each vehicle identifier beside its destination and local recipient. Do not assume that one delivery method or schedule applies to every truck in an order. Assign one coordinator to maintain the overall schedule and a named recipient at each site. Share access instructions and contact details for each location. Match vehicle-specific documents to the correct unit as it arrives. A checklist can track identifier, planned location, actual arrival, condition observations, paperwork status and unresolved items. After handoff, reconcile the record against the order and assign an owner and follow-up date for every open concern. Check commercial truck inventory listings for inventory questions and confirm specific availability directly. How should you handle a changed or delayed delivery? Agree on a communication path before transport begins. Find out who will contact the recipient if the truck is delayed, how updates will be sent, and which number the recipient should use. Give the receiving person the current plan and working contact information. If a driver cannot access the site, a prepared contact can clarify where to wait or whom to reach. When the date changes, ask whether the new estimate affects transport, recipient availability, site access or a transaction step. Reconfirm the address and arrival window. Tell project staff about revised timing, and avoid promising a replacement date until the responsible party confirms it. If the address changes, seek approval before rerouting; new access details or offer eligibility may need review. Keep written confirmation with the purchase records. How can you prepare the truck’s operator for handoff? The employee receiving a vehicle may not be the person who selected it. Prepare a brief handoff note identifying the truck, business contact, promised items still open, and where records are stored. Explain who handles discrepancies and who approves putting the vehicle into regular use. This prevents the handoff from becoming an informal exchange of keys without follow-up. Where practical, have the intended operator participate in the condition review. Ask what information or materials will be supplied, but do not assume delivery includes training, accessories or setup not specified in the transaction. Record missing items and assign someone to resolve them. A landscape business may need the truck delivered to the yard where its crew can check the body and organize tools; a delivery operation may prioritize loading-area access and fleet-system setup. What should you keep after delivery? Store signed documents, delivery correspondence, inspection notes and photos where responsible staff can find them. Use a record name that includes a unit identifier and handoff date. For an open issue, add the report date, contact and agreed next step. For multiple vehicles, use the same fields for every handoff so staff can compare what was expected with what arrived. Before closing the receiving record, confirm that the vehicle has a named internal owner, outstanding questions have assigned next steps, and documents are stored. Follow your business’s retention practices and ask the dealer or relevant authority if you are unsure which originals must be kept or submitted. What should you ask before purchase? Use these questions to get specific answers before committing to a delivery plan: What exact address or area is included? Is the date confirmed or estimated? Who arranges transport and communicates with the driver? What delivery-related charges, if any, apply? How will the truck be inspected and documented before leaving? Which documents will be provided, and which must we arrange? Who approves a change in destination or schedule? How should we report damage, missing equipment or incorrect paperwork? Ask for answers in writing when they affect cost, timing, included services or responsibility. Resolve unclear points before scheduling staff or jobs around an expected arrival. If a detail changes, request an updated written plan and share it with the receiving person. What should you confirm with Tri-County before purchase? Delivery arrangements can depend on the truck, transaction, destination and current availability. Contact Tri-County Truck to confirm whether delivery is available for your purchase, which locations are covered, expected timing, the inspection and paperwork process, and who handles transport. Verify how the dealership’s complimentary delivery within Florida offer applies to your specific truck and address before relying on it. Contact Tri-County Truck to confirm your delivery plan A clear plan helps your business receive the right truck at the right place, with timing, documents and responsibilities understood before it enters service.

Work-ready commercial box truck traveling on a Florida road

Commercial Truck Fuel Economy: How to Compare Real-World Efficiency

Commercial truck fuel economy is most useful as a planning measure, not a promise. A published figure or short test drive cannot account for every load, stop, route, or idle period your business encounters. To compare trucks fairly, look at the whole job: what the vehicle carries, how it is configured, where it travels, and how it is driven. Talk with our truck team A truck that uses more fuel on one route may still be the better fit if it carries the required payload in fewer trips or handles the work without strain. The goal is not to find one number that applies to every operator. It is to estimate fuel use under your conditions, then compare suitable configurations consistently. Why may published fuel figures differ from fleet results? Fuel economy depends on the vehicle and the work it performs. Specifications can help narrow your choices, but daily results change with load, speed, traffic, terrain, weather, vehicle condition, and time spent idling. A lightly loaded truck moving steadily on open roads faces different demands from a fully equipped truck making frequent urban stops. Comparisons also depend on what is being measured. A chassis or powertrain specification may describe a truck before the final body, equipment, and cargo are installed. Accessories, tires, axle ratios, transmission choices, and other configuration details can affect the finished vehicle. Ask what configuration a quoted figure represents before treating it as a direct comparison. Test conditions matter too. A short drive may not include a representative payload, stop pattern, weather, or route grade. The result can be informative about how a truck feels, but it cannot reproduce a month of mixed work. The U.S. Environmental Protection Agency provides consumer information about vehicle and fuel topics at EPA.gov; use vehicle-specific information as a reference, then validate expectations against your own duty cycle. For your fleet, use actual fuel purchases and odometer readings over a representative period. Keep track of the truck’s work pattern at the same time. One unusually light week or a single long highway trip can make the result look unlike normal operations. How should you compare engines for the job? Start with the work the truck must do, not with fuel economy alone. Consider loaded weight, route, terrain, stop frequency, and how often the vehicle operates near its capacity. The engine and powertrain should be appropriate for the intended use and the manufacturer’s ratings. An engine that is poorly matched to regular heavy work may have to work hard under load. A larger configuration can add cost or capability you do not need. Neither label alone predicts fuel consumption across every route. Ask a dealer to compare available powertrain configurations against your operating conditions, and confirm payload and gross vehicle weight ratings for the complete truck. Describe the heaviest regular load, not just the average. Explain whether routes include hills, highway speeds, congestion, or frequent stops. Identify equipment such as liftgates, refrigeration, tool storage, or auxiliary systems. Confirm ratings after body and equipment installation. For example, a delivery business with repeated stops and moderate loads has a different duty cycle from a contractor carrying dense materials over uneven routes. Compare configurations against the task each truck will perform rather than assuming one engine choice is most efficient in every situation. It can help to bring two or three representative days of route information to the conversation. Include approximate distance, number of stops, load changes, and any time spent on steep grades. If the truck sometimes operates near its rated limits and sometimes runs lightly loaded, explain both patterns. Choosing around the heaviest routine work can avoid buying a vehicle that is unsuitable when demand increases, while an honest account of light-duty hours helps prevent unnecessary over-specification. How do payload and body style affect fuel use? More weight generally asks more of the powertrain, while a body’s shape and equipment can influence vehicle weight and air resistance. The size of the effect varies by vehicle and operating conditions, so treat these as factors to evaluate—not as a fixed miles-per-gallon prediction. Choose a body around the cargo and workflow. A box body can protect freight and organize deliveries. A flatbed can suit materials that need side or top access. A dump body serves work that requires unloading loose material. Each configuration changes what the truck weighs, how it carries cargo, and how it is used. Review body options and intended application before comparing fuel numbers. Tri-County Truck lists box trucks, flatbed trucks, and dump trucks. These pages can help identify a body style to discuss for your operation. Think through a normal workday from loading to return. A box body may make sense when goods need weather protection and orderly delivery access. A platform body may make loading long materials easier, but the load and securing method must suit that setup. A dump body may reduce manual unloading for certain jobs, yet adds its own equipment and weight. There is no body style that is universally most efficient; suitability depends on what the truck must accomplish and how often it performs that task. Avoid choosing solely for maximum capacity if regular work does not need it. At the same time, do not compromise required payload or safe operation to pursue a lower fuel figure. Compare trucks that can both do the job, and account for the number of trips each configuration would require. How do route conditions change the comparison? Stop-and-go traffic, short trips, road grades, speed, and congestion all affect fuel use. Frequent acceleration and braking create a different pattern from steady cruising. Short trips may also include a larger share of time before the vehicle reaches normal operating conditions. Map a typical week rather than relying on a broad label such as “city” or “highway.” Note the approximate share of local streets and highways, delivery stops, loading time, hills, and seasonal traffic. Include the miles driven with a full load and the miles driven empty. This gives you a practical description to use when discussing truck choices. Separate routes into useful groups when trucks have different assignments. A local delivery truck that makes many stops should not be evaluated as if it were a regional vehicle with long steady runs. A maintenance contractor may have short trips between job sites and extended time parked at each location. For each group, record a typical route and one demanding route, so a single unusually easy day does not define the buying decision. When comparing vehicles, keep the route as similar as practical. If one trial includes a long highway leg and another includes traffic and multiple stops, the difference says little about the truck itself. Note weather and unusual congestion too. The goal is not a laboratory test; it is a fair, repeatable comparison of trucks doing comparable work. How much can idle time matter? Fuel can be consumed while a truck is stationary and its engine is running. Waiting at a site, extended warm-up, power needs, or driver comfort can add idle time that an odometer-based comparison will not reveal. A vehicle covering few miles during a long shift can show a low miles-per-gallon result even when its moving efficiency has not changed. Track idle time separately if it is significant. Review why the engine is running while parked and whether work can be organized differently. Could dispatch reduce waiting at a site? Can loading and paperwork be coordinated so the vehicle is not left running unnecessarily? Follow the vehicle maker’s guidance and job-site or safety requirements; do not switch off equipment when doing so would compromise safe operation or required functions. Do not treat every idle period as avoidable. Some work requires power, temperature control, or operation of equipment. Record the reason for longer idle periods alongside the fuel data. This makes the comparison more useful and helps distinguish a change in operating practice from a change in vehicle performance. What should you check about tires and maintenance? Tire condition and inflation affect how a truck rolls and handles. Follow tire and vehicle manufacturers’ recommendations for pressure, load, and inspection. Check tires regularly for damage and uneven wear, and have issues assessed rather than relying on appearance alone. Use the recommended pressure for the actual load; do not adjust it to chase a fuel target. Maintenance matters for dependable operation as well. Keep up with the recommended service schedule and address warning lights, unusual behavior, or changes in performance promptly. A maintenance record helps you distinguish a configuration difference from a vehicle that needs attention. Tri-County Truck provides commercial truck service and parts information for owners planning maintenance support. For a fair before-and-after comparison, note when tires are replaced, service is performed, or equipment is added. If fuel use changes around the same time, check those facts before drawing a conclusion. A route change and a maintenance event can overlap, making a simple monthly average hard to interpret. Keep the records together rather than relying on memory. Which driver habits are worth reviewing? Driving behavior can influence fuel consumption across a fleet. Smooth acceleration, steady speeds appropriate to conditions, anticipating stops, and avoiding unnecessary idling are practical habits to review. Safety comes first: drivers should follow posted limits, maintain safe gaps, and adapt to traffic and weather rather than trying to meet a fuel target. Make coaching specific and consistent. Share a few observable habits, such as reducing avoidable engine-on waiting or planning a route to limit backtracking. Avoid ranking drivers without considering route, payload, traffic, and time spent on site. Those differences can make a simple comparison unfair. Useful coaching focuses on practices drivers can control. For instance, dispatch can review whether a route sequence causes needless backtracking, while drivers can report recurring wait times or access problems. Agree on a small set of safe practices and revisit them after enough comparable work has been recorded. Do not pressure drivers to rush, coast unsafely, or skip appropriate warm-up or equipment use. Fuel management should support safe, dependable work rather than compete with it. How can a fleet measure fuel economy consistently? Use the same calculation and recording process for each truck. A common method is to divide miles traveled by gallons used over the same period. For a useful comparison, gather enough data to represent normal work and record major changes in load, route, tires, or configuration. Record the odometer at each fill-up and the gallons purchased. Use consistent fill practices where possible, and retain receipts or fuel-card records. Record truck configuration, body, major equipment, and tire details. Log route type, payload patterns, idle time, and unusual operating conditions. Compare periods with similar work, and investigate changes before drawing conclusions. For example, suppose a vehicle logs 1,200 miles and uses 200 gallons during a period. The simple calculation is six miles per gallon for that period. It is not a guaranteed future result or a statement about every route. If the next period includes more highway miles and lighter cargo, compare the records in context rather than treating the difference as a mechanical change. Fueling records need consistent boundaries. If a period begins with a partial tank or ends before a comparable fill, the estimate can be distorted. A full-to-full practice, when practical and safe, makes the calculation easier to interpret. If fuel is drawn from a bulk tank, record the amount assigned to each vehicle and reconcile the record regularly. Be consistent about whether auxiliary fuel use is included. For example, if a truck’s result falls after equipment is added, check whether the equipment added weight, changed the body profile, or coincided with a route change. Do not assume the engine itself is the cause. Likewise, a better result after a week of highway work may reflect the route rather than a mechanical improvement. Look for a persistent pattern across comparable periods before deciding that a change is meaningful. What should you ask before selecting a truck? What is the complete ready-to-work configuration, including body and installed equipment? What are the payload and weight ratings for that configuration? How does the powertrain match loaded routes and stop patterns? What maintenance and tire checks belong in the operating plan? Can you compare a similar vehicle under a representative load and route? What trade-offs in capacity, body utility, or route flexibility come with each option? Bring a realistic description of the work and, if available, current fuel and mileage records. Tri-County Truck offers new Isuzu commercial trucks as one place to review available options. You can also search available inventory and compare trucks that fit your requirements. It can be useful to write down the must-haves and preferences separately. Required payload, body function, and safe operating limits belong in the first group. A preferred cab feature or a hoped-for fuel result may belong in the second. This distinction keeps a promising estimate from overshadowing whether the truck can reliably handle the work. Ask how the final body and equipment affect the completed configuration, and confirm details in writing before making a decision. Discuss your truck requirements How should you use fuel economy in the buying decision? Fuel economy is one part of choosing a commercial truck. Compare only vehicles that meet your payload, body, route, and uptime needs. Then assess expected fuel use alongside acquisition cost, maintenance planning, service support, and the number of trips the truck may need to complete its work. Set expectations as a range rather than a single guaranteed figure. A best-case route may not reflect the typical workweek, and a difficult week should not automatically define the vehicle’s long-term performance. Build your estimate from comparable records, state the assumptions, and revisit it when the truck’s assignment changes. If the operation adds a body, equipment, or a new route, treat that as a new set of conditions to measure. A disciplined comparison beats a headline figure. Define the job, confirm the finished configuration, account for real routes and idle time, and track results consistently after purchase. That gives your business a more useful basis for selecting a work-ready truck and improving how it is operated.